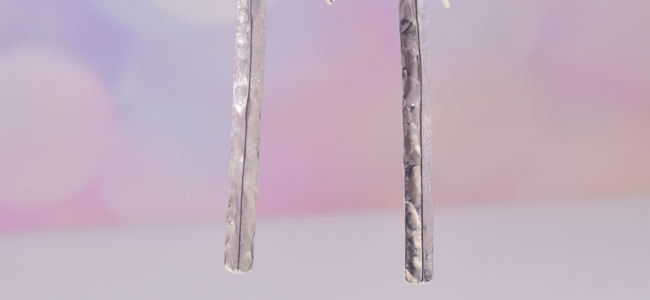
Create something a little bit different yet elegant with the help of this Hammered Bar Earrings project,
Step One: Decide on your earring length
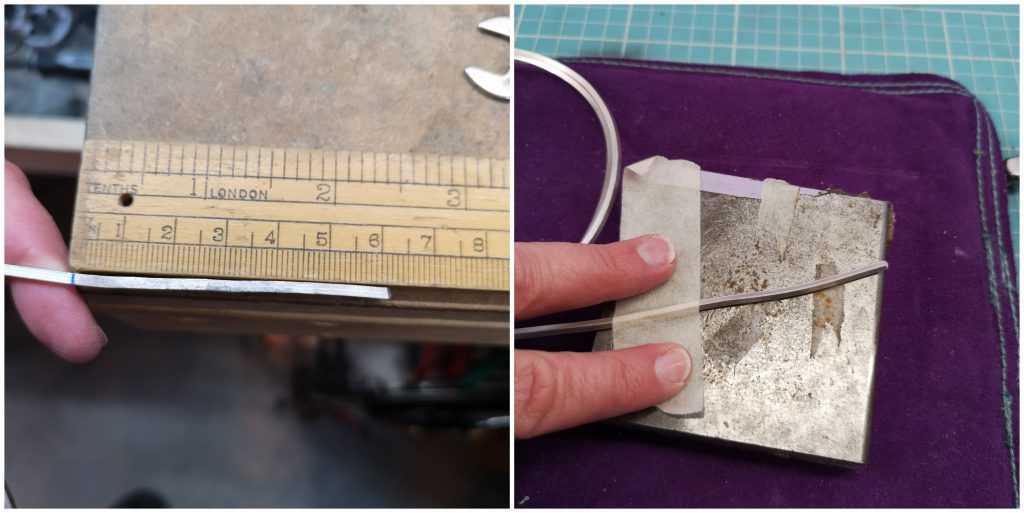
Mark your square wire with a marker pen at double the length that you would like your earrings to drop. I’ve chosen to make the earrings 3cm each here. Now tape your wire to the steel block to keep it secure, you can use masking tape or electrical tape to do this, but I find masking tape doesn’t leave a sticky residue on the silver.
It’s best to turn your pickle pot on now, to allow it to heat up and speed your project up.
Step Two: Hammering your wire
Once your wire is taped down (you will still need to hold it with your fingers to stop it jumping), you can start to hammer each side of the square silver in turn with the rounded end of your repousse hammer, from the end of the wire to the mark you’ve used for the length of both earrings. If you’re struggling, you can cut the wire at this stage, but I prefer to use the wires full length to save any silver waste. You can use a sandbag under your steel block to deaden the noise and protect your work surface as shown, or you can use a folded towel/ flannel, piece of rubber matting etc instead if you don’t have one.
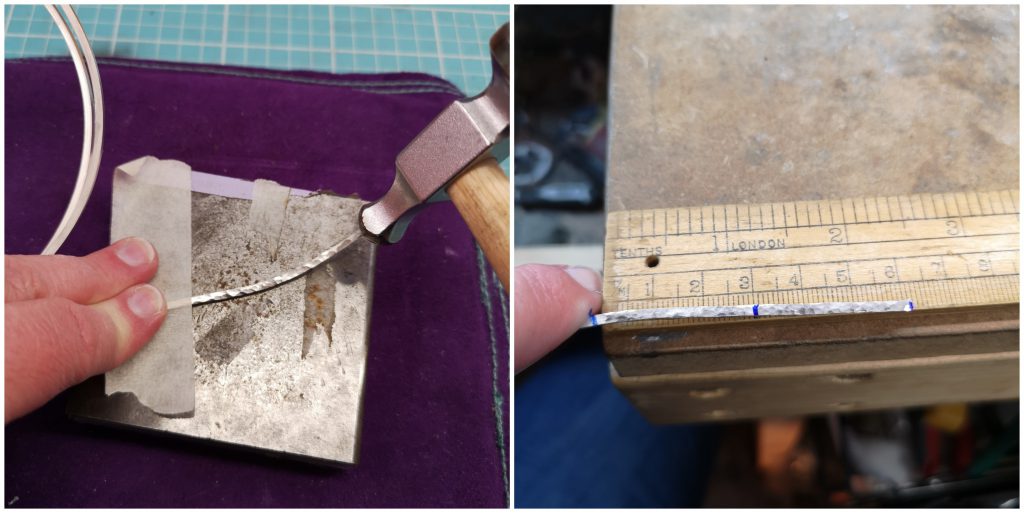
Once you’ve hammered each side of your silver, you can remove the tape and straighten the wire by tapping it with the rawhide mallet on each side on your steel block. Now it’s time to mark your wires end points- your original 6cm measurement, a 3cm measurement to cut the length in half, and 0 to mark the end of your piece.
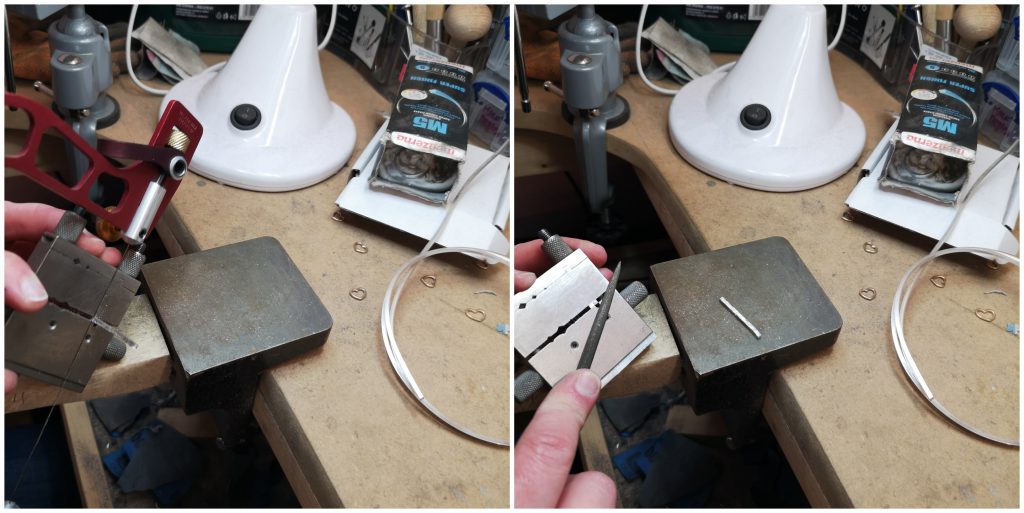
Step Three: Sawing and Filing
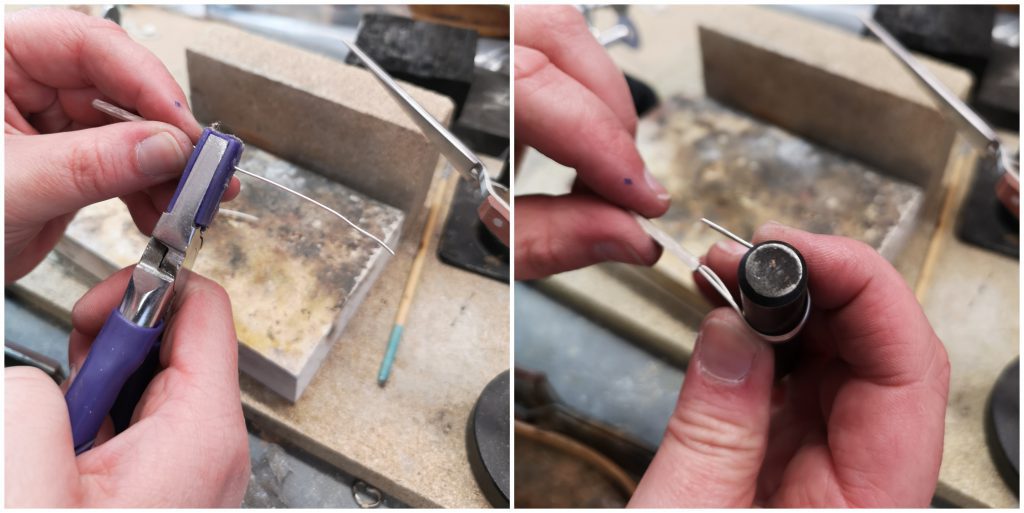
Using your piercing saw, you can now cut your silver wire at your marks- you can either secure your silver in a mitre jig to get a straight edge, or line the silver up with the straight side of your bench peg to saw a straight edge. Don’t forget to wear safety glasses here incase your blade snaps, and to keep your fingertips behind the blade at all times to save your fingers! Once you have your ends cut, tidy up any rough edges with a needle file.

Double check that your pieces match in length, and file them down a little more if one is slightly longer than the other. Now using your sandpaper grits from 800, 1000, 1200, gently round the edges and corners of each end of the silver bars to remove any sharp edges. This is easiest when you rub the bar over the sandpaper as shown.
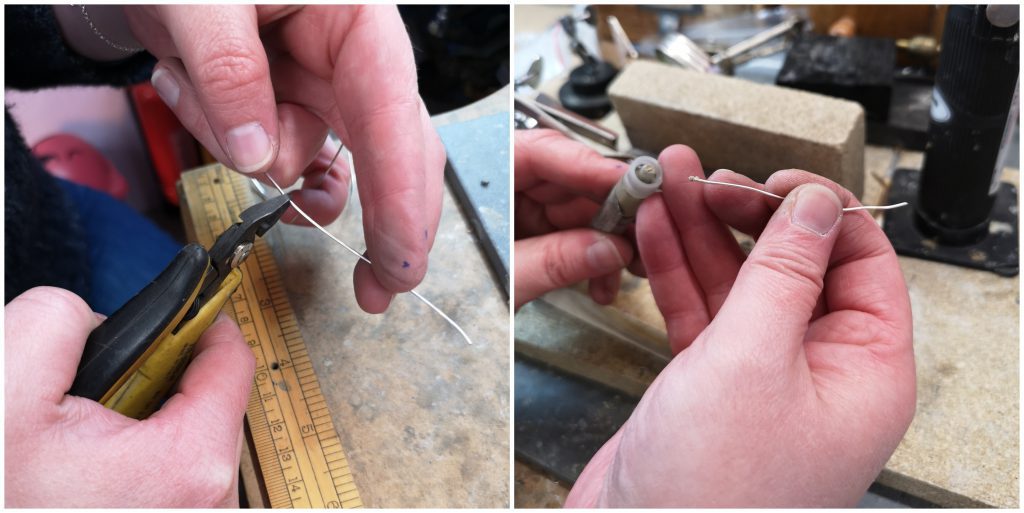
Step Four: Ear Wires
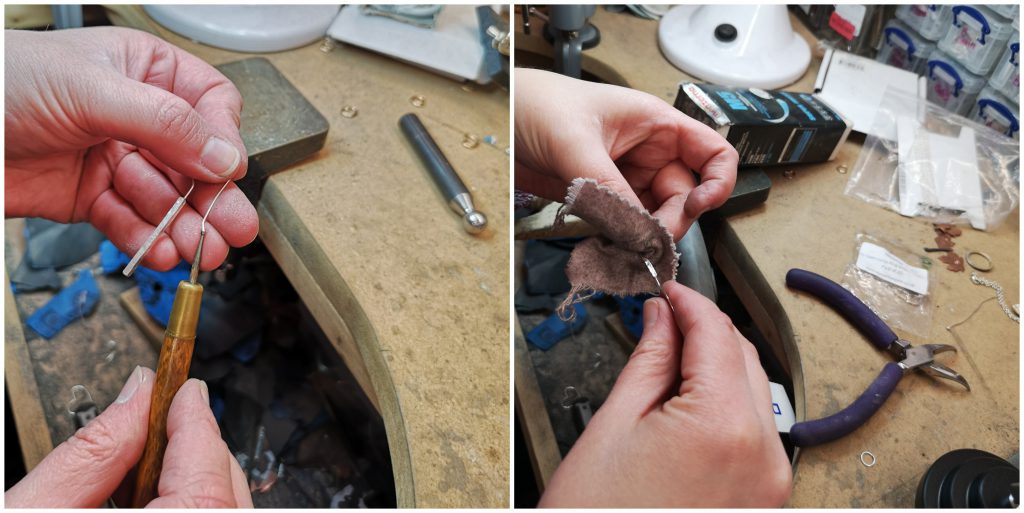
Measure your desired length of 0.8mm silver wire for the ear wires- I’ve used 2.5inches per wire. Cut the wire with the flat side of your cutters to give you a straight edge for soldering (or run over the end with a file to get a flat edge). Open the easy solder paste, and take a small amount of paste onto the end of the ear wire.
Step Five: Soldering
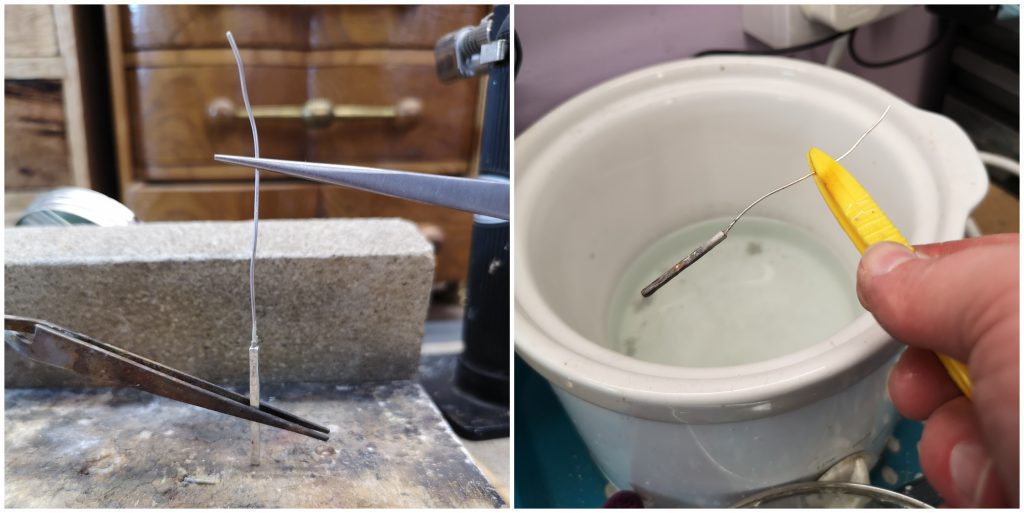
Set a pair of reverse action tweezers into each third hand base, so that the tweezers are facing each other. Now secure the hammered bar into the bottom set of tweezers, the ear wire into the top set of tweezers so that both pieces meet and touch- with the solder paste in the middle. Make sure to use your solder blocks in an L shape here to prevent burning anything behind your block. Using your blow torch, concentrate on heating the hammered bar first, as this is the larger piece of silver and will need more heat. Run the blow torch up and down the ear wire join gently, until the solder runs and the pieces are joined.
Remember not to touch the piece or the tweezers- they’re super hot! Gently remove each pair of tweezers from the third hand clamps, and retrieve the earring with one pair- pop this, and the extra tweezers, into your quench bowl to cool. Now use your plastic tweezers to add the piece to your hot pickle pot. Repeat the process again for the second earring.
Once your pieces are clean, remove them from the pickle with the plastic tweezers, and rinse in the quench bowl to stop the pickle acid taking further effect.
Step Six: Ear wire forming
Dry your earrings, and you’re now ready to form the ear wires (doing this before soldering can cause the wire to deform and loose its shape, so it’s best to do this now). Straighten the ear wire by running it through a pair of nylon jaw pliers- you can also use your fingers to do this. Once your wires are nice and straight, use a doming dap, marker pen, round pliers or something similar to form the bend in the wire where they will sit in the ear lobe. By doing this for both earrings at once, you’ll get a nice, even shape that matches.

Now use a pair of flat nose or snipe nose pliers to create the bend at the end of the hooks, and a flat section at the join of the earring. Again, it’s best to do this with both earrings at the same time to achieve a uniform look. Trim the ear wires with your side cutters if needed.
Step Seven: Finishing
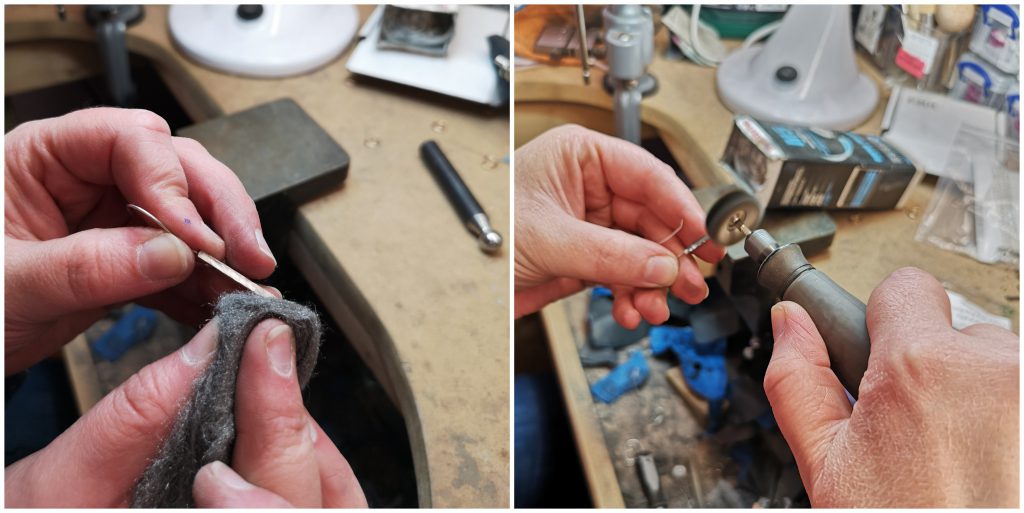
It’s now time for a quick clean up. Rub a piece of 0000 super fine wire wool over your earrings to remove the white pickle colouring from the hammered texture. Now, using a rotary tool and a cotton mop, run over the earrings with the M5 polishing compound- be careful not to catch the ear wires here, or they can bend out of shape. Repeat the process with the wool mop and the M5. Be sure to wear a mask and safety glasses when using your rotary tool to protect yourself.
Use a wire rounder/ cup burr to smooth the ends of your ear wires and make them comfortable to wear. If you don’t have one, you can round the ends of the wire by gently circling the wire ends on a piece of sandpaper instead. A quick rub over with a polishing cloth to clean them up, and your earrings are ready to go!

We want to see what you have been making! Share your creations with us on social media, tagging in Cooksongold on Facebook, Twitter and Instagram.
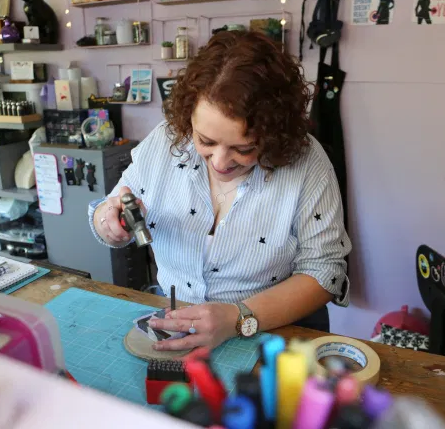
Kirsty Halsey
I am a self-taught contemporary silver smith and use tradition techniques to create my designs in Sterling Silver. Specialising in unique, meaningful and personalised jewellery and gifts, each piece is hand crafted and finished to the highest standard. I craft my designs from British sterling silver and gemstones in my garden studio on the edge of Essex, where I draw inspiration for my pieces from the surrounding countryside and world around me.