Take a break from your usual jewellery making and try something a little different. This unique step by step project on how to make your own bobby pins is a great way to develop on your beading and wire wrapping skills. A good bobby pin is great hair jewellery after all so why not try our step by step guide. Follow the instructions below.
Step One

Take 130mm of 18g wire. Put your wire against a ruler and mark 70mm in from each end, or you could do this by eye. Carefully bend the wire at each mark so the ends are pointing in the same direction and you have left a bit less than 10mm across the top of the two prongs, this will be where you attach the embellishment later.
Step Two

Using your finger and thumb nail, bend three shallow kinks into the centre of one side of the pin. When you are happy with these, do the same on the other prong and put to one side. You could mark the bends with a fibre tip pen before you bend them if you wish.
Step Three
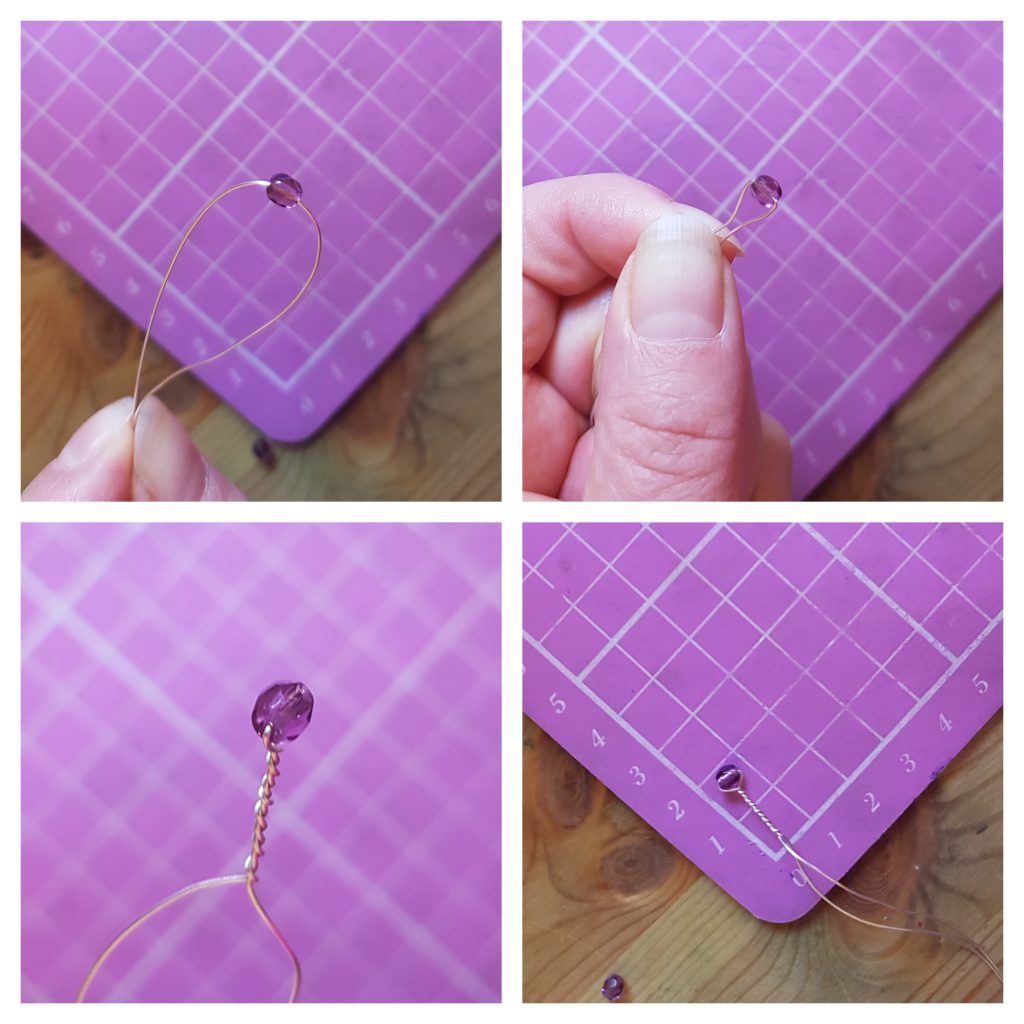
Take 600mm of 24gauge/0.5mm wire and thread a 4mm bead onto the wire until it is in the centre. Hold the bead in one hand and pinch the wire together under the bead and twist until you have about 10mm of twisted wire and the bead is secure.
Step Four

Take a 6mm bead and thread it onto one end of the wire until it reaches the twist, then pinch the two wires together and twist until the bead is tight and you have another 10mm of twisted wire.
Step Five

Take a 4mm bead and thread onto one side of your wire, pinch the two wires together and twist until you have 7mm of twisted wire. You should now have about 40mm of embellished twisted wire. Your first and central spike.
Step Six

Now take one length of the wire and thread a 4mm bead onto it about 40mm along, bend, pinch and twist the wire together, until you have 10mm of twist.
Step Seven

Now thread a 6mm bead up to the twist you have just made, pinch the two wires together and twist until you have another 10mm of twisted wire. This is your second spike.
Step Eight

With the same wire, thread a 4mm bead about 20mm along and then pinch and twist until the twisted wire reaches the bottom the second spike. This is your 3rd and shortest spike on the outside of your decoration.
Step Nine
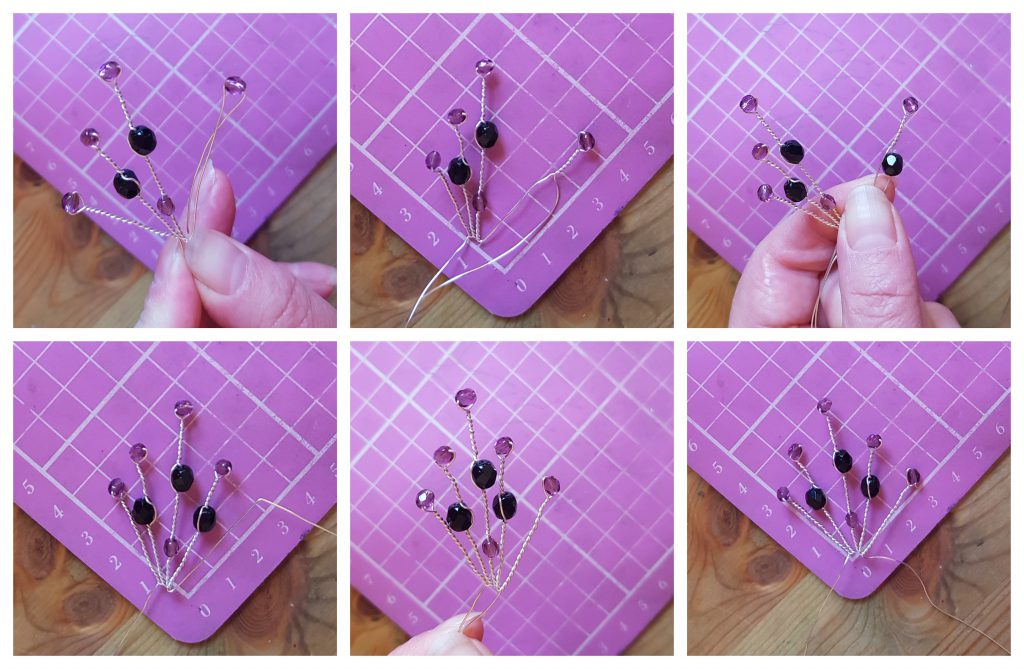
Swap to the now longer length of wire and repeat steps 7 and 8, when you have completed these, you have 5 varying lengths of spikes for your bobby pin embellishment. You should have two lengths of wire coming from your bead twists, which you will use to attach your decoration to the pin you have made.
Step Ten
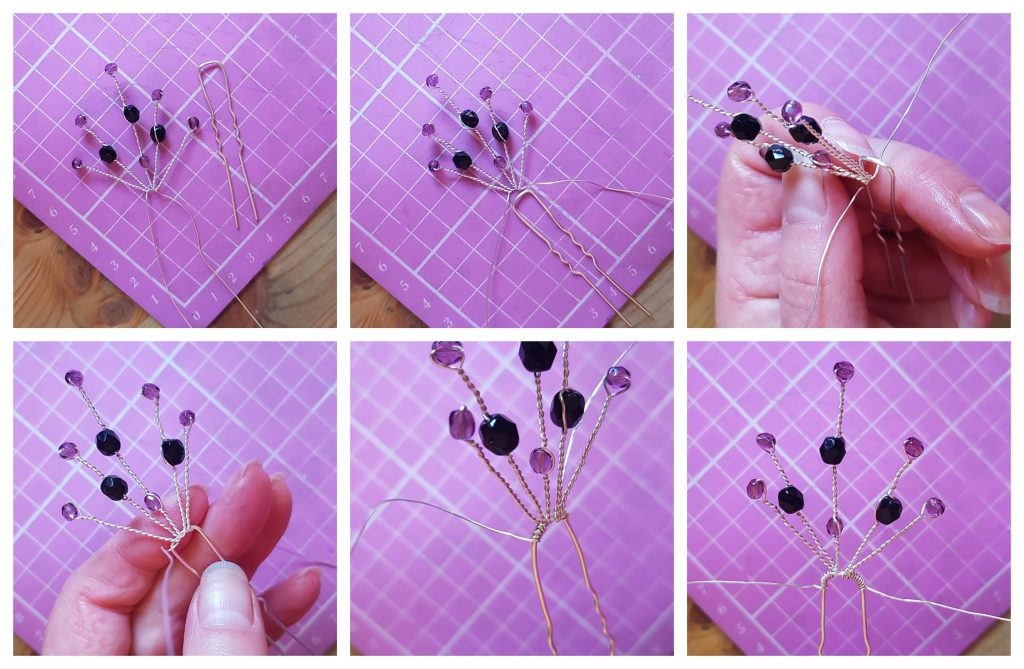
Pick up your bobby pin and hold the wire decoration against the 10mm bend section. Push one wire underneath and back, wrapping the thin wire around the thicker pin carefully until you have about 5mm of wire wrapping, then take the other wire over the top in the opposite direction of the first wire and tightly wrap the wire around the pin for about 5mm, then take the wires back up to join together around the base of the embellishment. Your embellishment should now be firmly attached to your bobby pin.
Step Eleven

Pinch the two wires together and twist from the base of the decoration until you have twisted the two wires together. Don’t over twist as the wire may break.
Step Twelve

Take this final piece of twisted wire and bend the end of the wire over to leave a 30-40mm strand, then pinch this between your finger and thumb and manipulate the twisted wire into a spiral, almost as if you are rolling it up.
Step Thirteen

Press your spiral over the decorated end of your bobby pin and once it is in place, put a drop of hypo cement on the back of the spiral to secure your design and leave to dry.
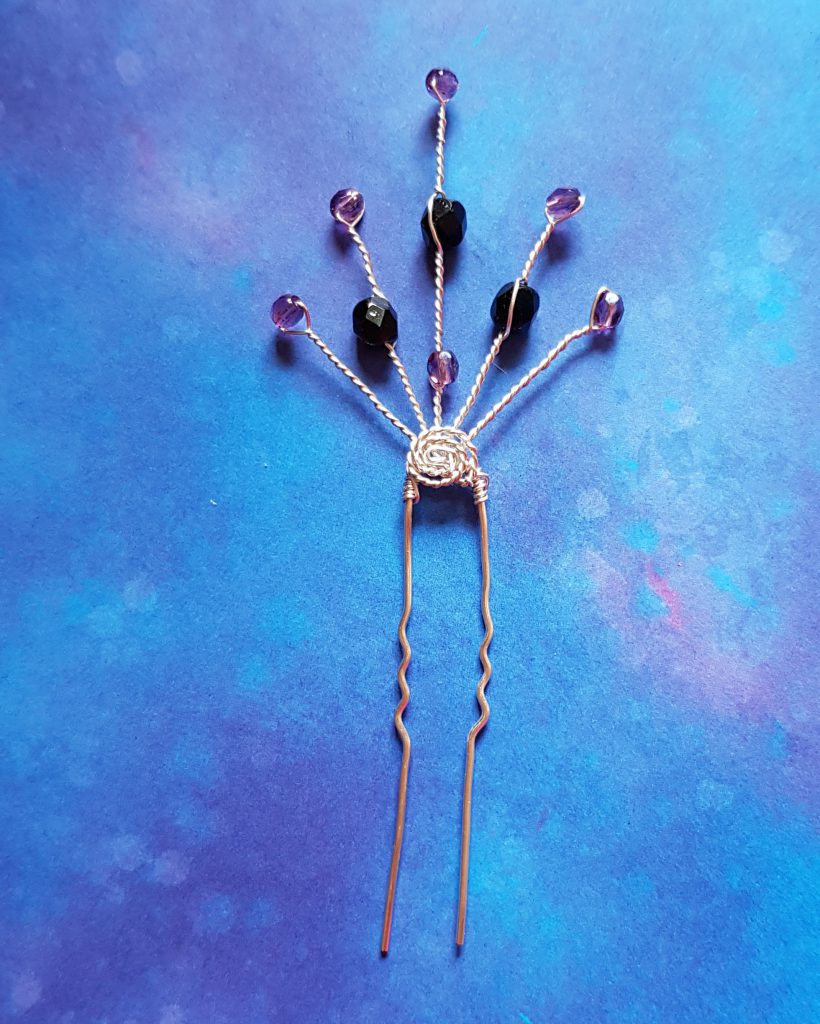
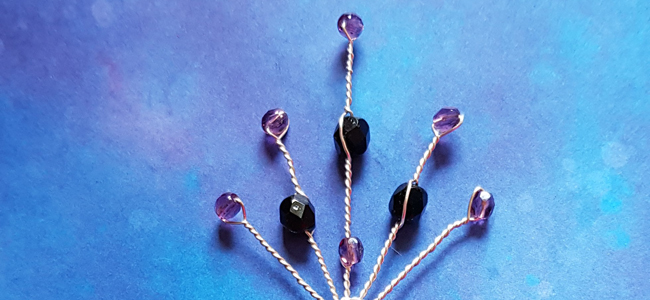
Our step by step breakdown has shown you how surprisingly simple it is to make your own bobby pin. You now have your very own DIY Bobby Pin. Why not experiment with different choices of beads and semi precious gemstones?
We want to see what you have been making! If you have been making your own bobby pins then share your creations with us on social media, tagging in Cooksongold on Facebook, Twitter and Instagram.
CRZyBest
Silversmith & Sculptor. I'm Claire, I create tiny bespoke sculptures & turn them into jewellery, accessories & alternative bouquets.