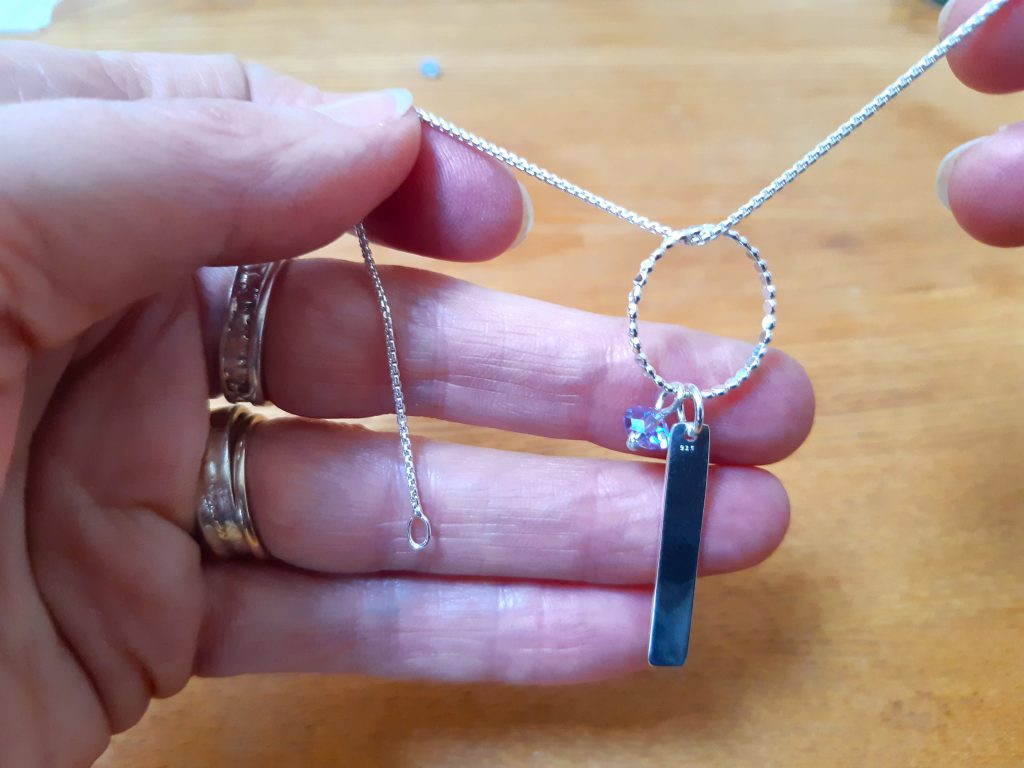
Create a very simple but effective pendant using ready made stacking rings and blanks. You can vary the design depending on which rings, beads or shaped blanks you choose – or even personalise by stamping
Step One
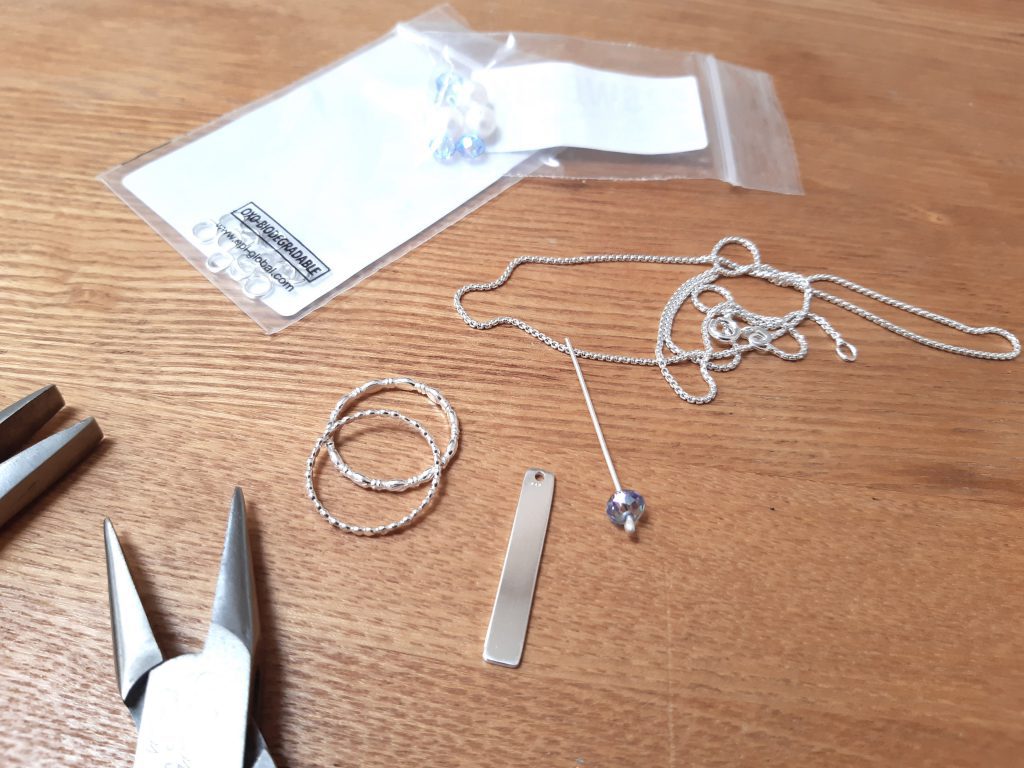
Assemble items and form a design using the chain, ring, tag and bead(s)
Step Two

If you wish to personalise, first stamp the tag with letters, numbers or a pattern.
For further instruction on how to do this, please see our Silver ID Bracelet Project or Chunky ID Bracelet Project
Step Three
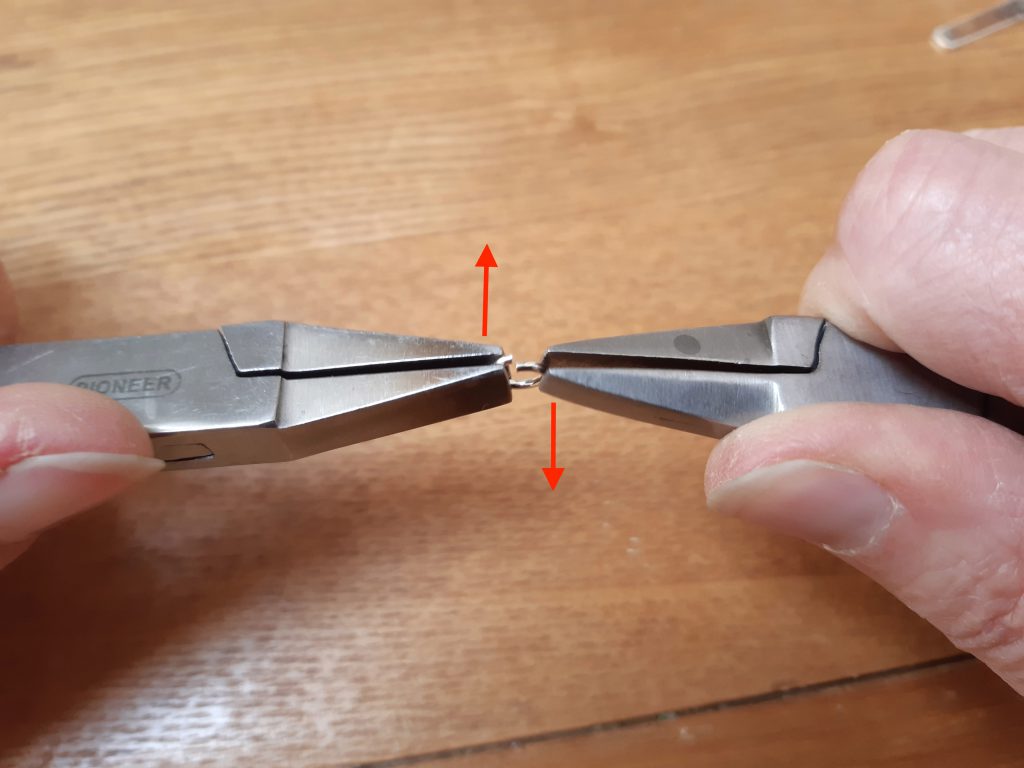
To add the tag to the stacking ring, use a 6mm heavy jump ring: To do this, twist the jump ring open using 2 flat pliers. Do not pull open as this will deform the jump ring.
Step Four
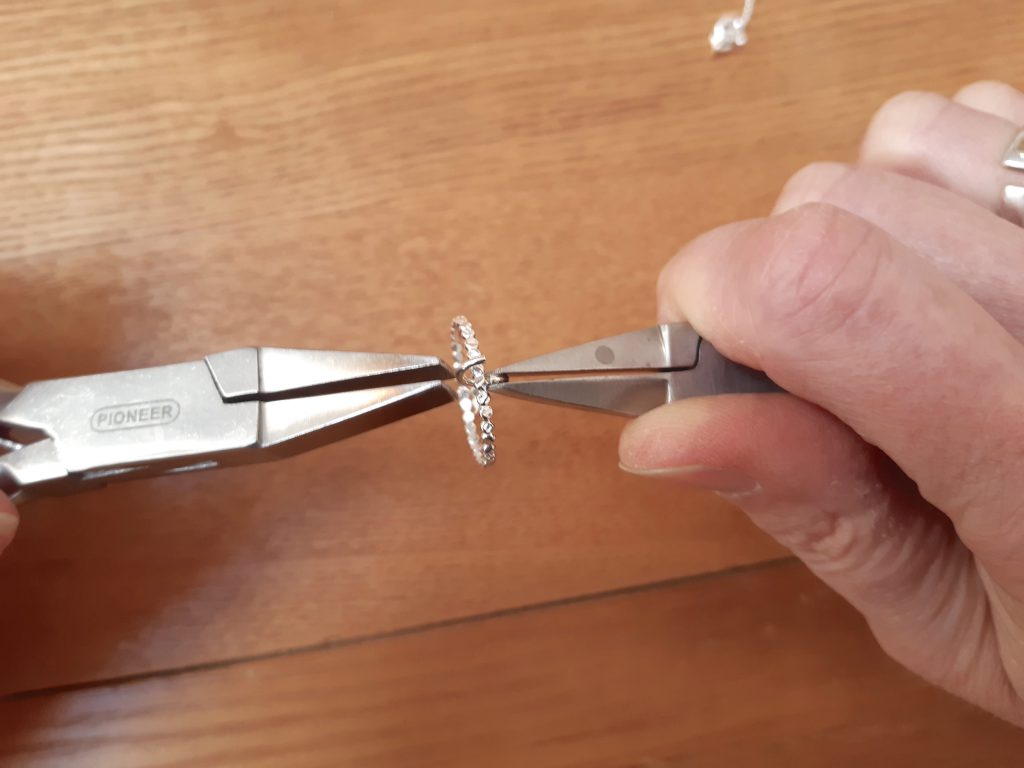
Slip the tag and the stacking ring onto the jump ring and close in the same twisting motion, easing the 2 ends of the jump ring together neatly.
Step Five
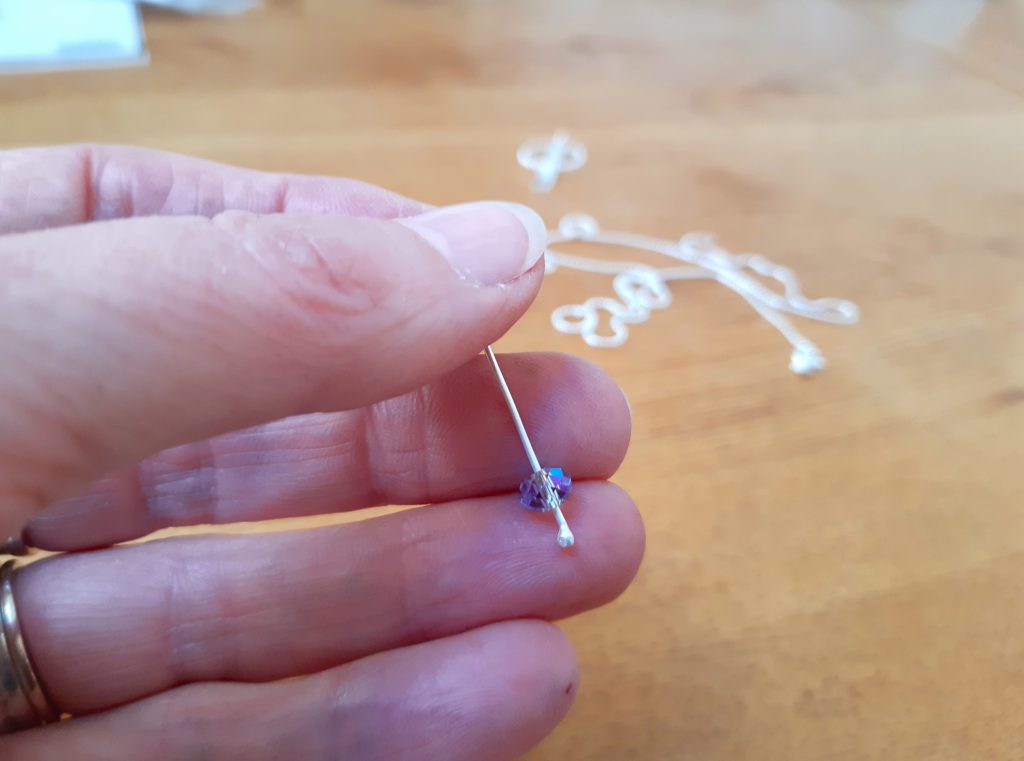
An extra touch is to add a bead. Use a wire head pin and thread your bead.
Step Six
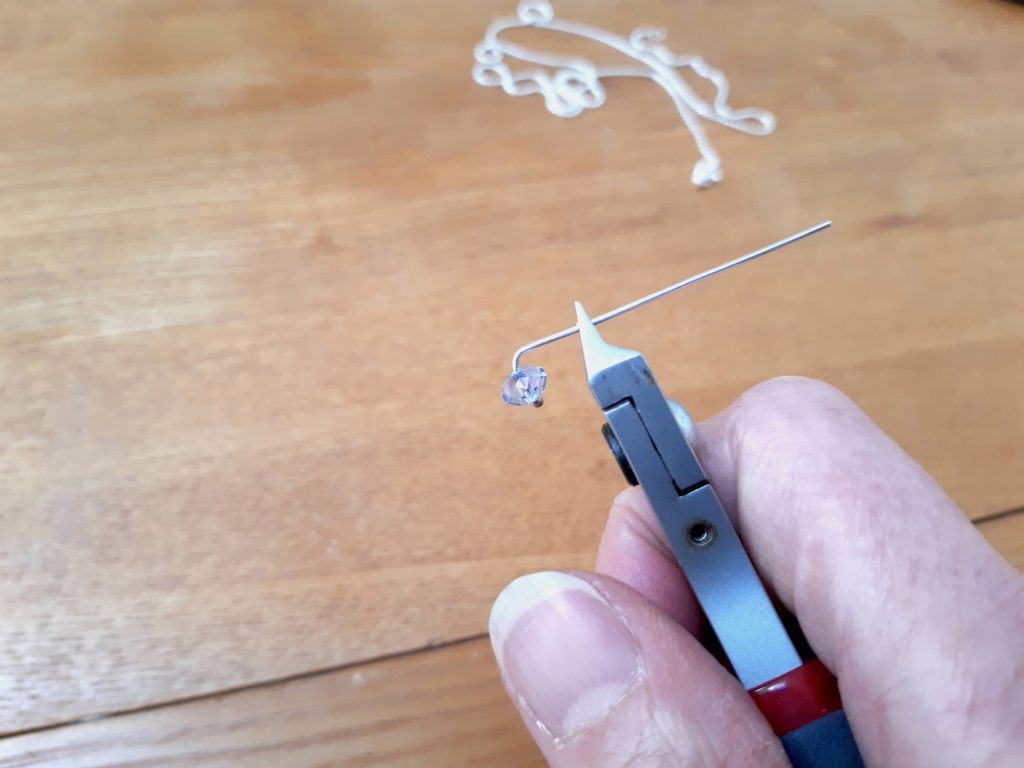
Fold the wire at a right angle, then snip off leaving about 8mm of wire.
Step Seven
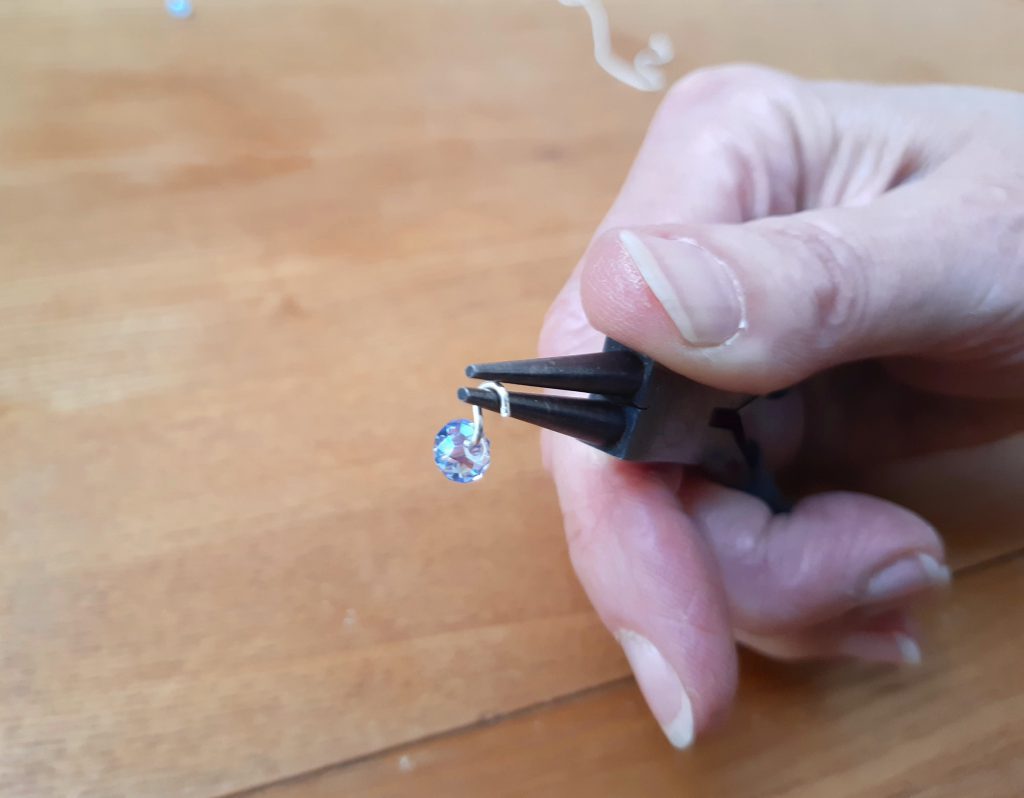
Using round nose pliers, grip the end of the wire and roll the wire into a loop to fit snugly against the bead. (This may take a little practice, but there are 20 head pins in a pack, so don’t worry too much if your first one doesn’t work. Maybe even practise with copper wire first.)
Step Eight
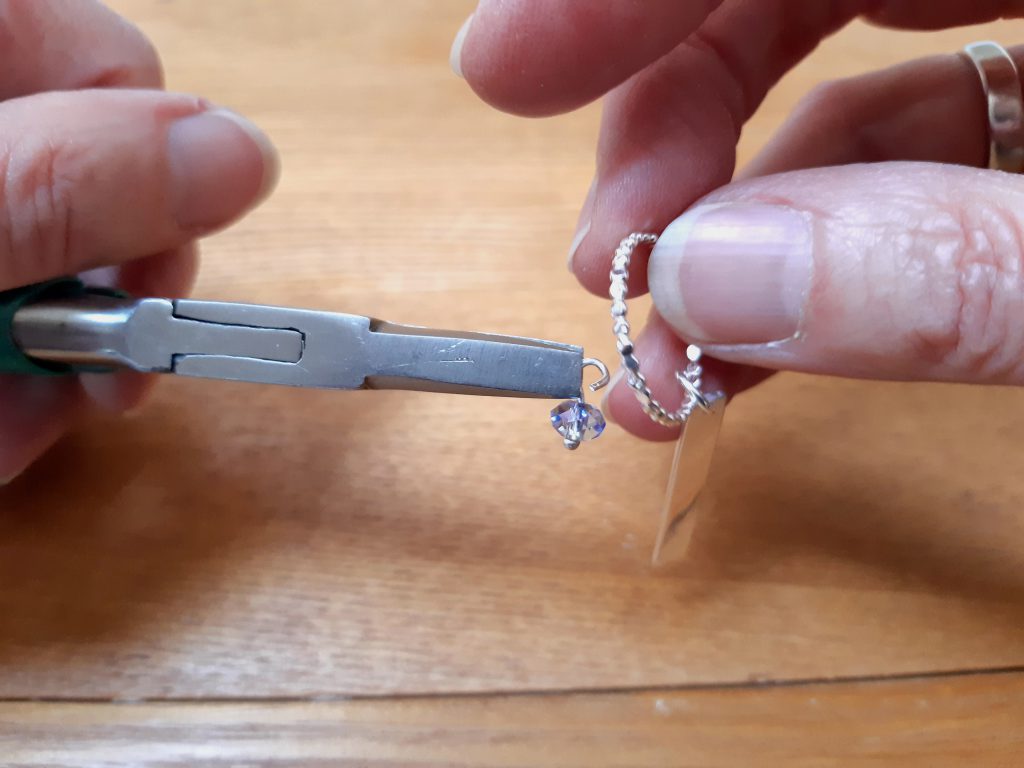
To attach, open the loop in the same way as opening the jump ring and slip onto the ring next to the tag. Close it neatly.
Step Nine
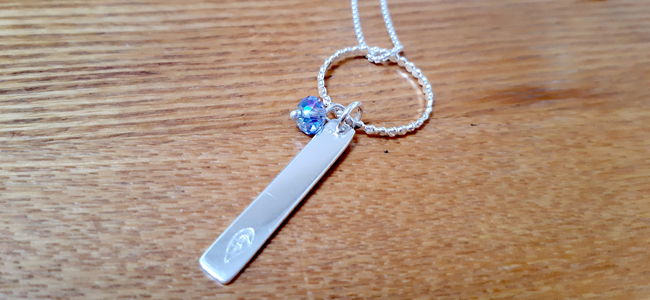
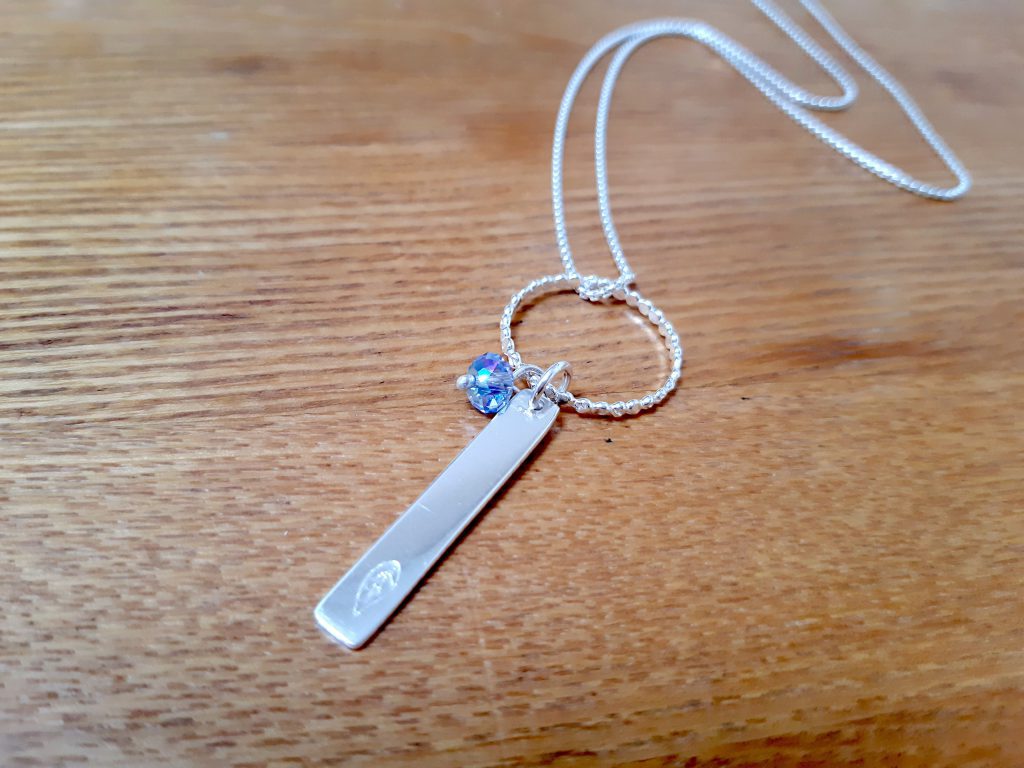
Slip the completed ring with the tag and bead onto the chain…
And there you have your finished pendant!
There are so many variations – the simplest is just to slip 2 stacking rings – eg – rondelle and flat bead onto the chain… Have fun creating your designs!
We want to see what you have been making! Share your creations with us on social media, tagging in Cooksongold on Facebook, Twitter and Instagram.
Janet Royle
Working in silver, gold and beautiful gemstones (sometimes combined with original antique pieces), Janet blends traditional skills and modern technologies to create her unique collections.