Looking to give your loved one something handmade this Christmas? These beautiful silver stacking ring from jewellery designer Janet Royle will have your loved one jumping up and down for joy!
Before you start
Once you know your ring size, work out how much wire you need to make the ring. Look up the circumference on a ring size chart. Add to this three times the width of the wire to allow for it to fit. Eg ring size L = circumference 51mm. 3 x width of wire is 3 x 2mm = 6mm + 51mm = 57mm of wire. Snip off the end of the beaded wire with flush cutters to make sure it is flat.

Step 1:
Measuring the wire.
Measure the wire against a ruler to the length required. Remember, there is a little leeway as you’ll only be able to cut in between the beads.

Step 2:
Snip and file.
Snip off the ring piece with the flat edge of the cutters. Then file each end flat, so that you get a good join to solder.
Step 3:
Bringing the ends together.
Start to curve the ring, using the half round pliers – start at each end, then bring the ends together in a rough circle: Next, adjust the ends so that there is no gap between them where they join. Check against a light. You may need to file further (or run a piercing saw blade through the join) to make the ends level.

TIP: Mark the bead on either side of the join with a marker pen, as it can be hard to see when you come to solder.
Step 4:
Joining the ends.
Place the ring on your solder block and add a blob of hard solder paste – about the size of one of the beads – to the join. Next, heat the ring, starting from the back, then all around before concentrating on either side of the join until the solder melts.

Step 5:
Clean your pieces.
Let the ring cool, or quench it in water (don’t forget to pick it up with tweezers as it will be very hot!). Once cooled, check the size of the ring by slipping over a ring mandrel and forming it gently with the hide mallet. If the ring is too large, you can cut and file out a section. If too small, you can try tapping with the mallet a little harder to stretch it.

Step 6:
Pickle and polish.
At this point, you can pickle the ring and then polish it and have it as a simple stacking ring. Otherwise it is ready to solder on a bezel cup.
Step 7:
Attaching the bezel.
File a flat edge over the solder join onto which the bezel cup will sit.
The flat edge needs to go about half way through the top bead, to provide a good surface for the bezel cup.

Step 8:
Check your work.
Prop the ring using your reverse action tweezers. Sit the bezel cup on top to check that it lies flat. Add a blob of solder paste and reposition the bezel cup – checking from all angles that it is in the correct position. Add a blob of solder paste and reposition the bezel cup – checking from all angles that it is in the correct position.

Step 9:
Bring the heat.
Heat the ring, moving around towards the bezel cup. Try toget in a position where you can see when the solder melts. The paste will hold the cup in place – but when heated it will move slightly as it melts. Make sure that your solder block is in a tray, so that if the cup falls off at this point – when
Step 10:
Polish again!
Quench the ring, or let it cool and then pickle it to remove any heat blackening. The ring is now ready to be polished. The easiest way is to
barrel tumble for about half an hour. (otherwise, Cooksongold ultra polishing pads 998 027B can also give good results).

Step 11:
Setting the ring.
The ring is now ready to be set. Firstly, lightly sand the top of the bezel cup on a level surface to make sure it is even. Then, place the ring in a ring clamp and add the stone to see how it sits. It may be necessary to file the bezel down further if it is too high.

Note: When using pre-made bezel cups, we often find that the stones do not always fit the bezels snuggly – which is the ideal. Make sure that there are no large gaps around the stone as it will not set properly. You may need to try several stones to get the best fit.
Step 12:
Push the stone.
Once you are happy with the seating of the stone, start to gently push the bezel around the stone. Work on opposite sides imagining a clock face. So start at 12 o’clock, move to 6 o’clock, then 9 o’clock, then 3 o’clock, and then fill in the other edges. This is to make sure the bezel is wrapped around evenly and there are no gaps.
Step 13:
Secure the stone.
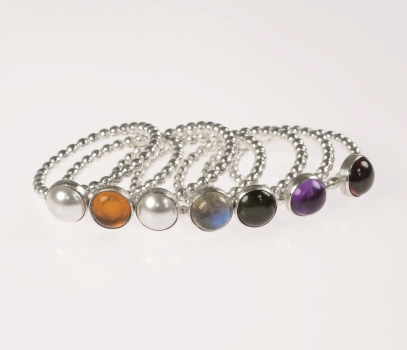
Once the sides are all pushed in, check that the stone is secure by gently rocking it with your finger. If it is secure, you can then burnish rub round the edges with a burnisher, which also pushes the bezel more securely around the stone. Here is a selection of gemstones and skinny rings

Step 14:
The finishing touches.
Give the outside of the bezel a little polish with a soft cloth – and sit back and admire your gem-set stacking ring!

We hope you’ve enjoyed making colourful silver stacking rings. If you have any questions or want to know more, get in touch with us on Facebook, Twitter and Instagram. We’d also love to see what you’ve been making so please share pictures of your creations with us too, tagging Cooksongold!
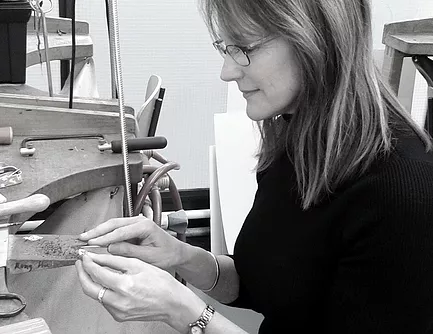
Janet Royle
Working in silver, gold and beautiful gemstones (sometimes combined with original antique pieces), Janet blends traditional skills and modern technologies to create her unique collections.