We know that starting your jewellery making journey can be overwhelming which is why, as a part of our how to make jewellery hub we’re giving you some helpful advice, tips, guides and more on a range of jewellery making. Here we’ve listed what we think are some useful tips for those new to stamping metal.
Whether you’re new to the metal stamping process or you’d just like to brush up on your knowledge, we can help. In our metal stamping process guide, we’ll talk you through the ins and outs of how to stamp metal and the basics of metal stamping for beginners to get you started. So to begin your journey, read on.
What is metal stamping and why is it so popular?
Metal stamps have been developed to offer designers a huge range of options for creating their own, custom stamped jewellery, metalwork and craft projects. Stamping metal is a great way to start making personalised sterling silver jewellery adding letters, numbers, star signs, morse code, symbols or even stamping a complete scene.
Your metal stamping kit
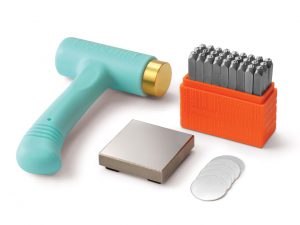
Before you start learning how to stamp metal, it’s worth stocking up on a few key pieces of equipment. Here’s what we would include in a metal stamping kit for beginners:
- Metal stamps – these could be letter stamps, number stamps or design stamps. ImpressArt design stamps are suitable to use on gold, silver, copper, brass, pewter and aluminium. It is also possible to use these stamps on other materials such as leather, glass, wood, wax, card, and clay.
- A stamping hammer – purchase a stamping hammer so you can create the desired effect with ease. Designed specifically to be used with ImpressArt stamping tools, this hammer has a short handle and a wide, flat face designed to provide an even and correct angle for an efficient hammer blow. The head is made of brass which is intended to provide a ‘soft’ blow, making it is less likely to double bounce when striking.
- A stamping block – or flat plate, so you can stamp on a stable surface. This large, deluxe bench block will accommodate a variety of jobs, providing the perfect support for metal stamping processes. We also love that it has a rubber central section that deadens the sound of repeated hammer blows.
- Metal blanks – stock up on a range of different sizes of metal blanks to begin with so you can find your favourite size to work with. Pre-cut metal blanks make life easier as it doesn’t require annealing, and has a flat and level surface which is ready to stamp. Simply stamp your design, add a jump ring through the pre-cut hole at the top and you have a dog tag/pendant complete in minutes.
- Stamping tape – you’ll need stamping tape to hold your metal blanks in place.
- Marker pen – use a stamping enamel marker pen mark your impressions and help the designs stand out.
- A polishing cloth – if you choose to use a marker pen to enhance your design you’ll need a cloth to buff away any remnants of the pen.
The metal stamping process
- The first step in the metal stamping process is to fully support the metal from underneath. This can be done with either a steel block or a sandbag.
- Next, place the metal on the block or sandbag and tape down the bottom so that it’s secure, without covering too much of the metal.
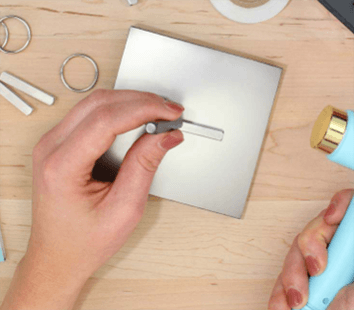
- Once the metal is taped in place, use a ruler and a marker pen to mark the positions of where you’d like the impressions to sit.
- Using your marks as a guideline, hold the stamp in place with the logo facing your body and ensure it’s fully upright and in complete contact with the surface of the metal.
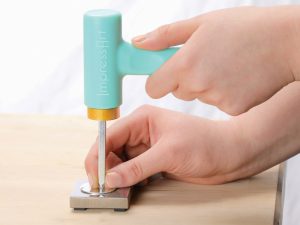
- When you’re ready, raise the hammer and strike the stamp from the top and repeat as necessary.
- For the final step in the metal stamping process, you have the option to enhance your design by rubbing the indentations with a black marker or enamel ink and then buffing off the excess with some cloth or paper towels. This will help you to highlight the impressions and make them stand out more.
We hope you found our metal stamping process guide useful. Find more information about metal stamping for beginners on our dedicated metal stamping page, part of the how to make jewellery hub; an area for beginners to learn just how fun and easy jewellery making can be! Enjoy making!
We hope you found our metal stamping process guide useful. And now you know how to stamp metal jewellery, why not try it for yourself? Find more information about metal stamping for beginners and the best tools you need in our Top 5 Metal Stamping Tools blog. Ready to get started? We have everything needed to build a metal stamping kit for beginners at Cooksongold.

Cooksongold