This tutorial will help you to create copper stud earrings using precious metal clay.
Once you have gathered all of the items you need, you can follow this step by step guide to create your own copper stud earrings
Step 1:
Create a tiny sculpture to create a mould from or buy a ready-made mould. I use Gedeo Siligum Moulding Compound for mould making, mix equal quantities of the two colours and press your tiny sculpture into it. Once set, remove your sculpture and your mould is ready to use. For easier release brush a little Badger Balm, I use Neves Bees Hand Salve. Rub some of your chosen hand salve onto your hands too.
Step 2:
Using Prometheus Copper Clay, I take enough of the clay out of your packet to fill the mould and work in your hand for a minute until smooth, before pressing into your mould. I use a modelling tool or finger to smooth the surface and leave to dry. I find leaving to dry naturally gives a better finish, however if you want it to dry faster, I find a mug warmer is great, or on top of my warm kiln, or 10 minutes in a very low oven. Once your clay is dry, remove from the mould and make another if you want a matching pair of earrings.


Step 3:
When you have both tiny copper sculptures, suitably dry, you are ready to refine them, I use tiny burrs on my Dremel pendant drill with a flexible shaft (remember to wear safety goggles).

Step 4:
Gently smooth the backs of the earrings, with a fine sanding sheet or flexible abrasive board, I find a that a disposable nail file works well too. You may want to gently brush away any clay dust with a brass brush.


Step 5:
Place your two refined tiny sculptures on a wire mesh ready for a two-part carbon firing. Place the mesh with the sculptures on, in your kiln, shut the door and fire on full power to 500 degrees and keep/soak at that temperature for 10 mins.

Step 6:
When the ten minutes has elapsed, carefully remove the mesh with your tiny copper sculptures on from your kiln and place on a heat proof surface (ensure you are wearing safety goggles and heat proof gloves).

Step 7:
Take a small carbon firing pan and place a layer of activated coconut carbon in the bottom of the pan (at least 1cm deep). Using kiln tongs or long metal tweezers, carefully place your tiny copper sculptures onto the layer of activated carbon. Cover the copper sculptures with more carbon, filling the firing pan.

Step 8:
Place the lid tightly on the firing pan and carefully put back into your hot kiln (wear green safety goggles and heat proof gloves). Heat to 850 degrees and soak for 90 minutes and then leave to cool.

Step 9:
Remove the cool carbon firing pan and take the lid off, find your two tiny copper sculptures.

Step 10:
Prepare some picklean solution, I use a small slow cooker to keep it warm. Brush any carbon dust off your sculptures with a brass brush and place into the picklean solution, I find about 30 minutes works well. Once this time is over, remove your sculptures and rinse with clean water.

Step 11:
Prepare your barrel polisher, I use a mix of 3 types of shot with a teaspoon of barrelbrite and water just to the surface of the shot. The tumbling process hardens your sculptures as well as cleans them up. I find, a good few hours, works best for copper clay, although you can probably get away with an hour or so. Remove from the barrel and dry.

Step 12:
You have now completed the creative part of making your copper earrings and they are now ready to solder on your chosen sterling silver posts. Prepare your soldering station, I use a soldering block, on a heat proof surface and insulated reverse tweezers on a third hand. You will need flux in a small pot, some fine insulated tweezers, your earring posts and some prepared pieces of solder, anything from hard solder if you are confident or easy solder, so you have less chance of melting the post.
I like to dip my entire tiny sculpture into the flux, before setting it up, on the soldering block, under the reverse tweezers on the third hand. Then using your fine tweezers, take an earring post and dip that into the flux, carefully place your post the correct way up (ridge towards the top) in your reverse tweezers. Align the earring post to sit directly on top of the back of your tiny copper sculpture, the post needs to be touching the sculpture.
Gently start to warm up your combination of elements with your blow torch, before taking your prepared solder and placing it on the back of your copper sculpture at the base of the silver post with the insulated fine point tweezers, the copper will conduct the heat away so make sure that you warm the top of the post to encourage the solder to run and do its job, holding the two pieces together (wear safety goggles).

Step 13:
Once your solder has run and your pieces are joined together, make sure that you have turned off your blow torch and quench your creation in water. Repeat this process for your second earring.

Step 14:
Remove your earrings from the water and place back in the picklean solution until clean. Remove from the picklean and put back in your barrel polisher for 30 minutes or so. Then remove from the barrel polisher, rinse and dry. I sometimes polish up a bit more using my Dremel, depending on how my piece has come out and how I want the finish.


Step 15:
Polish your earrings with a little renaissance wax to encourage the copper to keep its shine.

Step 16:
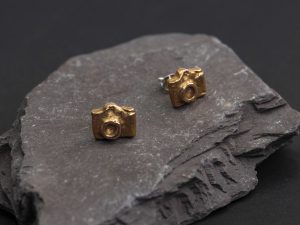
Put scrolls on the posts and you have a pair of unique copper earrings, ready to wear.

Enjoy your beautiful new earrings!
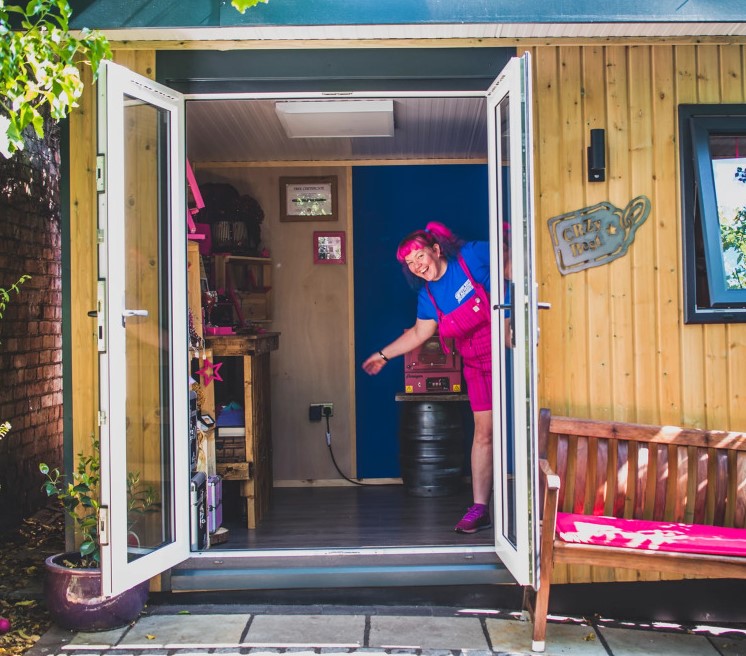
CRZyBest
Silversmith & Sculptor. I'm Claire, I create tiny bespoke sculptures & turn them into jewellery, accessories & alternative bouquets.