Wondering how to polish stones by hand? Asking yourself “is it worth investing in tools for cutting and polishing gemstones”? Well, we’ve put together a selection of methods and tools for cutting and polishing gemstones without a machine. So, whether you’re just getting a taste for lapidary, you’re trying to introduce it to your business, or your job involves gemstones on an everyday basis, we’ve got some ideas for you on how to polish stones and cut gemstones by hand.
How to polish and cut gemstones
When you’re just starting out, try these techniques with a larger gemstone that has obvious flat surfaces with minimal dents, as this will make it easier to shape. And focus on creating just a few, large facets as these are easier to polish later on.
How to cut gemstones by hand: using sandpaper
Polishing stones by hand doesn’t have to be an arduous task. Using sandpaper is a less precise and technical way of polishing gemstones, however it’s are an efficient way of experimenting with how you’d like your stones to look. It is also an ideal way for polishing gemstones for those who are just dabbling in using stones for their jewellery projects and aren’t looking to sell just yet.
Equipment:
- Chopping board
- Wet and dry sandpaper in four grits – 180, 400, 600 and 1200
- Tap water
- Tea towel
Method:
- Lay the lowest grade sandpaper (the 180 grit) out onto the chopping board rough side up. Be sure to work on a stable surface so the chopping board doesn’t move around – you may want to lay down a tea towel underneath the board for further support.
- Pour a small amount of water onto the centre of the sandpaper.
- Polish the stone by rubbing the gemstone over with the sandpaper and water to create a smooth facet.
- Repeat step three to create several facets and form a rough shape for your gemstone.
- Once all sides have been completed, grab the 400 grade and repeat the previous steps – making sure that you re-coat the paper and the stone with water in between each stage to avoid cross-contaminating the grits.
- Repeat the above with the 600 and 1200 grit paper.
Top tip: Every so often, rub the gemstone in a circular motion rather than back and forth to make sure you get a smooth surface.

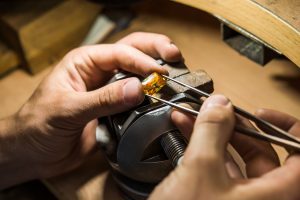
How to cut gemstones by hand: with a tool
For those who are looking to introduce more gemstone work into their business but don’t want to invest in a faceting machine, a Dremel hand tool may be the ideal choice. A Dremel is a versatile rotary tool that can be used around the house and in the workshop – and can be used for more than just cutting.
There’s a vast number of attachments and burrs that can be used for cutting, sanding, buffing and polishing gemstones. So with a Dremel engraver tool, carving gemstones is easy – but before you go all in with your precious gemstones, practice on a cheaper alternative to get the technique down first (river stones are an ideal surface to practice on). Here’s a step-by-step guide on how to cut a gemstone with a Dremel:
Equipment:
- Cordless Dremel – with cutting attachments
- Bench vice or clamp
- Fine tip marker
Method:
- Use a fine tip marker to draw your desired shape onto your gemstone.
- Secure the gemstone in a vice or clamp to make sure it’s steady and to avoid the tips of your fingers from getting too close to the cutting wheel.
- Hold the Dremel tool firmly by the rubber grip before turning it on and choosing a speed that you feel comfortable with.
Note: If you set the speed higher, it will cut deeper and may damage the stone – so it’s wise to start slow until you get a feel for the tool.
- Cut gemstones by carving along the marker line by dragging the tip of the Dremel attachment over the design.
Top tip: Don’t hold the tool in one spot for too long as you’ll cut deeper than you intend to and will cause a hole to form.
Find out more about how to use a Dremel rotary tool.
How to polish stones without a tumbler
Once you’ve cut your gemstone down to size, the next step is to polish it to a mirror-like finish. Polishing gemstones will allow the light to bounce off them as they hang from a necklace or sit in a ring. For a one-off project, you will need:
Equipment:
- Your choice of polishing compound – you can also try a metal/glass polish
- A clean cloth
Check out our range of polishing materials for more.
Method:
- Wrap a clean cloth around a chopping board.
- Add a small amount of polish to the centre of the board.
- Getting a good grip on your stone, rub the sides into the polish on the board – and repeat until the whole stone has been polished.
Top tip: Every so often, wipe the excess polish from the stone to check your progress, adding more as you go if you haven’t reached the desired finish.
If you already own, or are investing in, a hand drill tool (powered by battery or pendant motor), you can purchase polishing accessories that will help to get this job done a little bit quicker. Here’s how:
- Remove the sanding/cutting attachment and replace with one for polishing, locking it in place.
- Apply your polishing compound to the wheel and then buff and polish the surface of your stone until you’re happy with the finish.
- Remove any residue of the polishing compound from the wheel and continue to polish your stone until it’s clean and at your desired finish.
So, is it worth investing in tools for cutting and polishing gemstones?
Yes, if you’ll use them frequently. However, it may also depend on whether you’re creating the pieces to sell or not: a higher quality finish may be more achievable when you have the right tools. If you’re only experimenting and it’s unlikely that you’ll develop a stock offering in lapidary, it’s probably best to stick to the low-cost alternative. Or, if you’ve been asked to produce a bespoke gemstone piece, it may be worth outsourcing this service as a one-off.
If you’re looking to introduce gemstones into more of your jewellery designs, investing in the proper tools for cutting and polishing gemstones is the right way to go – be that a hand drill or pendant motor. As outsourcing every piece will add up and can get to be quite costly.
Find everything you need for your next jewellery making project at Cooksongold – from jewellery tools to bullion.

Cooksongold