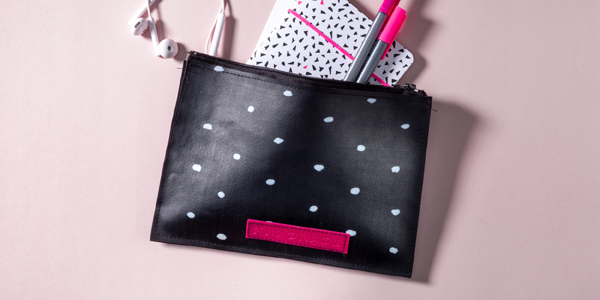
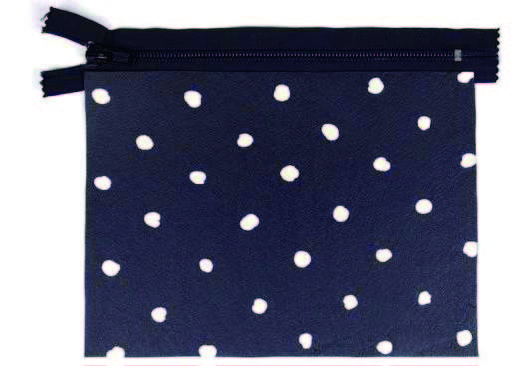
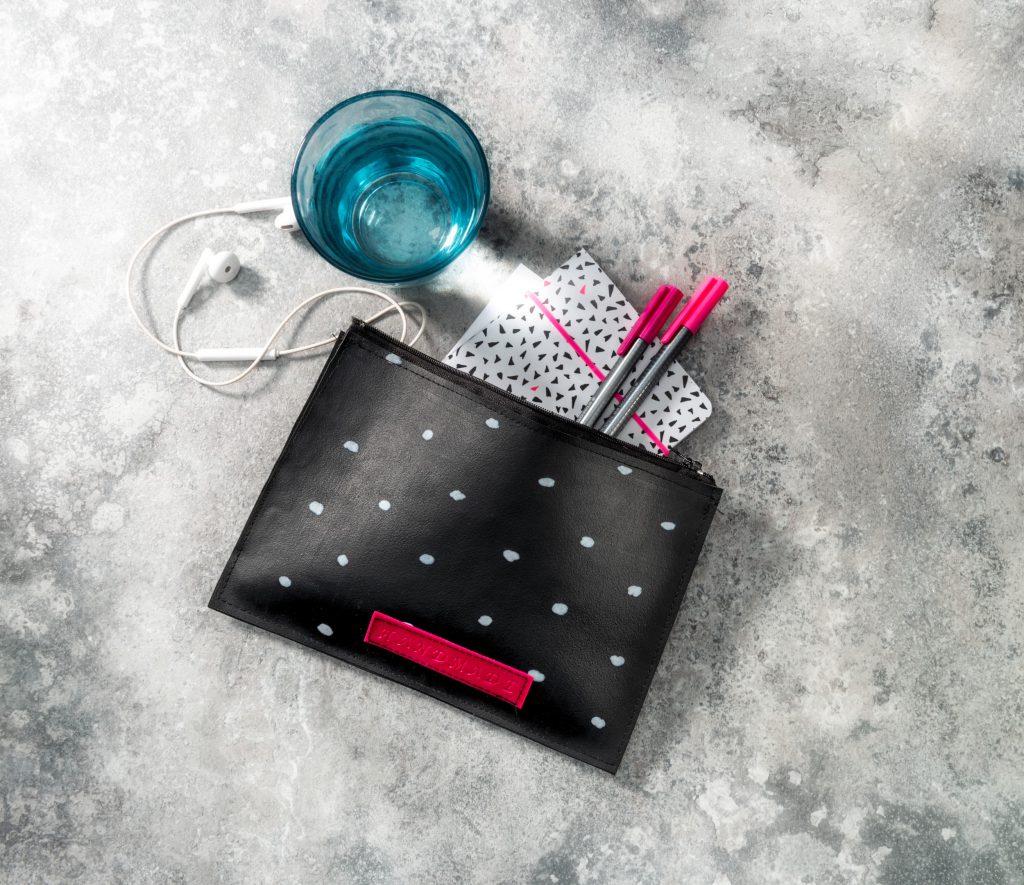
This FIMO leather-effect bag is a real one-of-a-kind and still looks really elegant! Classic in black, it goes with any outfit and has enough space for all sorts of utensils. The highlight is the patch in Berry, which makes it clear: Skillful hands were at work here!
Materials Overview
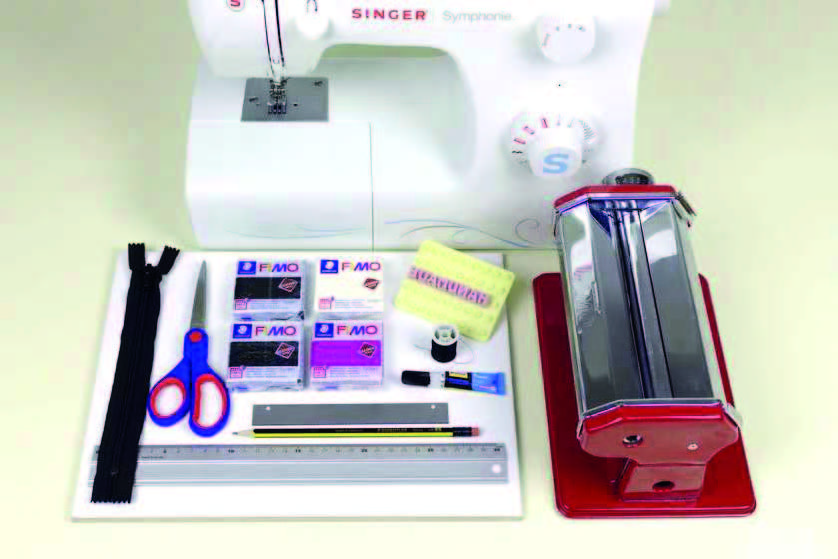
Additional items needed for project:
Biscuit stamp with punctuation letters
Black zip (approx. 20 cm)
FIMO Oven Thermometer
FIMO Clay Machine
Noris 120 Graphite Pencil
Smooth working surface (glass or ceramic)
Sewing machine
Black sewing thread
Step One
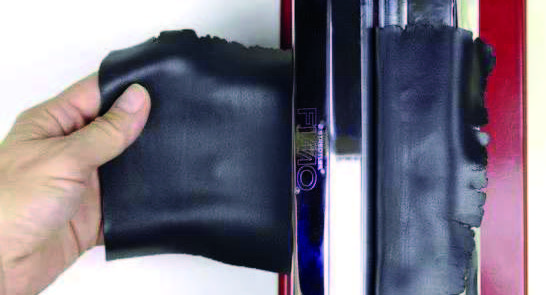
First, roll a thin sheet in black from an entire FIMO leather-effect block, approximately in A5 format. This is best done with the FIMO Clay machine. Roll out the FIMO sheet at a medium to medium thin level (setting 5 or 6). Start with the thickest setting (level 1). Repeat and roll the sheet thinner and thinner, gradually through levels 2, 4, and finally on level 6. The sheet should be approx. 1.5mm thick at the end.
Step Two
Now roll out a roll with a diameter of approx. 5mm from a half rib with an ivory-coloured FIMO leather-effect. Cut off many small pieces and roll
them into balls. Spread the balls evenly over the black sheet and
press them down a little.
TIP:
Work in progress and left-over material should be protected against sun and heat and can be stored in a screw-top jar or in cling film to protect it from dust and dirt.
Step Three
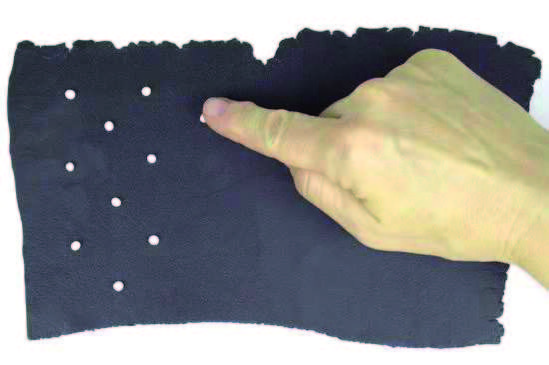
Spread the balls evenly over the black sheet and press them down a little.
Step Four
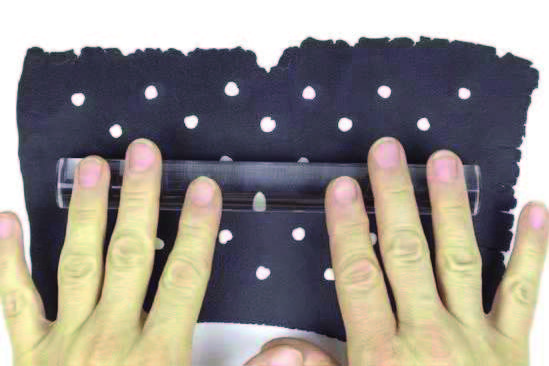
Roll the acrylic roller over the sheet to sink the white balls into the black sheet. The surface must then be completely level.
Step Five
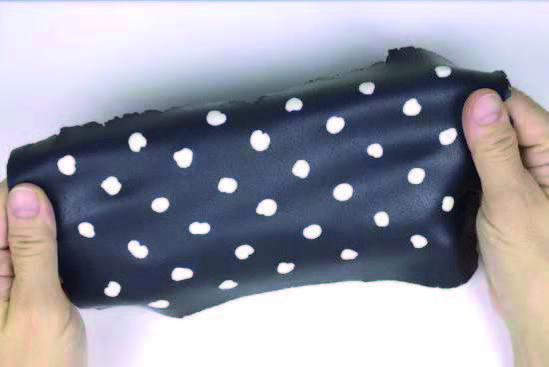
Make two of these sheets. The leather effect stands out even better if you
move the FIMO sheet gently by hand after rolling it out, pulling it apart a bit.
Step Six
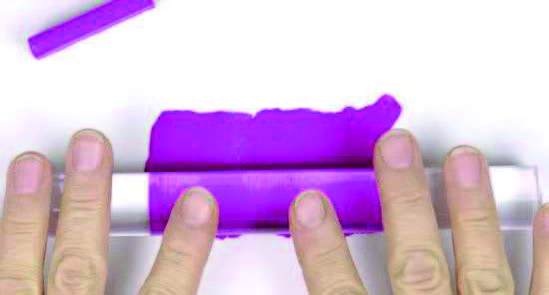
Roll out a rib of FIMO leather-effect berry nice and flat with the acrylic roller. Detach them from the working surface and also stretch them slightly.
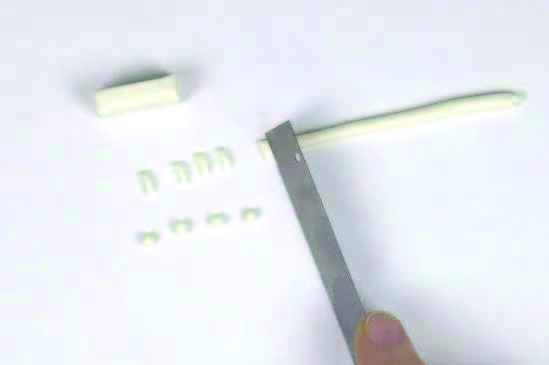
Step Seven
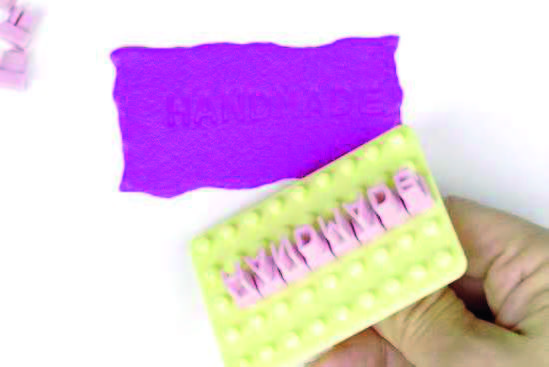
Prepare the letter stamp with the lettering “handmade”. Test this first for FIMO residues to see if the lettering fits. Engrave the letters in the berry-coloured sheet with the stamp. Now lay all FIMO sheets and the lettering
completely flat on baking paper. Harden them all using upper/lower heat at 130 °C/266° F in the oven for 30 minutes. Always use an oven thermometer for this purpose
Step Eight
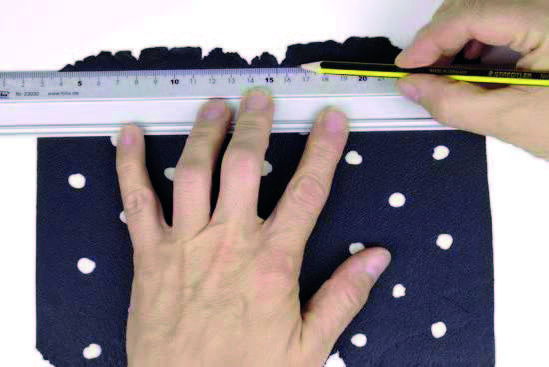
Let everything cool down well. Use the ruler and pencil to draw straight lines around the sheet so that the frayed edges are on the outside.
Step Nine
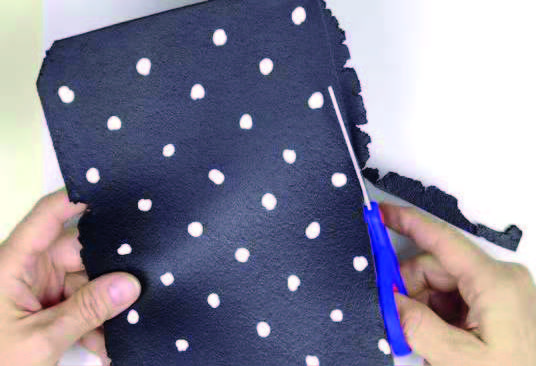
Cut a clean rectangle along the pencil lines.
Step Ten
Fit the long side to the zip. If necessary, shorten another side here.
Step Eleven

Now place the cut sheet on the unused sheet and draw all around with the pencil. Cut out the second sheet afterwards.
Step Twelve
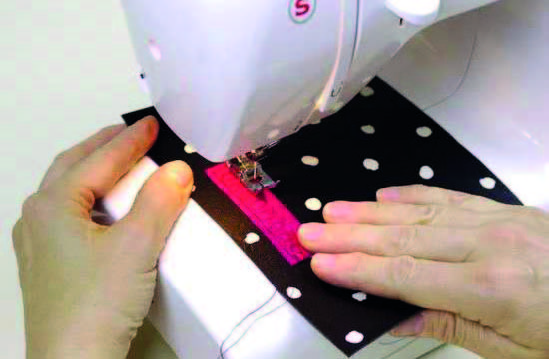
Also cut out the lettering in a nice rectangular shape. Make sure that there is enough edge left to sew! Sew the lettering on one sheet parallel to the lower edge.
Step Thirteen
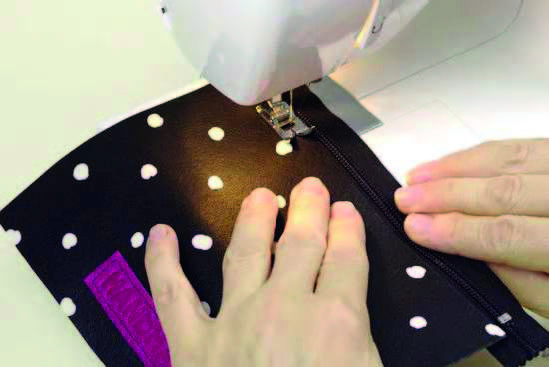
First, tightly sew the zip on one sheet.
Step Fourteen
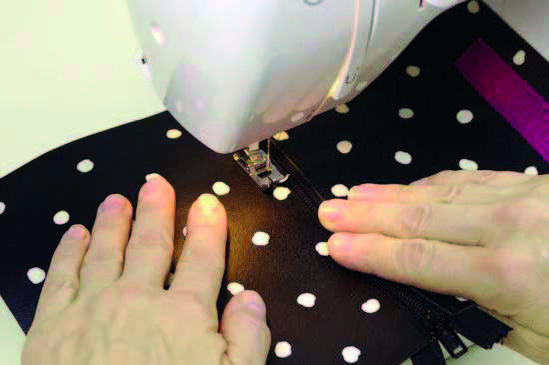
Then sew the second sheet to the other half of the zip.
Step Fifteen
Now fold the two sides together. If the edges are not exactly on top of each other, you can now cut a little more on the three open sides.
Step Sixteen
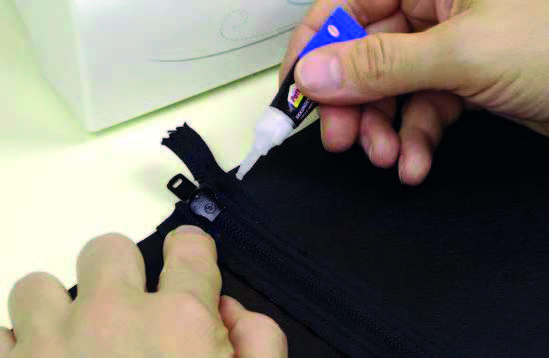
Cut off 2 pieces from the long FIMO strip, 1cm x 24cm then glue around the top and bottom of the cover.
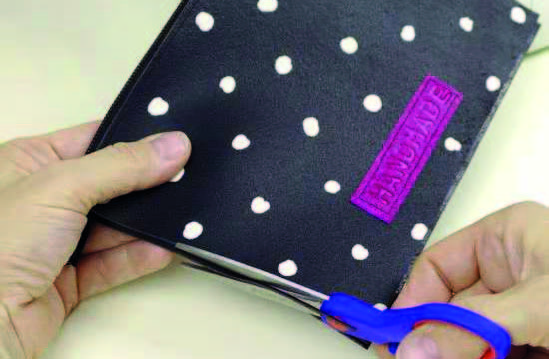
Step Seventeen

Finally, close the remaining three sides with the sewing machine. Sew all threads and cut them off at the end. Done!
Shop all of our Fimo products and create your own Fimo item right now
See the downloadable version of this project to print or keep

Cooksongold