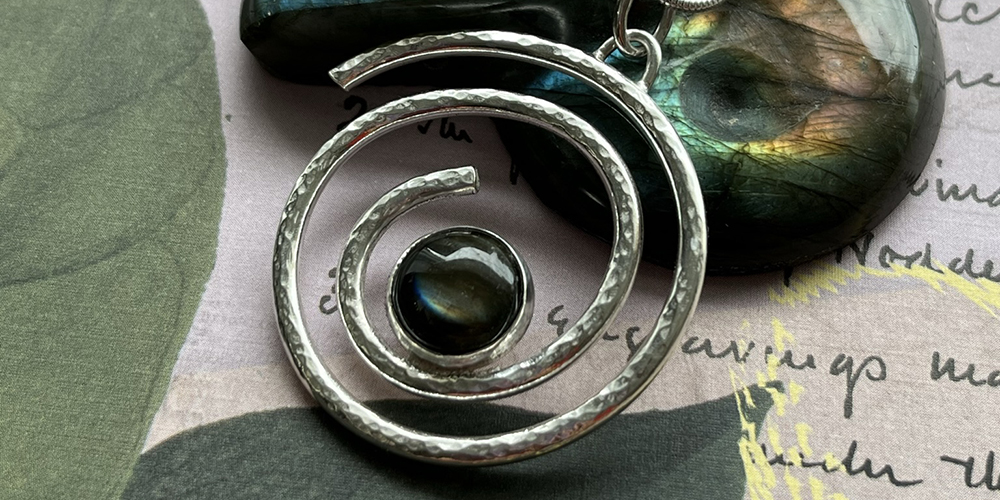
Learn how to make a beautiful sterling silver pendant featuring a cabochon. This is ideal as a Christmas gift or for yourself.
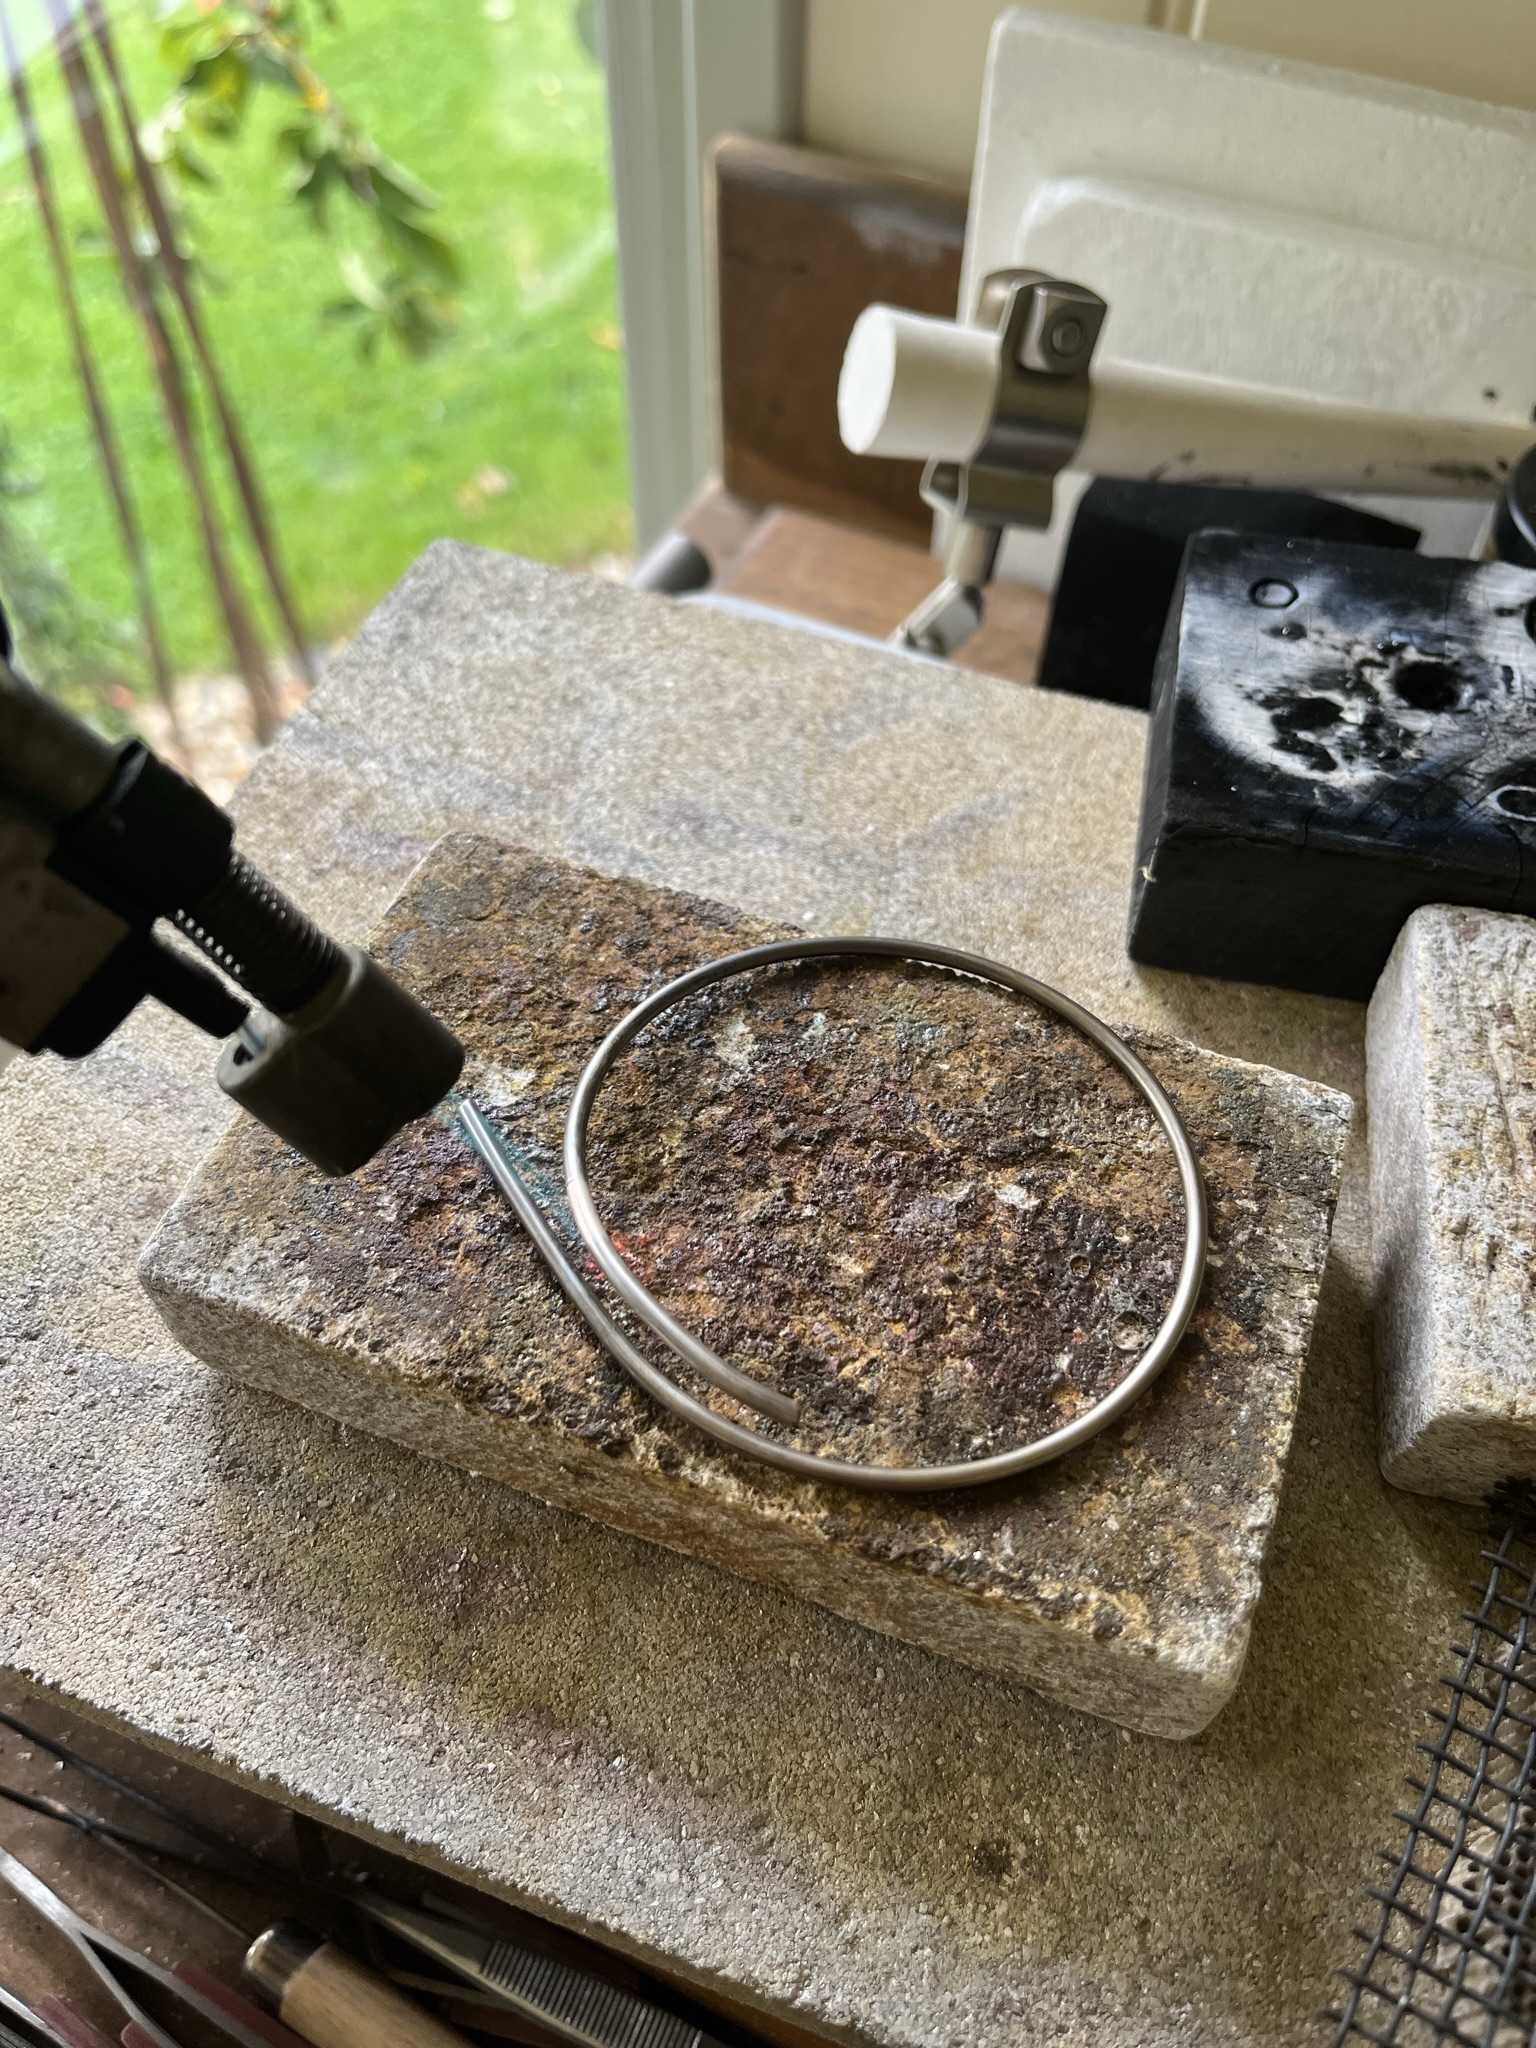
Step 1
Place the silver wire on a heatproof block.
Using a hand blow torch move the flame up and down the wire until the wire gently glows red.
Leave the wire to cool a little and then use tweezers to pick up the wire and quench (cool) in water, then add to a warm safety pickle solution.
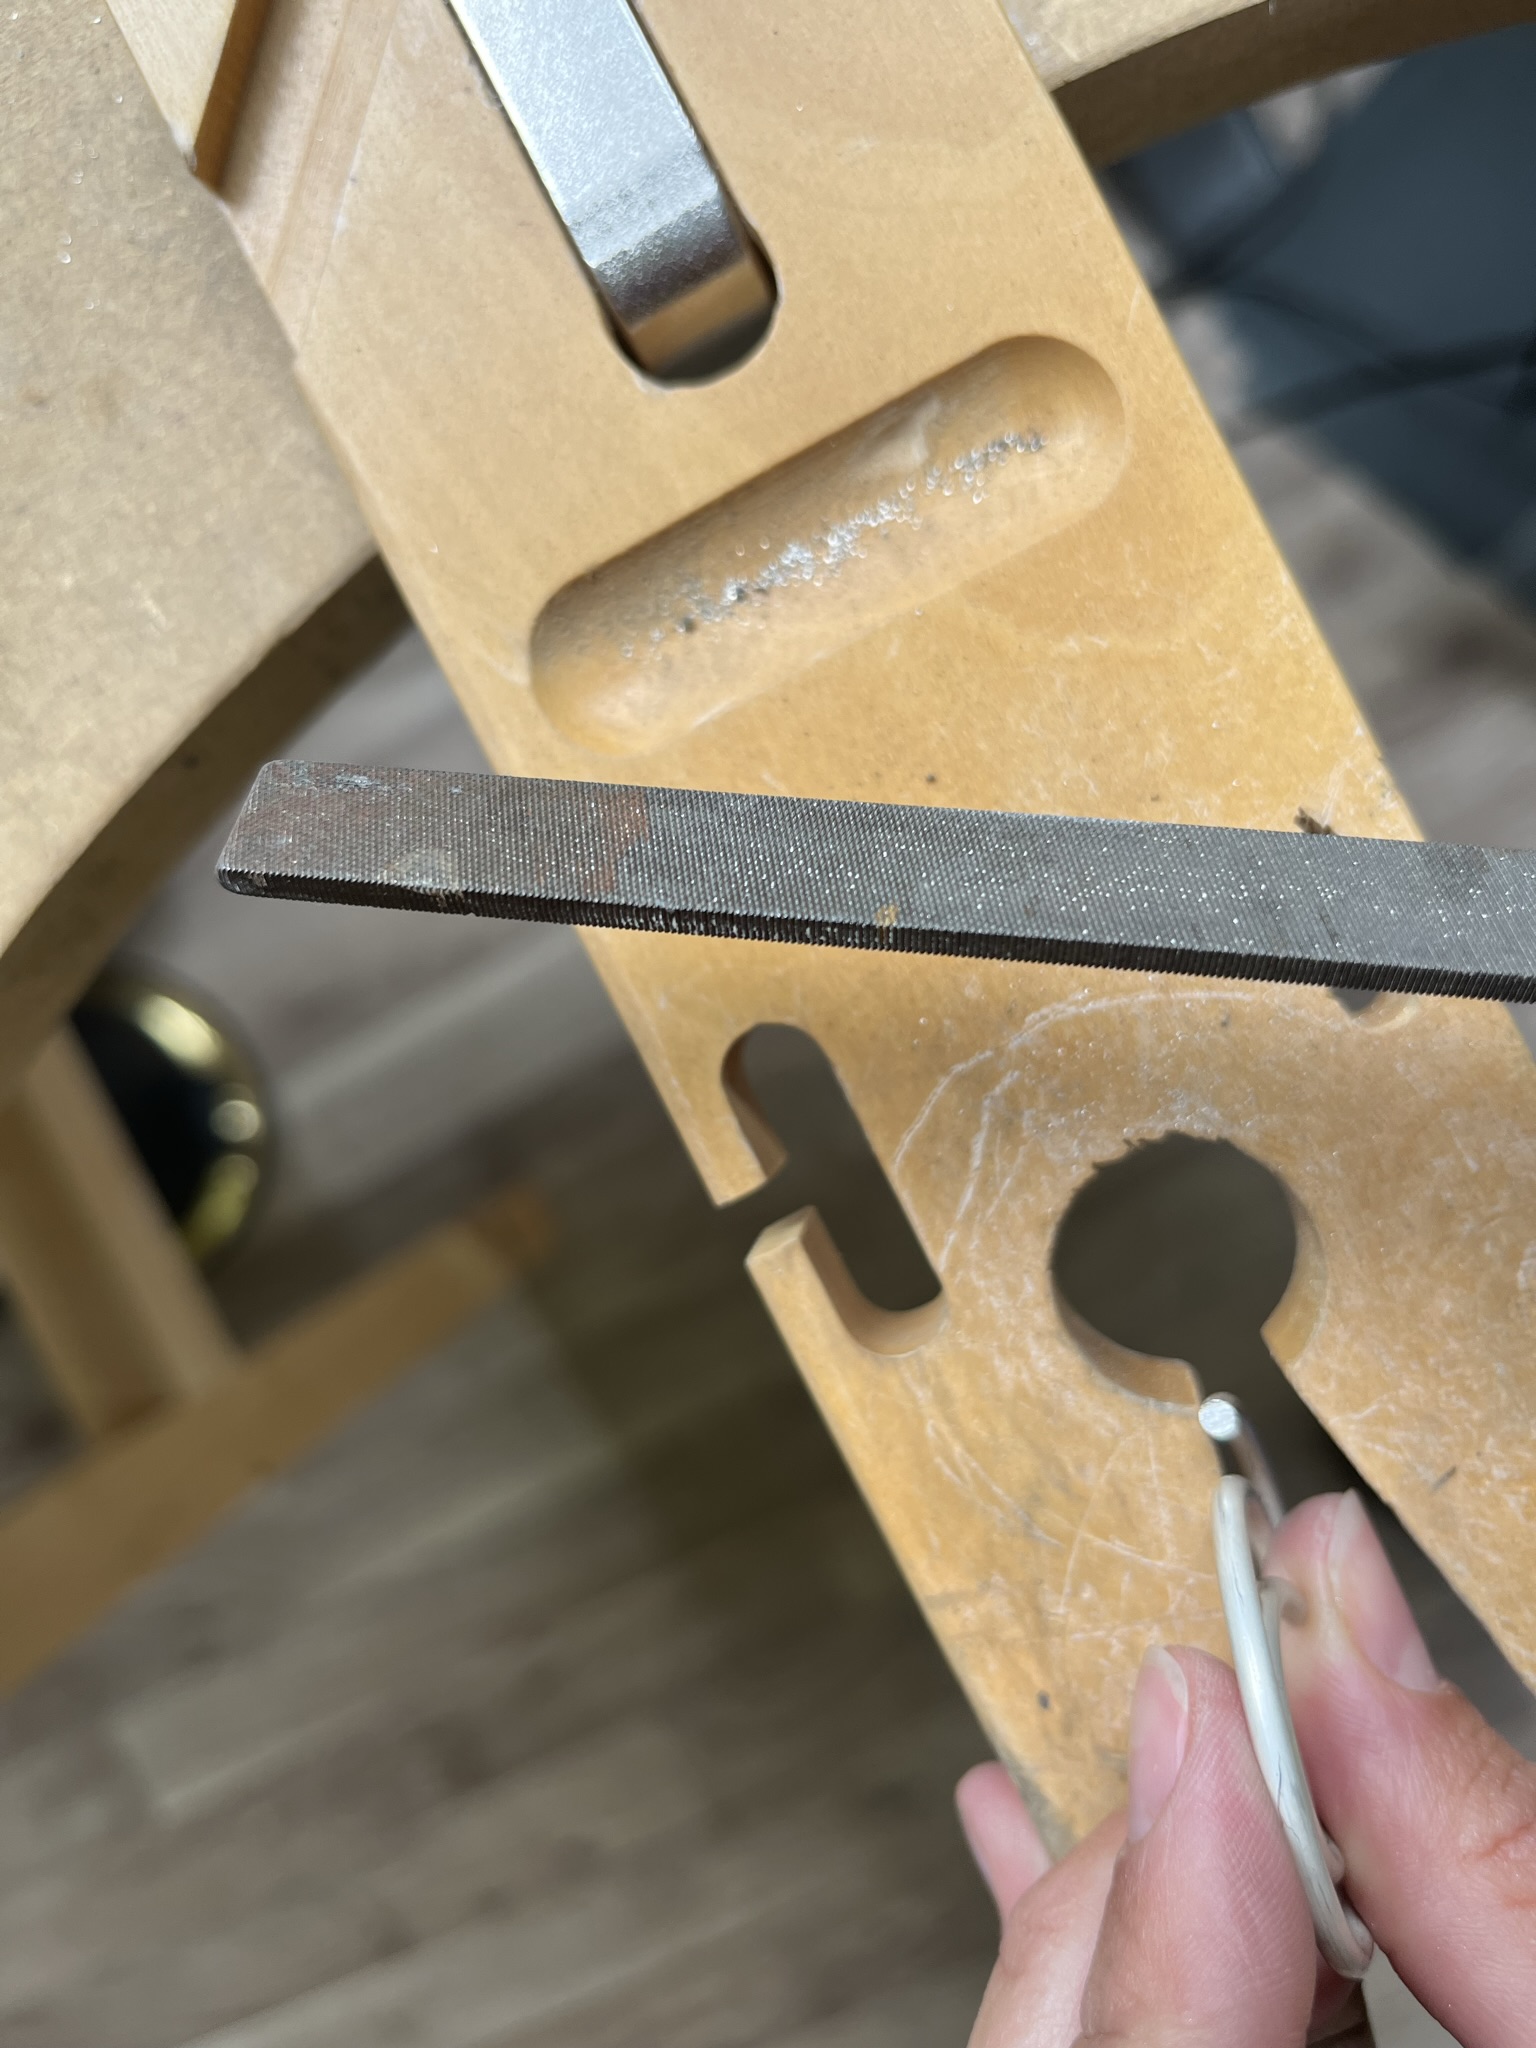
Step 2
Rest one end of the wire against your bench peg and file the end until it is straight and smooth. Smooth the end further by using your emery stick or paper.
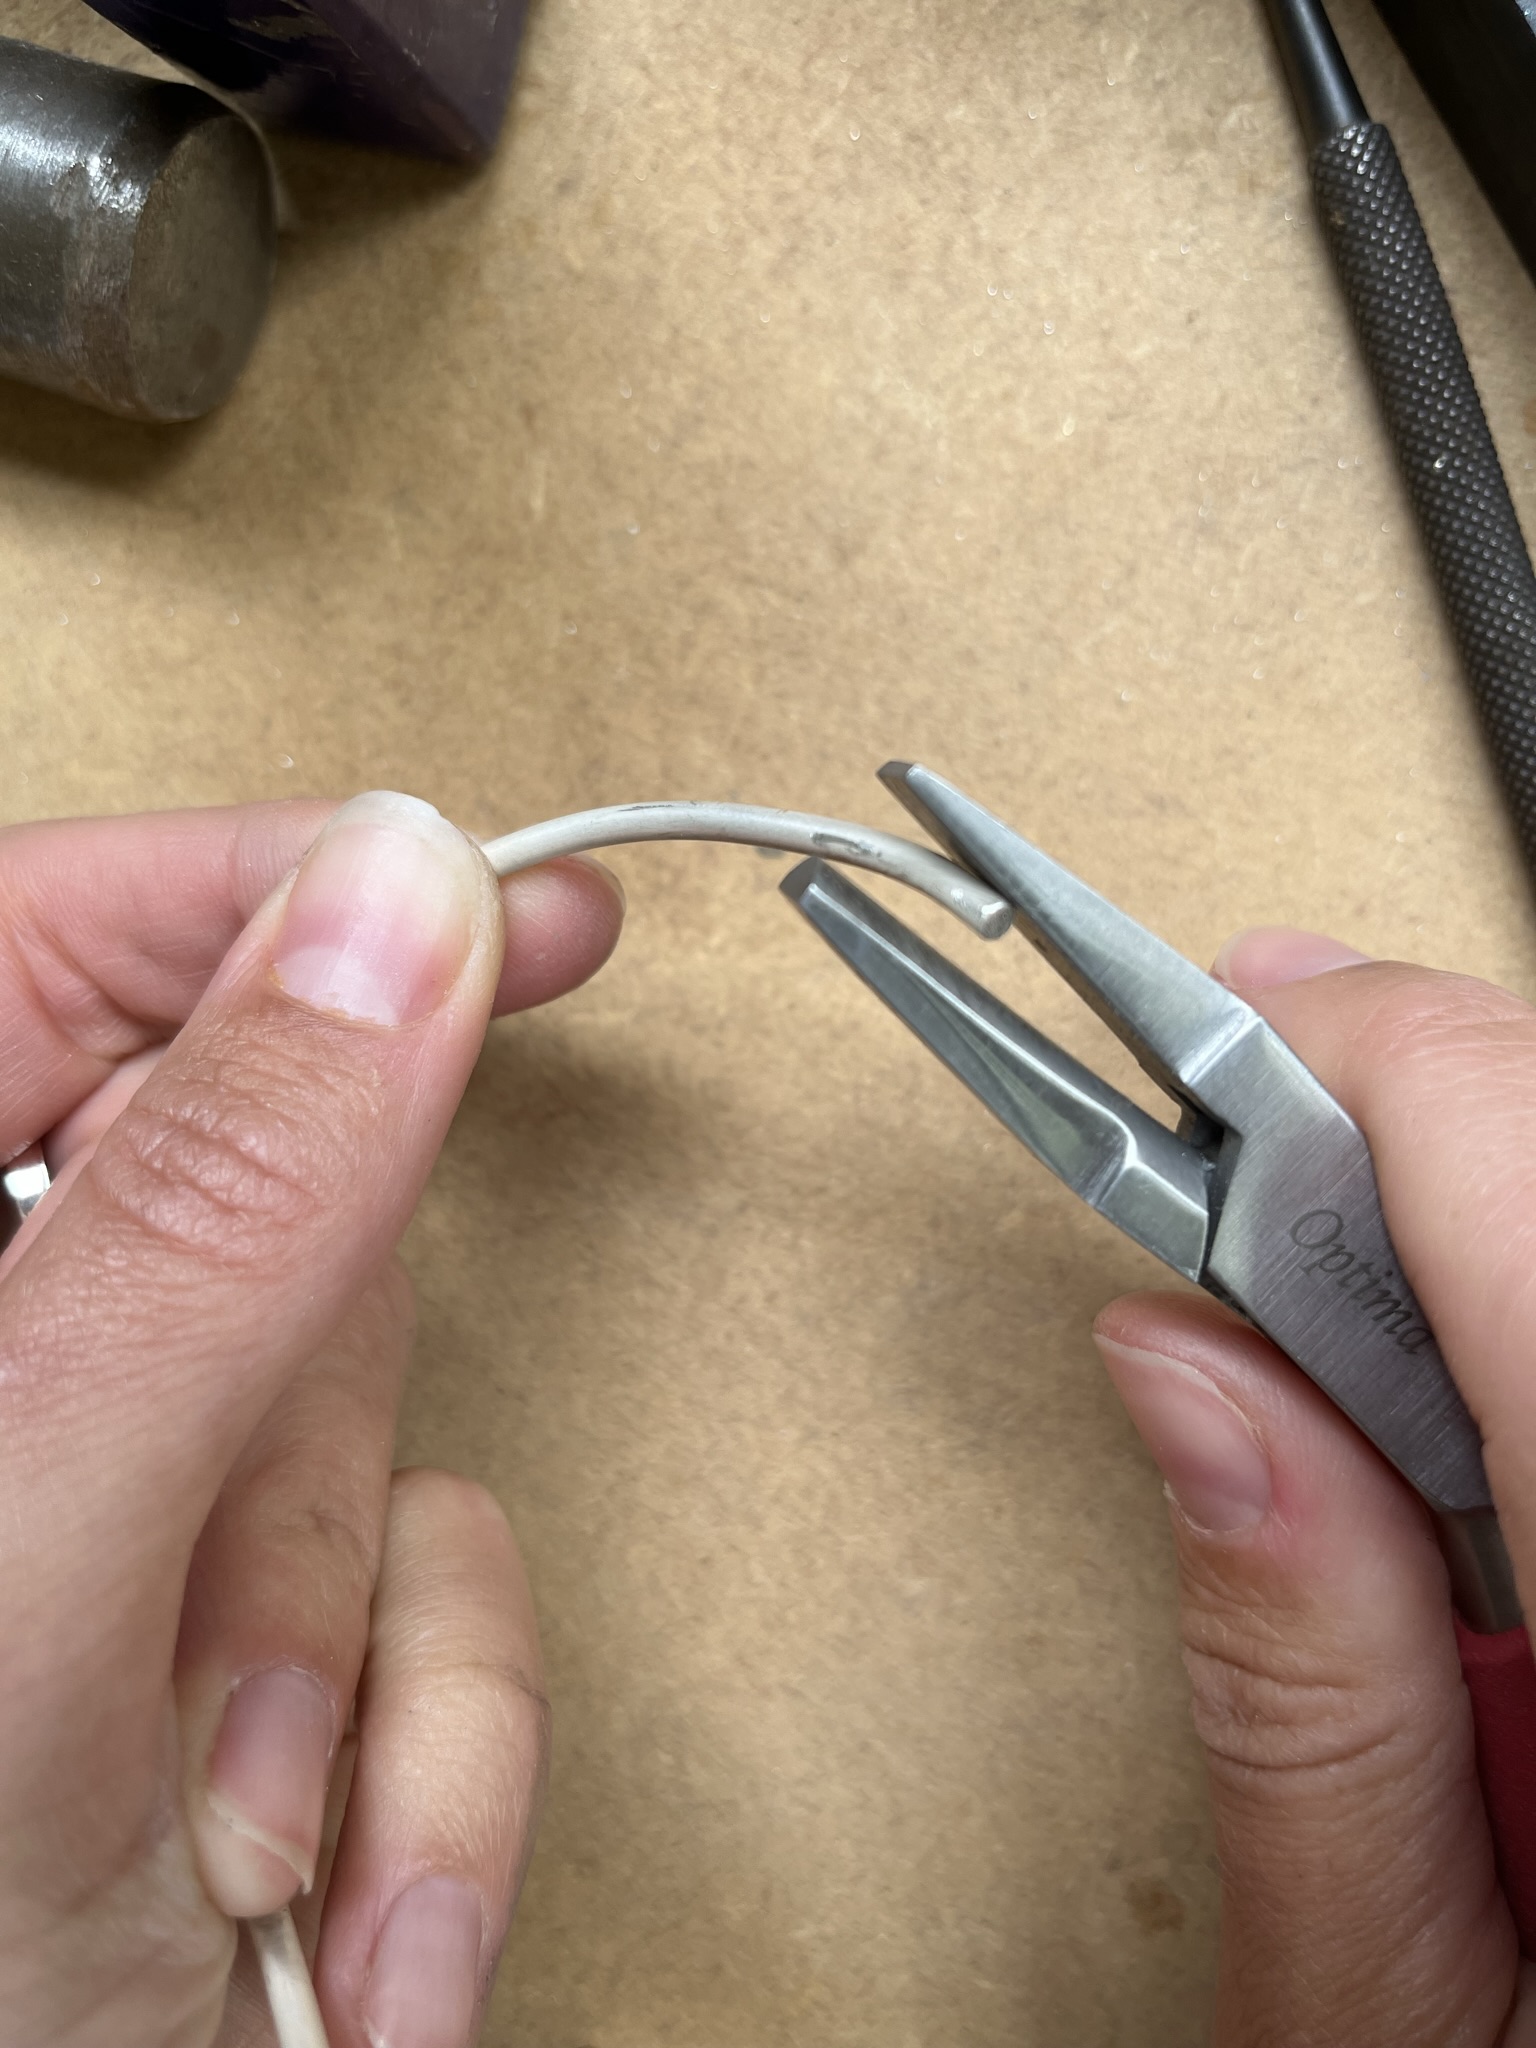
Step 3
Use half round pliers to grip the end of the wire and begin to bend the wire into a curve.
Be careful not to grip the wire with pliers too tightly as this will mark the metal.
You could use nylon plier covers or wrap masking tape around your pliers to avoid making marks.
Step 4
Continue to spiral the wire around itself using pliers or your hands if you feel able.
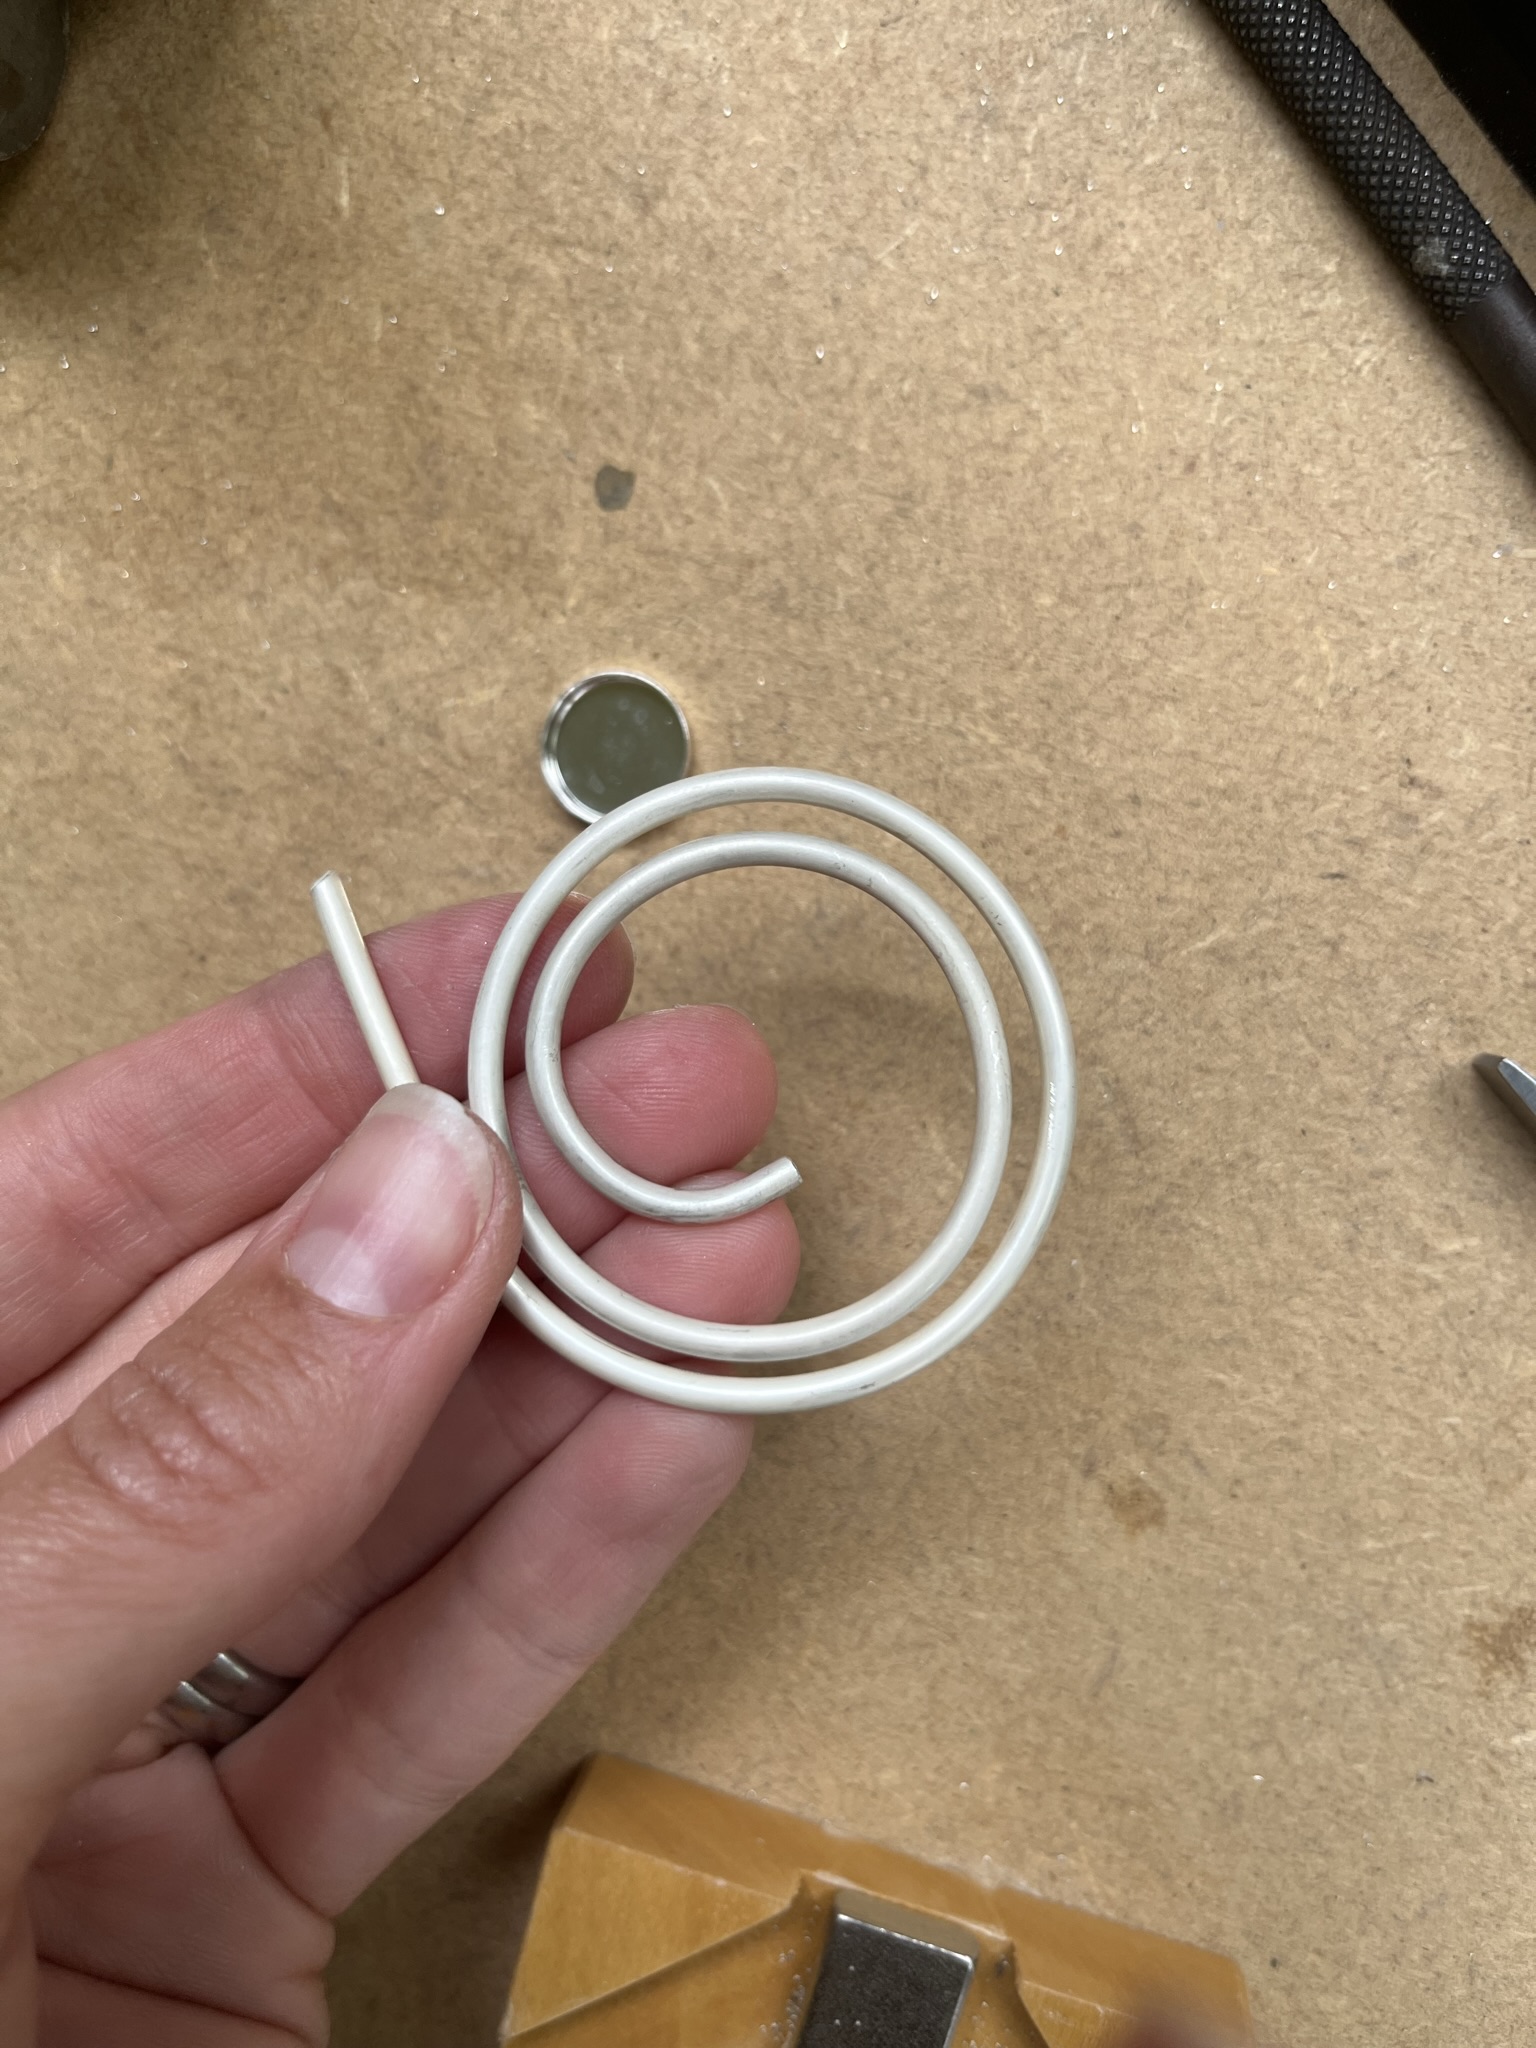
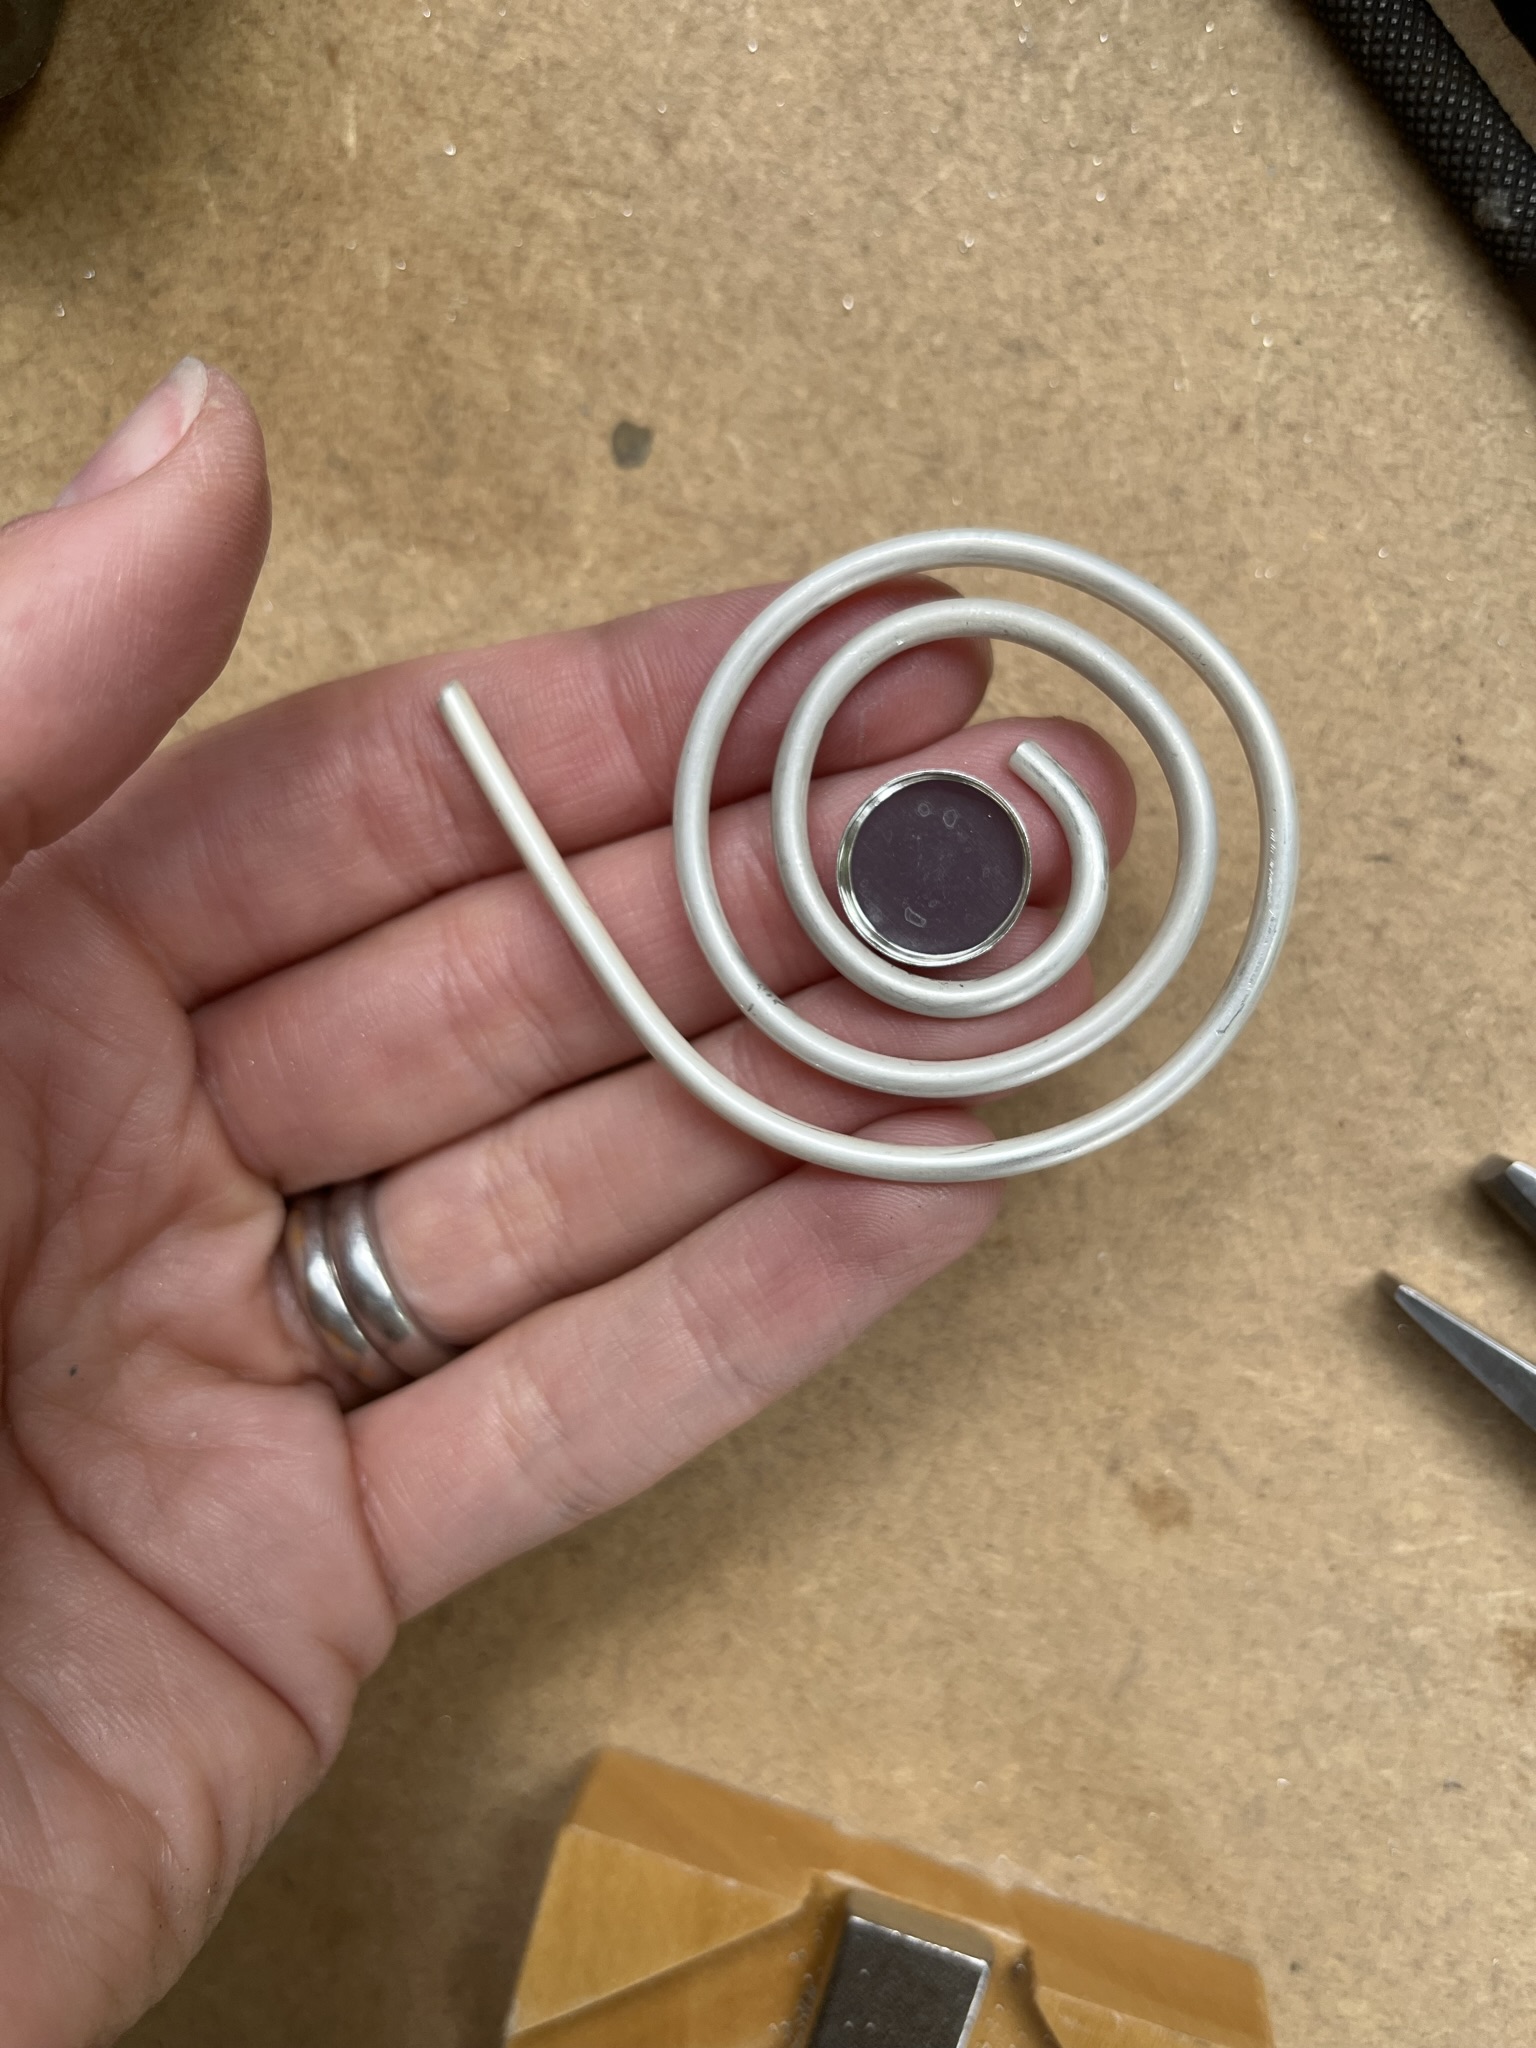
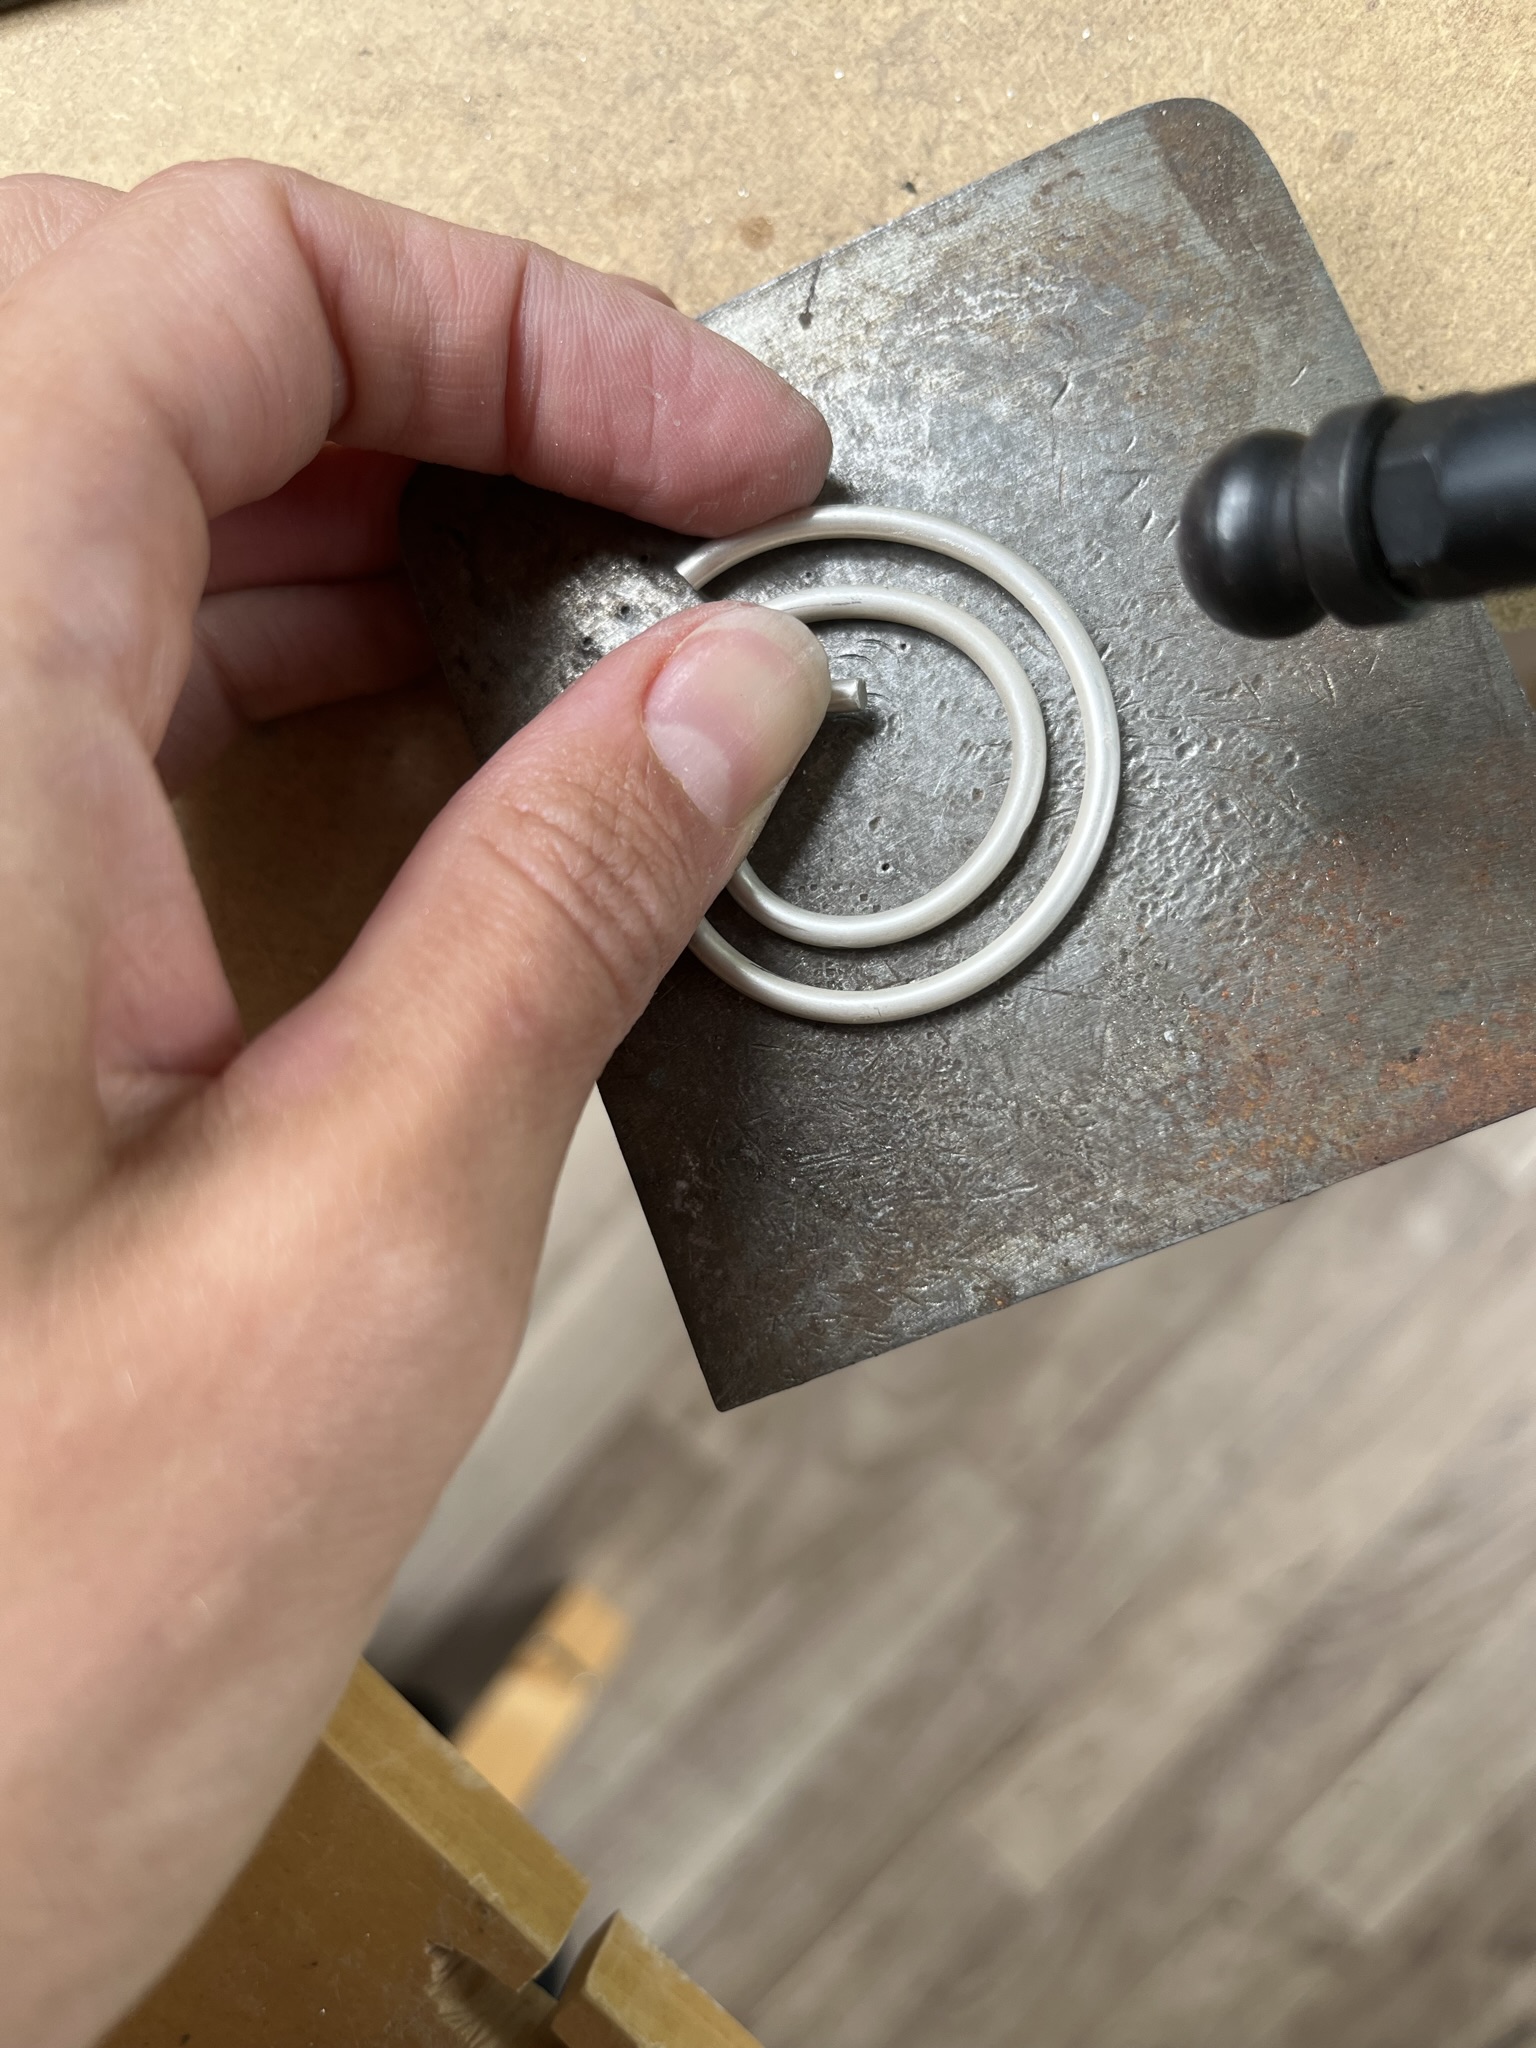
Step 5
Ensure that the middle of your spiral has a large enough space for your bezel cup to sit.
Step 6
Using a pen or scribe mark out any excess wire that you want to cut off.
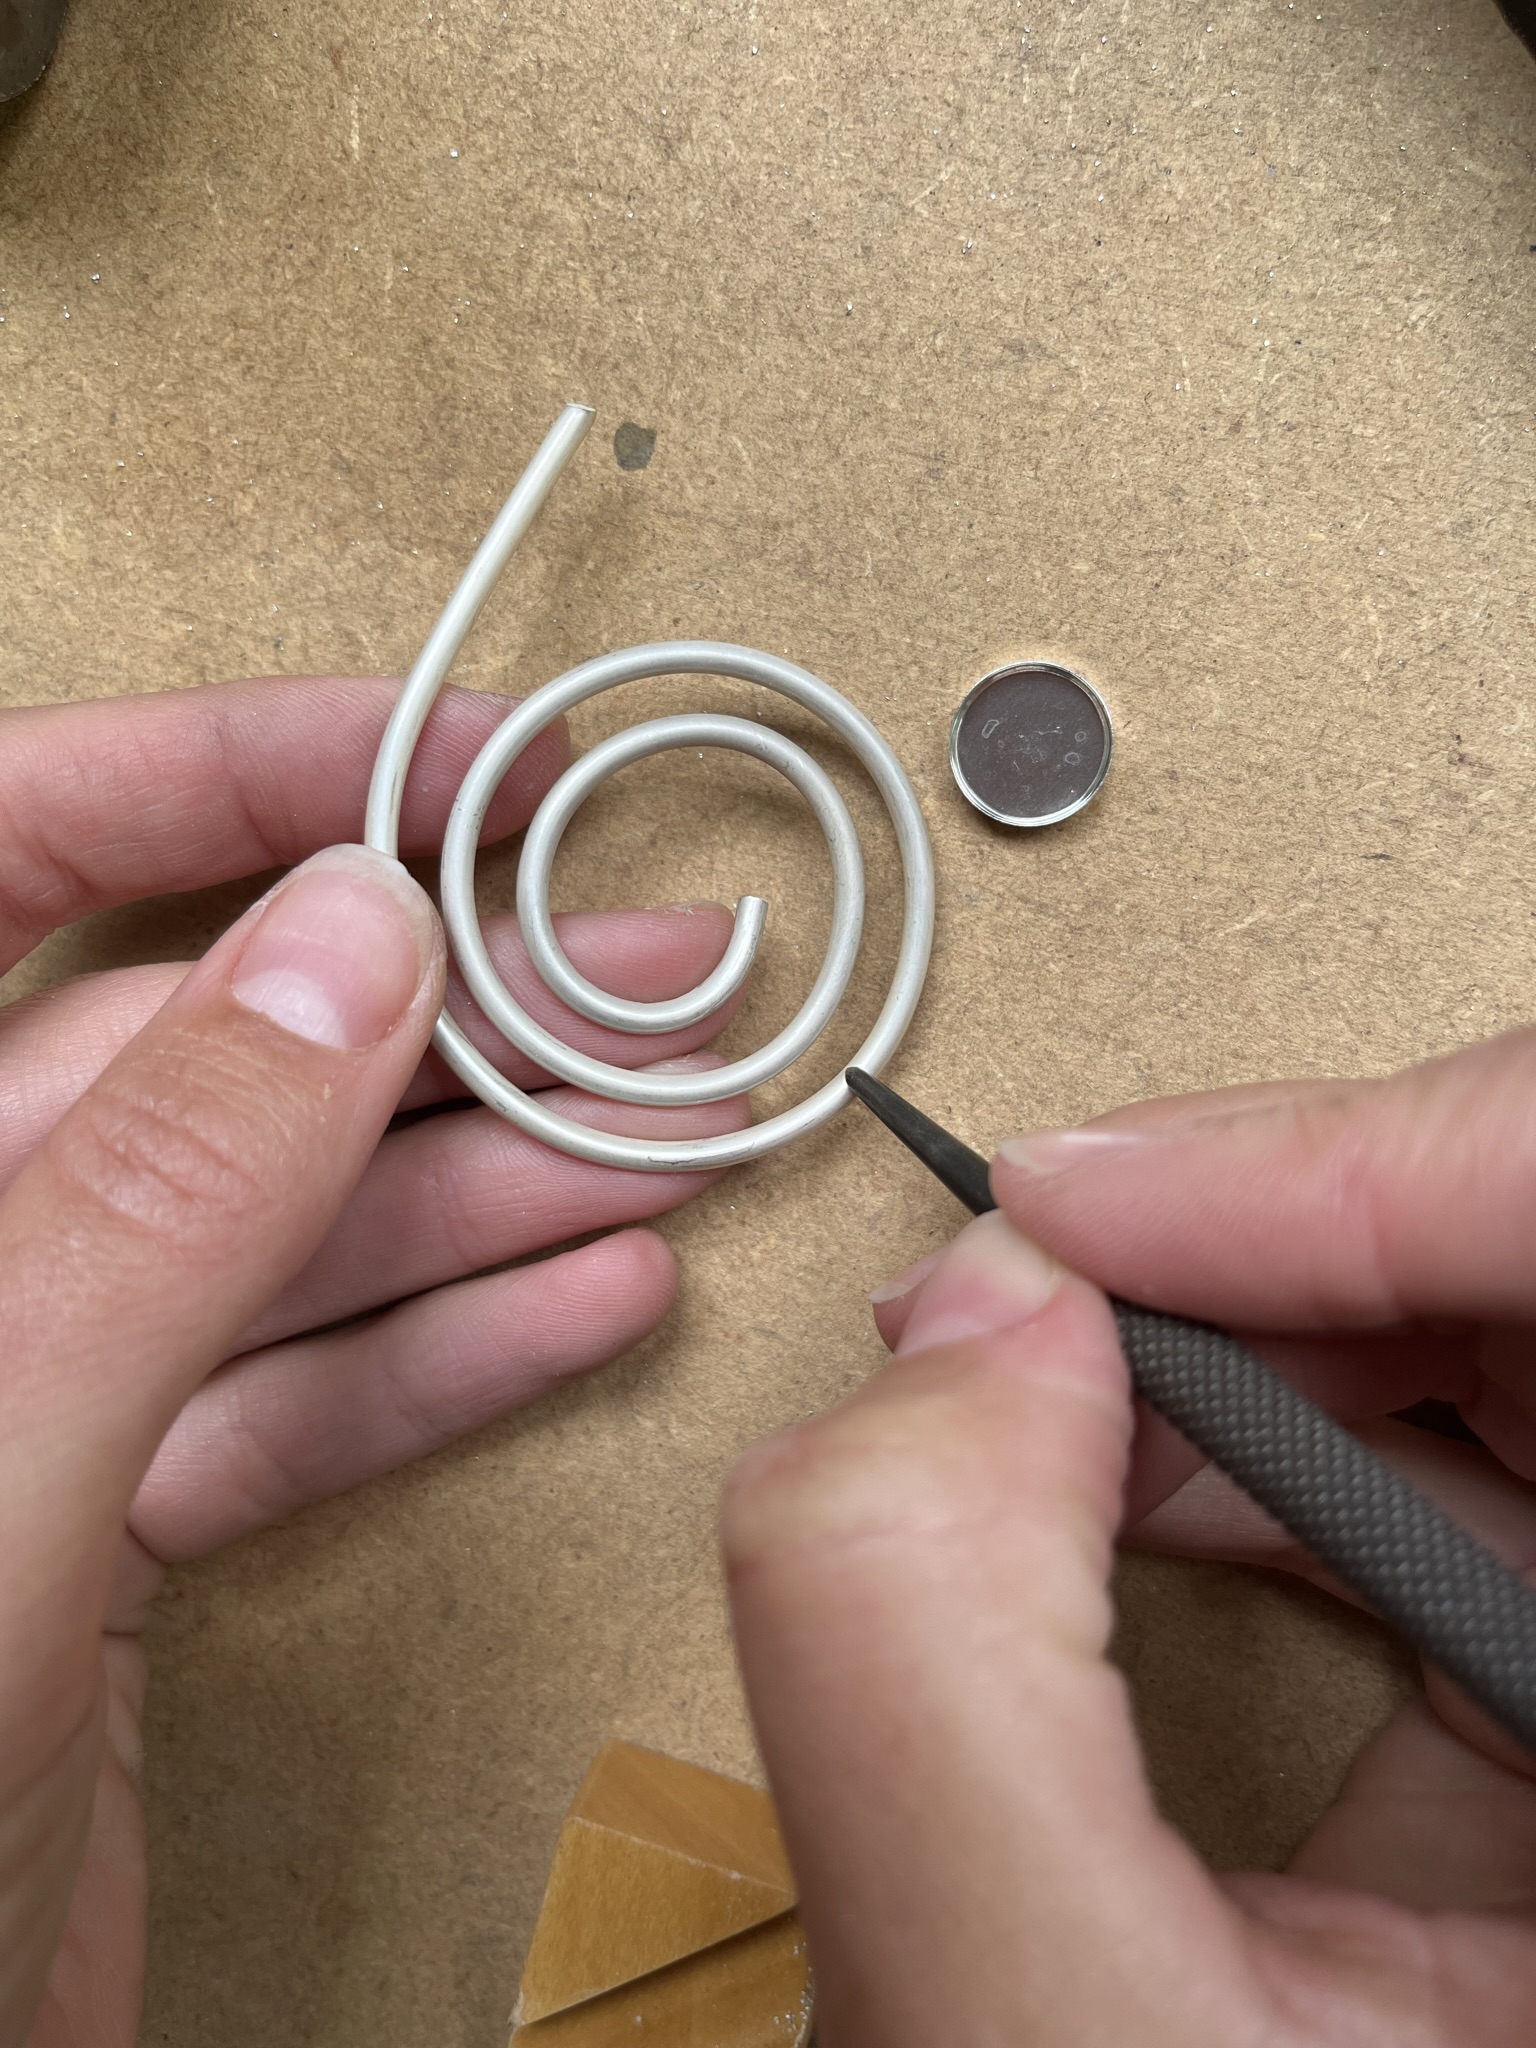
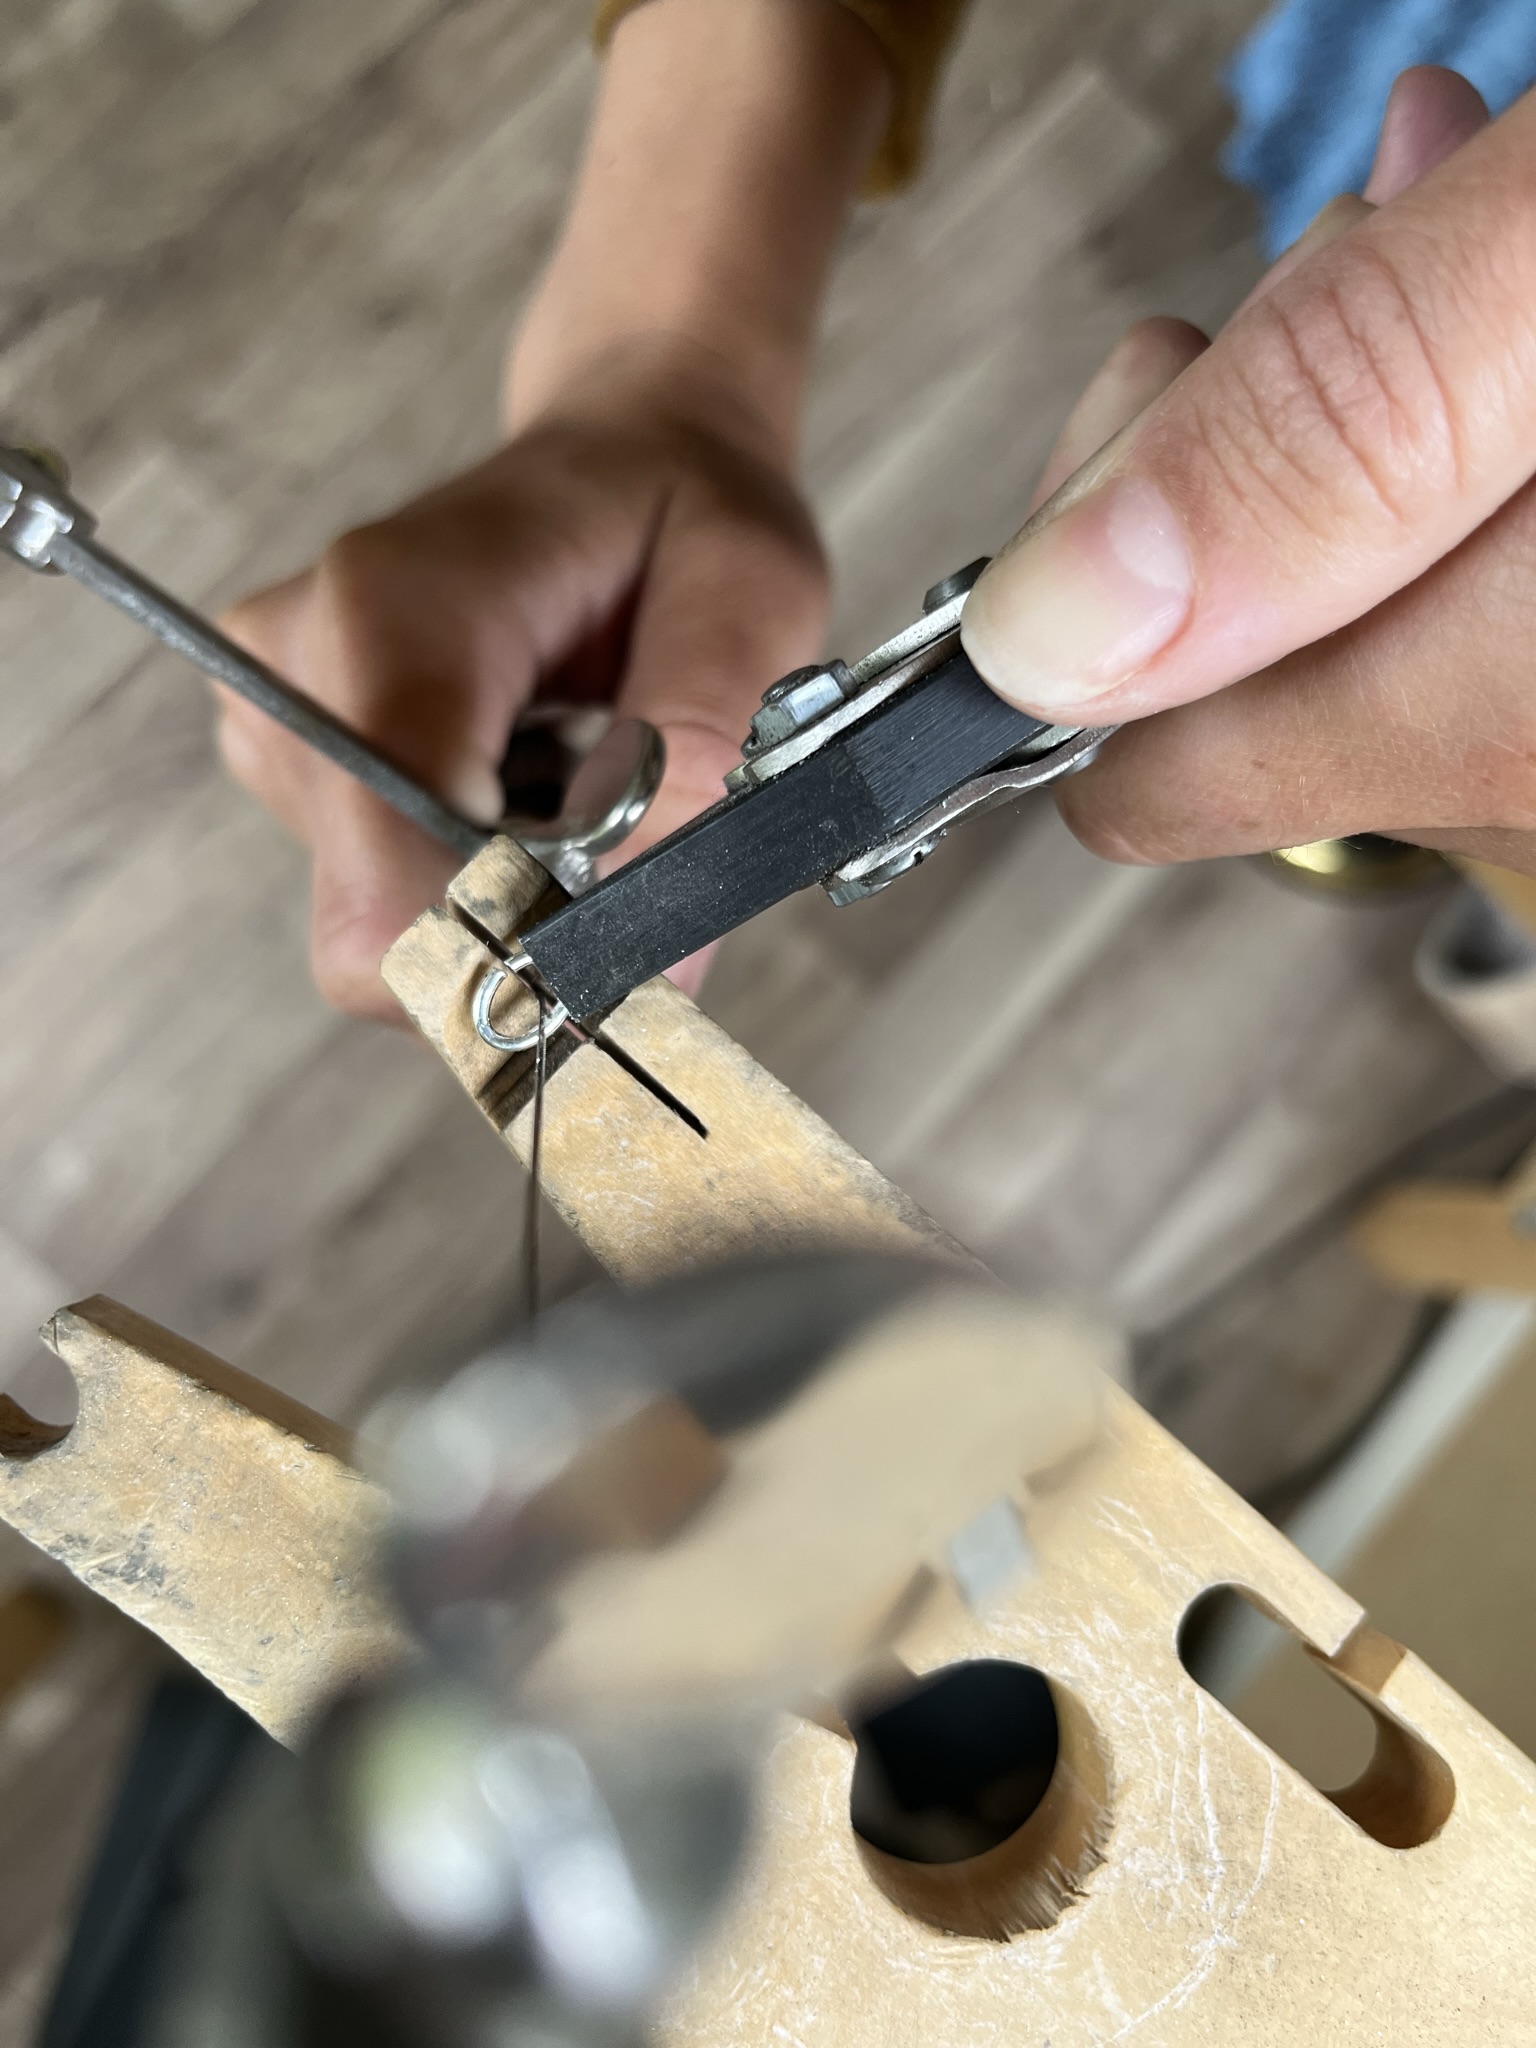
Step 7
Position the spiral on your bench peg and use your piercing saw to cut off the excess wire.
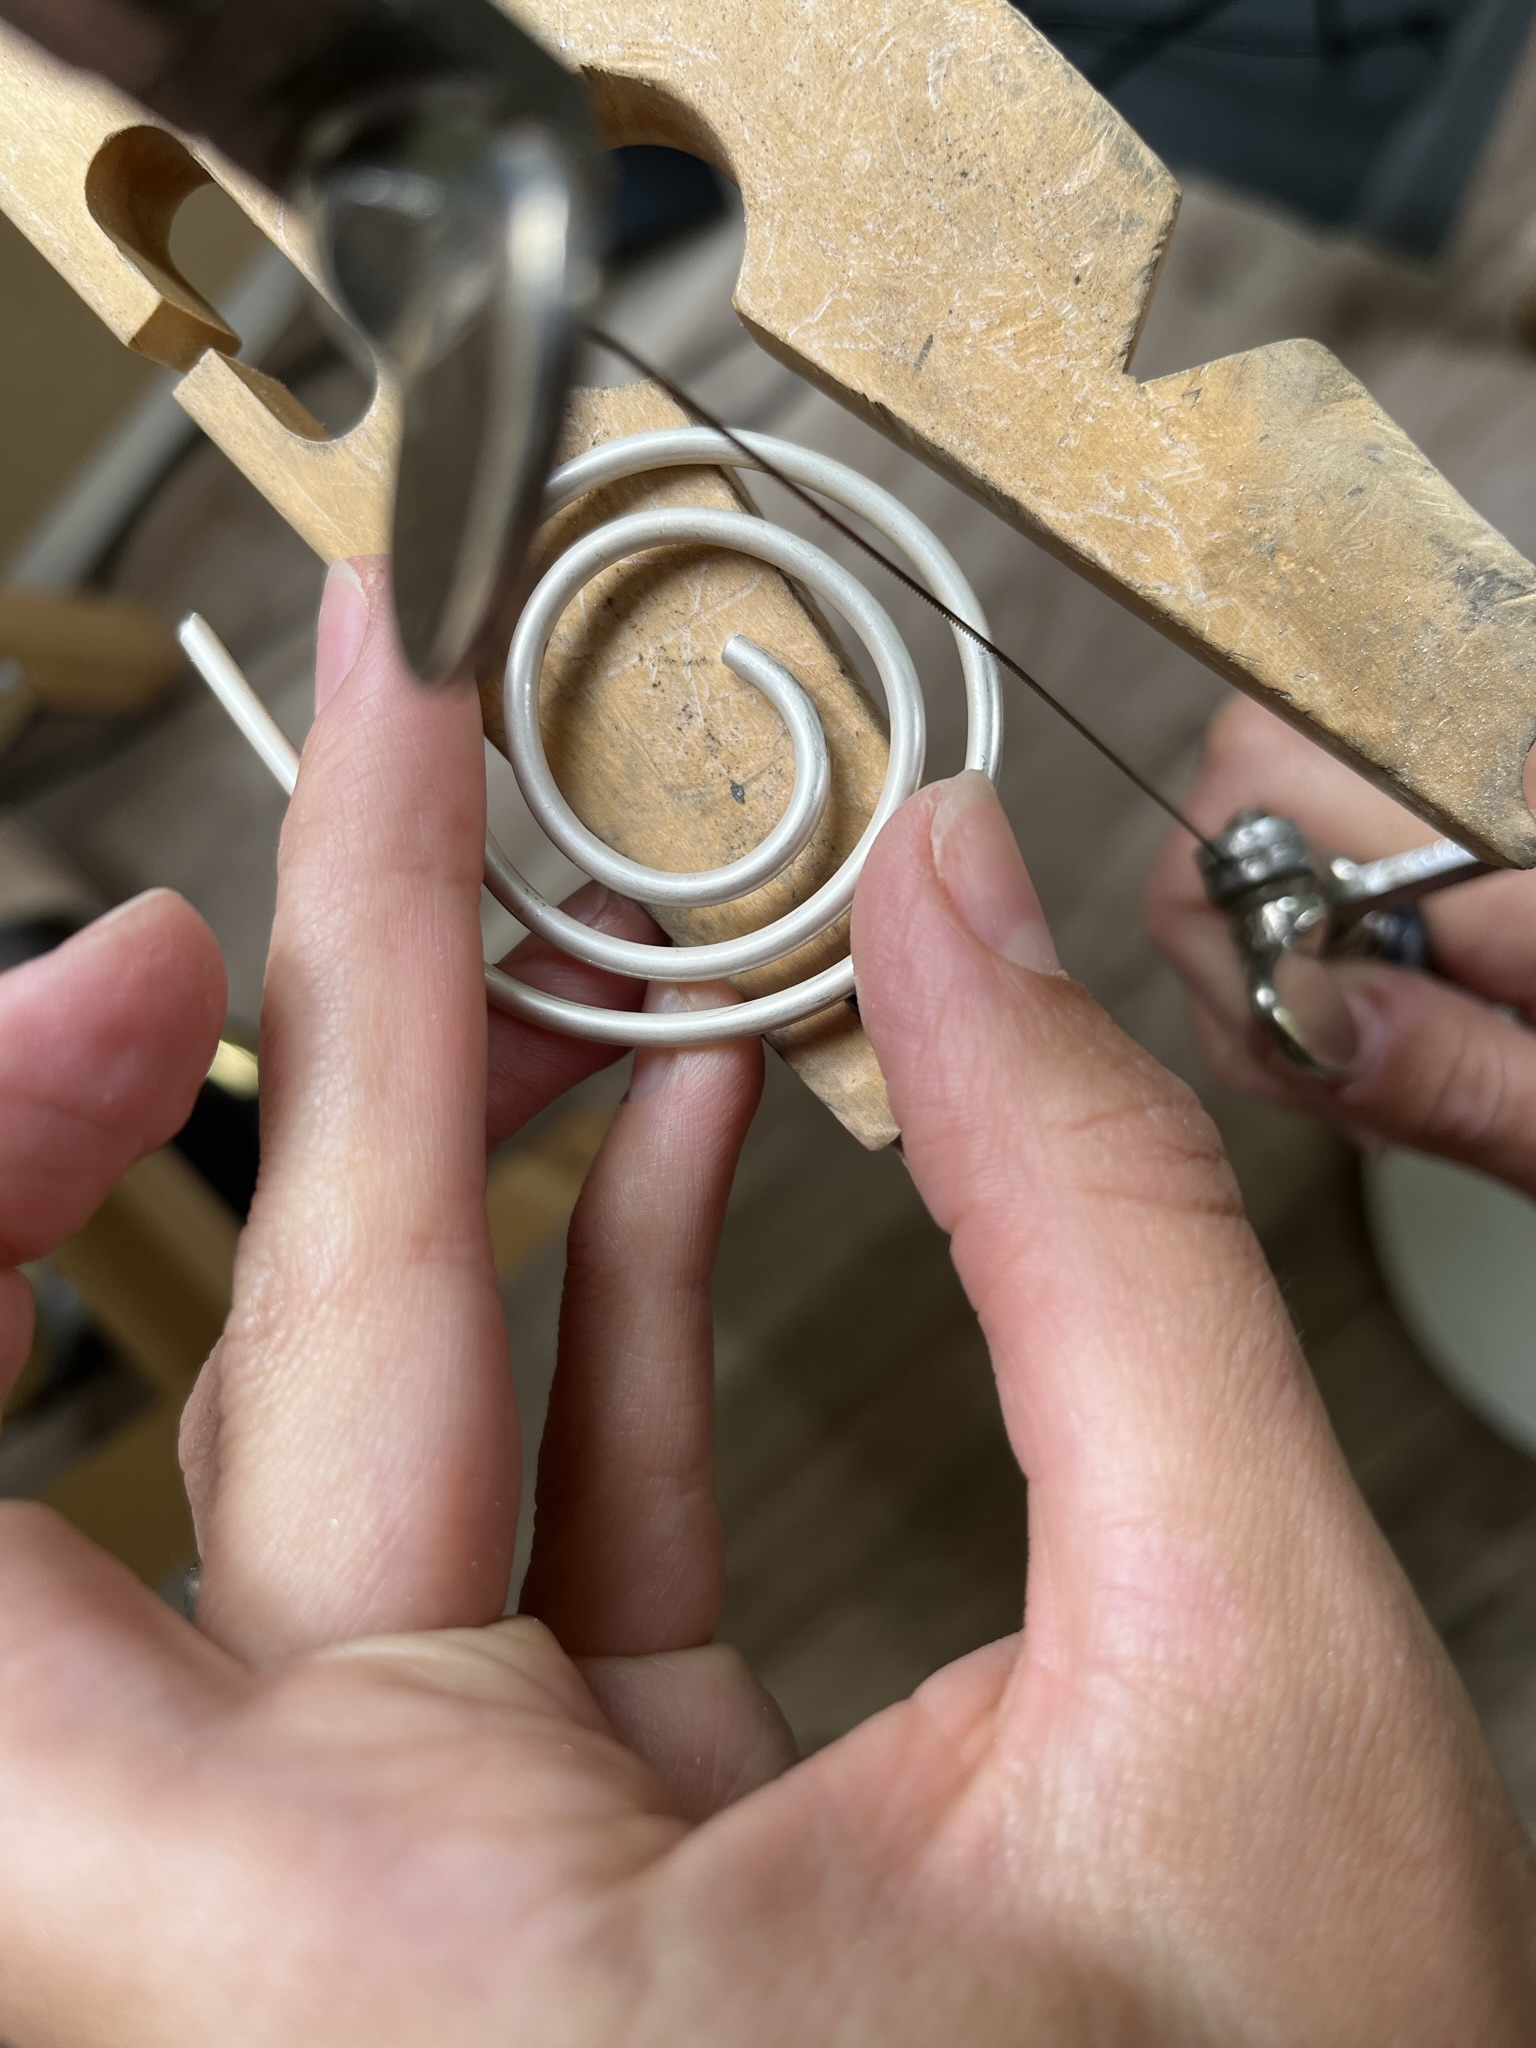
Step 8
Use your needle files and emery board/stick or paper to smooth the end of the wire.
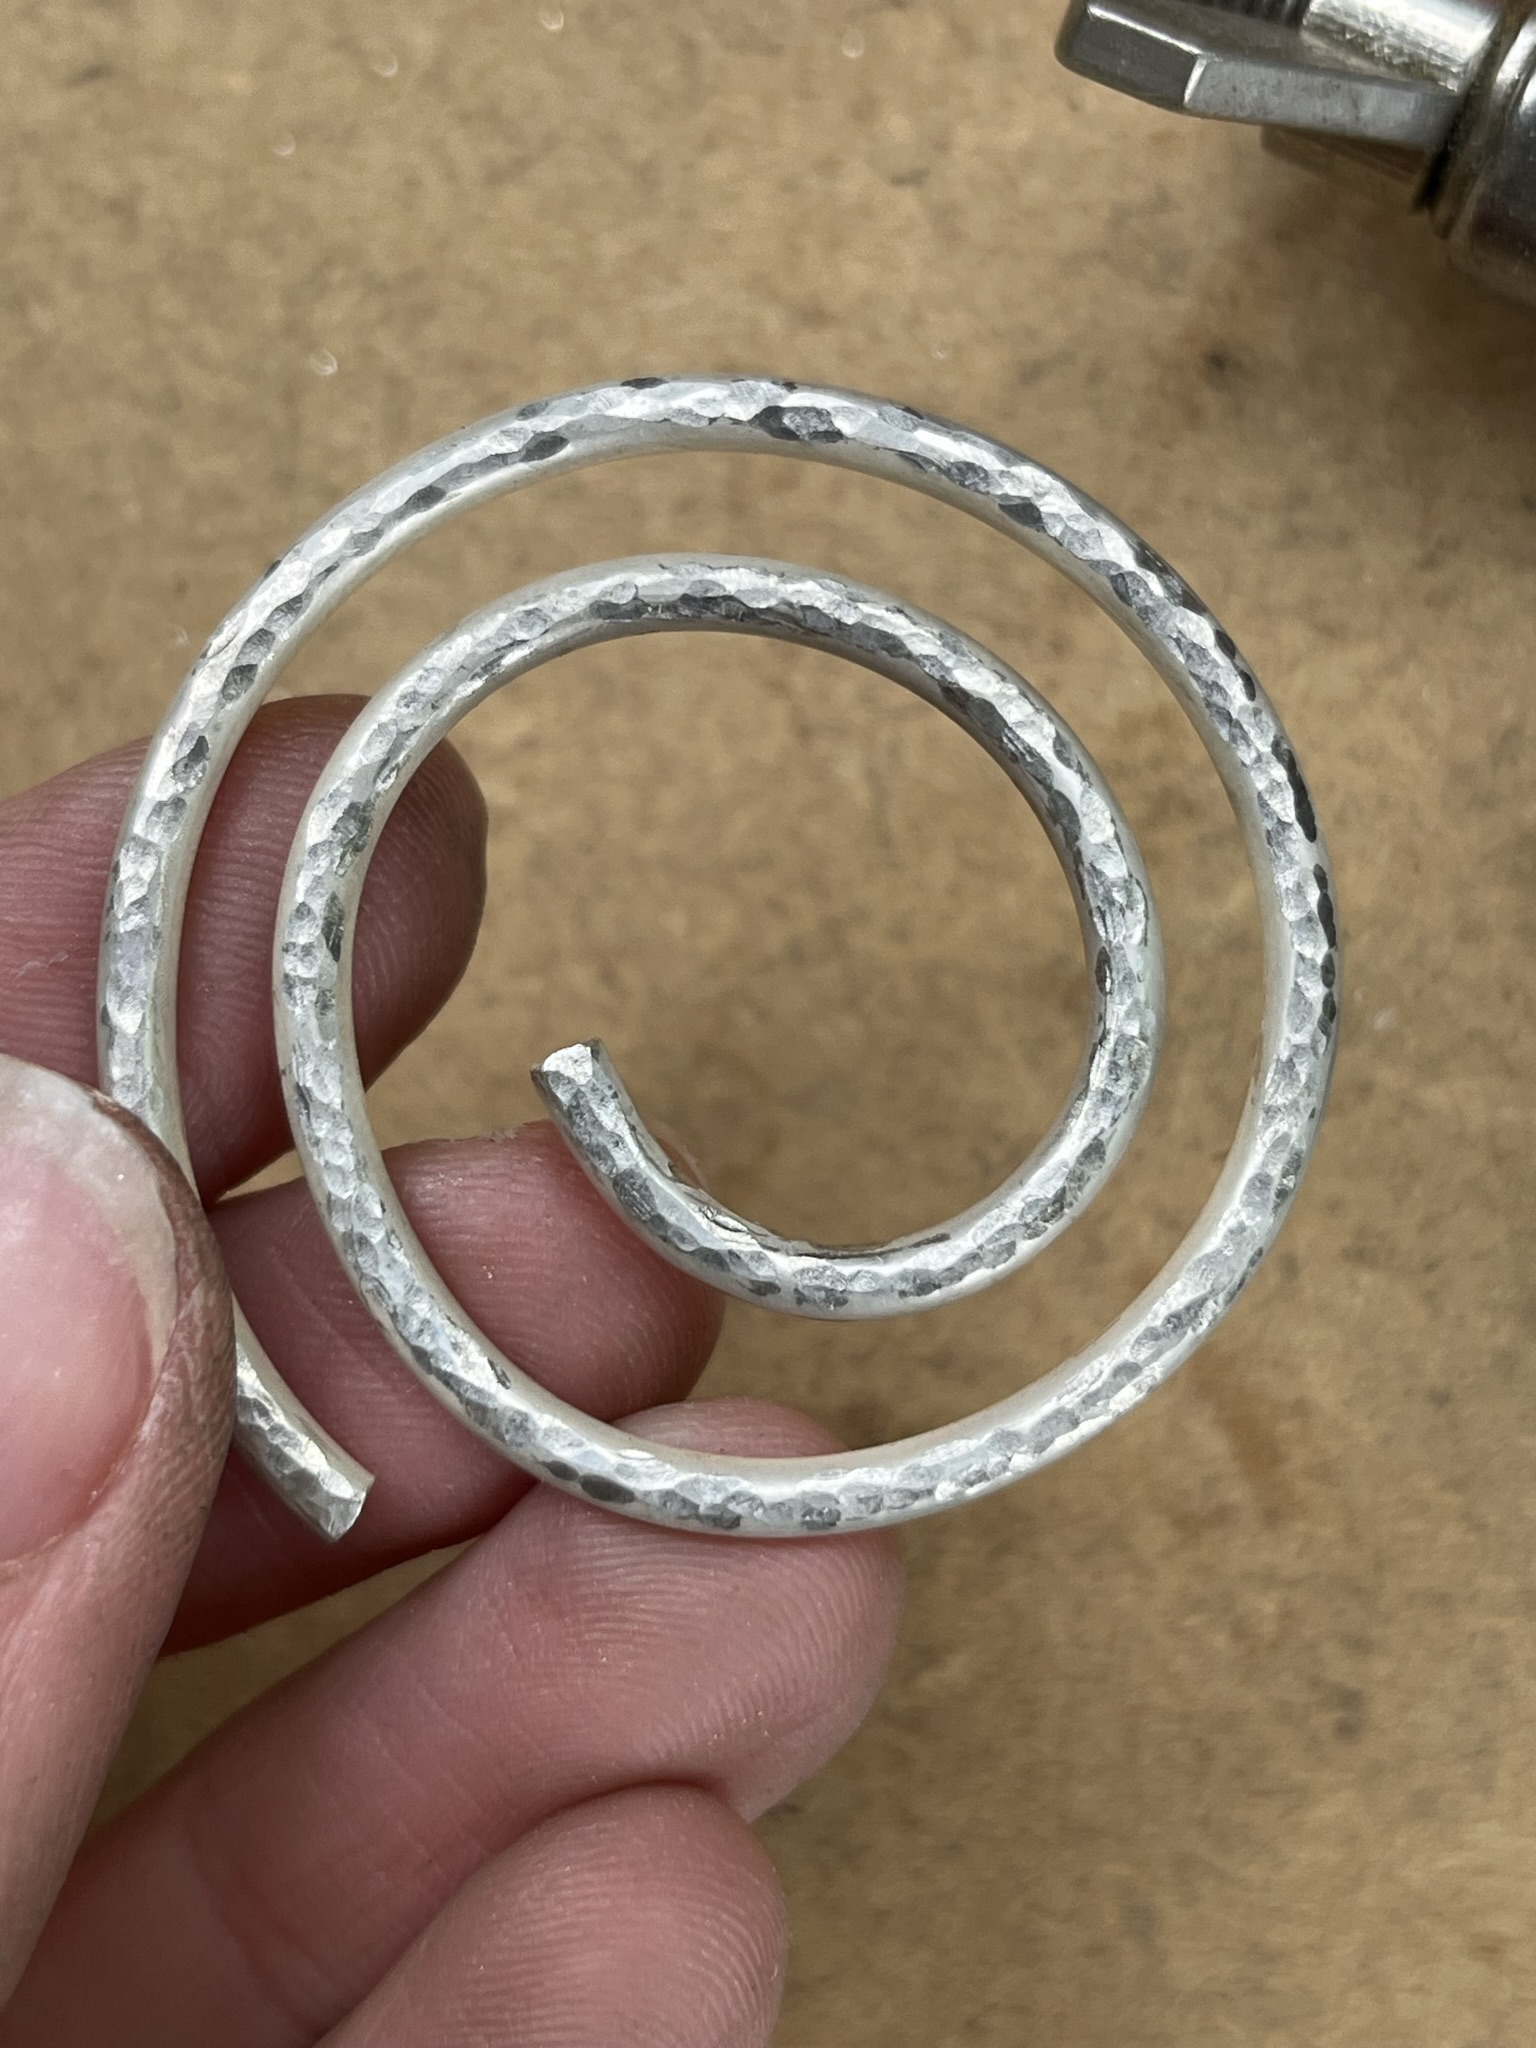
Step 9
Place the spiral on a steel block and use a ball pein or craft hammer to hit the spiral all over until the spiral is completely textured.
Step 10
You can add as much or little texture as you like, by varying how hard and how many times you hit the spiral with your hammer.
Step 11
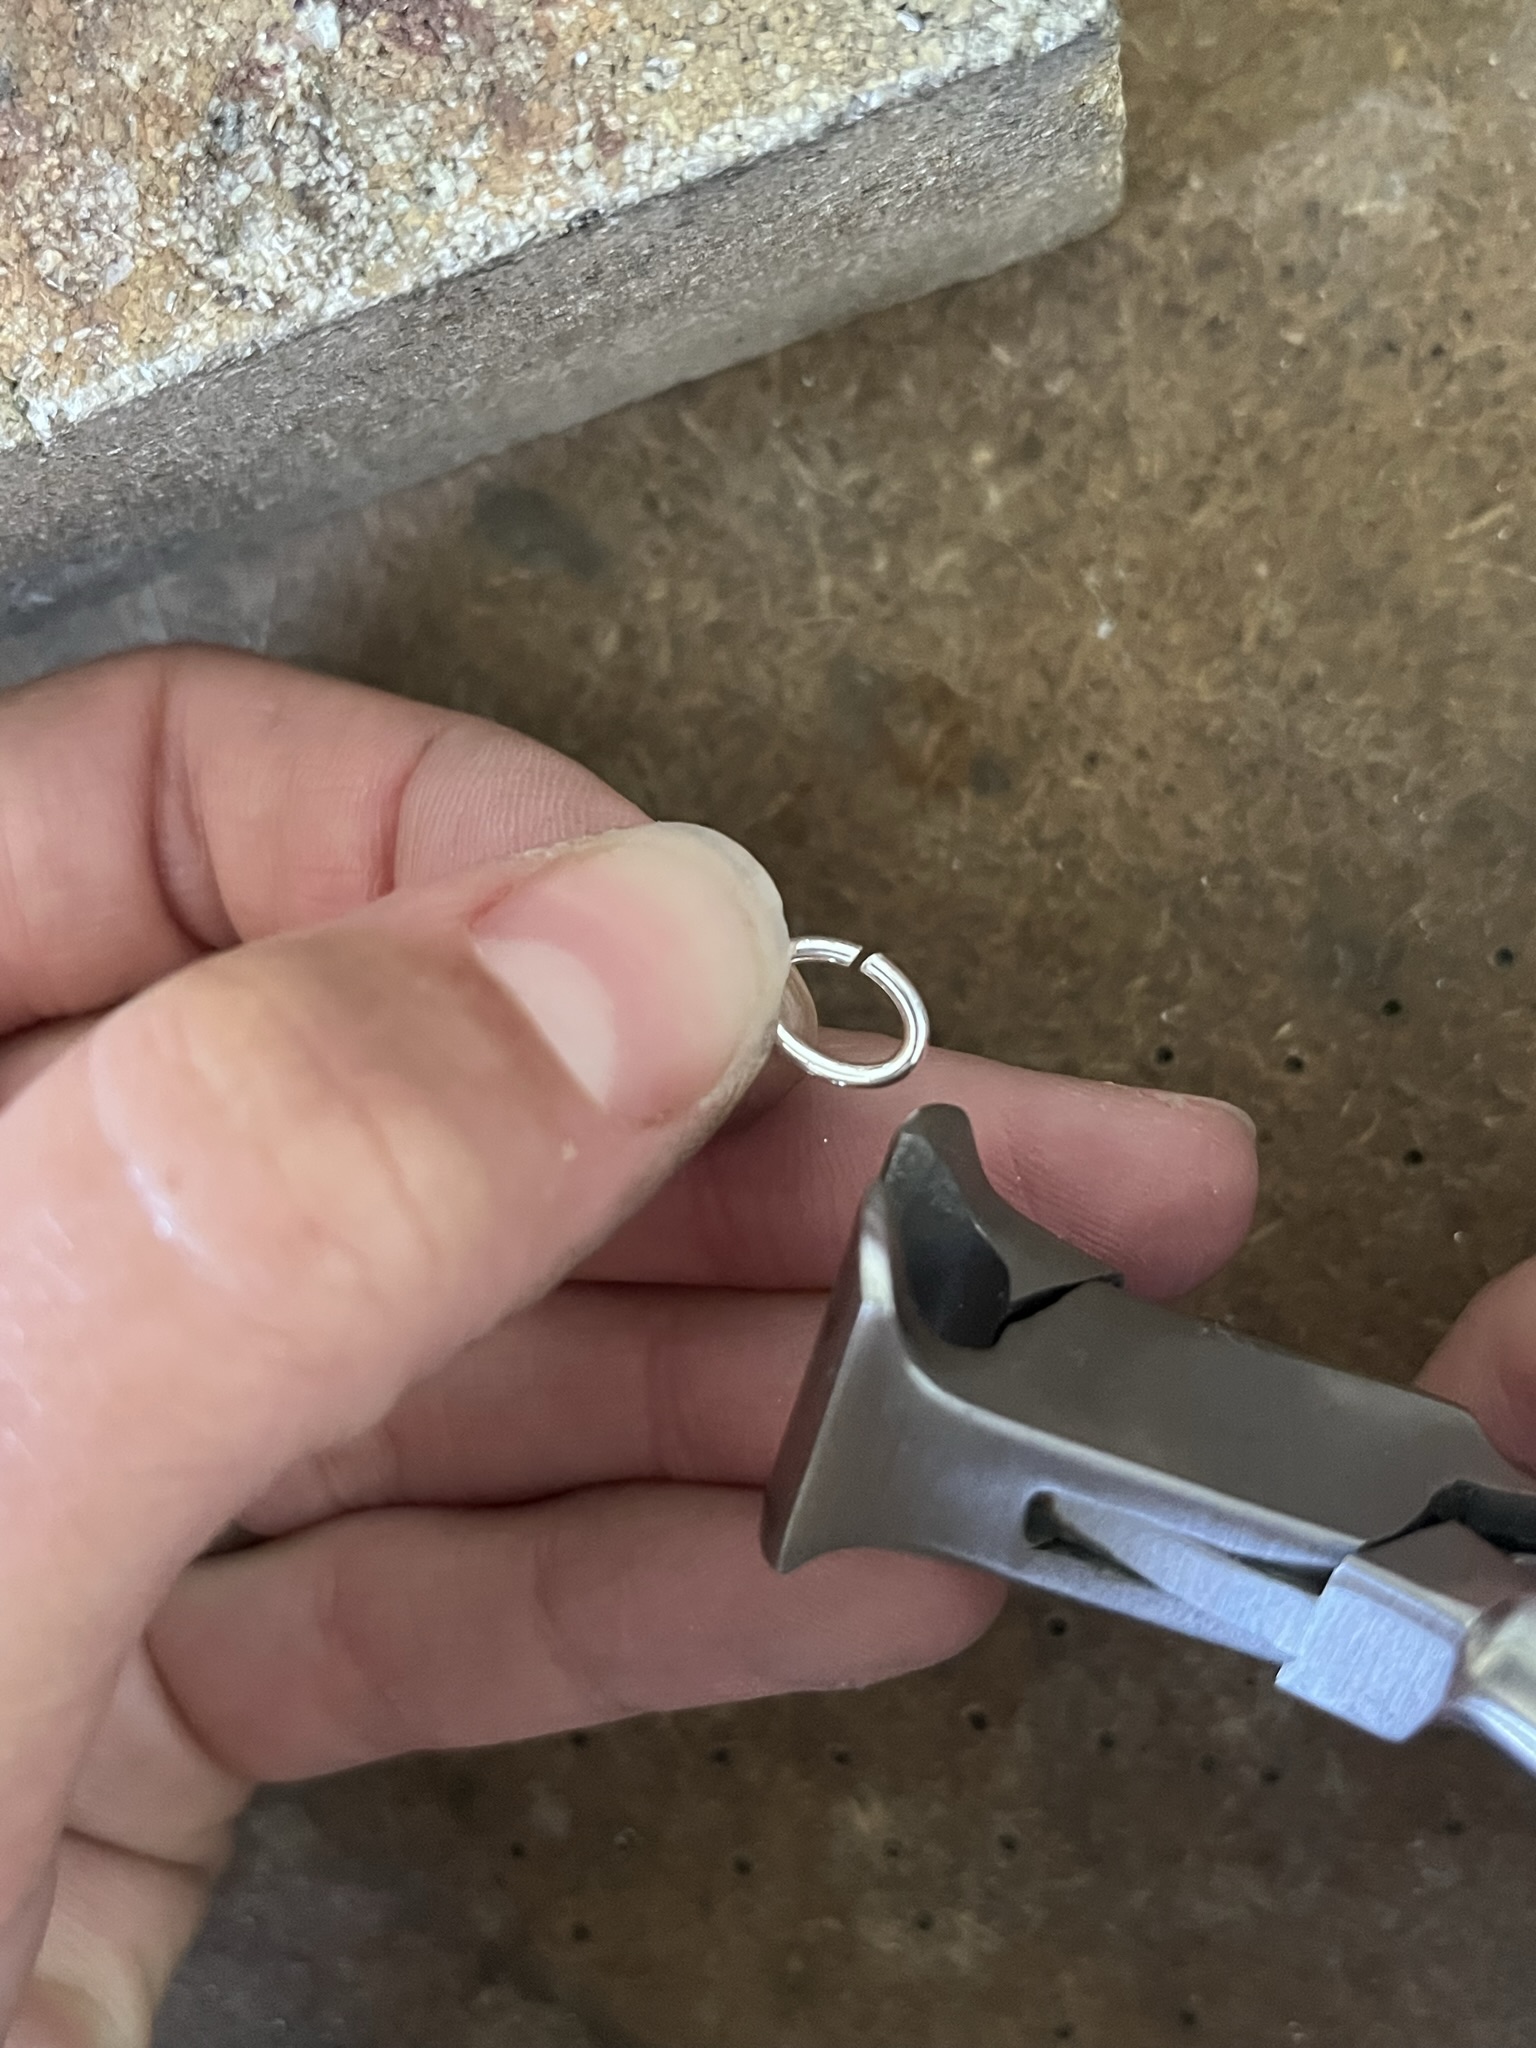
Take 1 silver oval jump ring and cut it in half.
You could cut it using your piercing saw. Use pliers to grip the jump ring, and rest the pliers against your bench peg. Use your saw to cut through the jump ring.
Step 12
Or, you can cut your jump ring in half using wire/side cutters.
You may need to file the ends of the wire if you choose to cut your jump ring as the pliers will more than likely ‘squish’ the ends.
Step 13
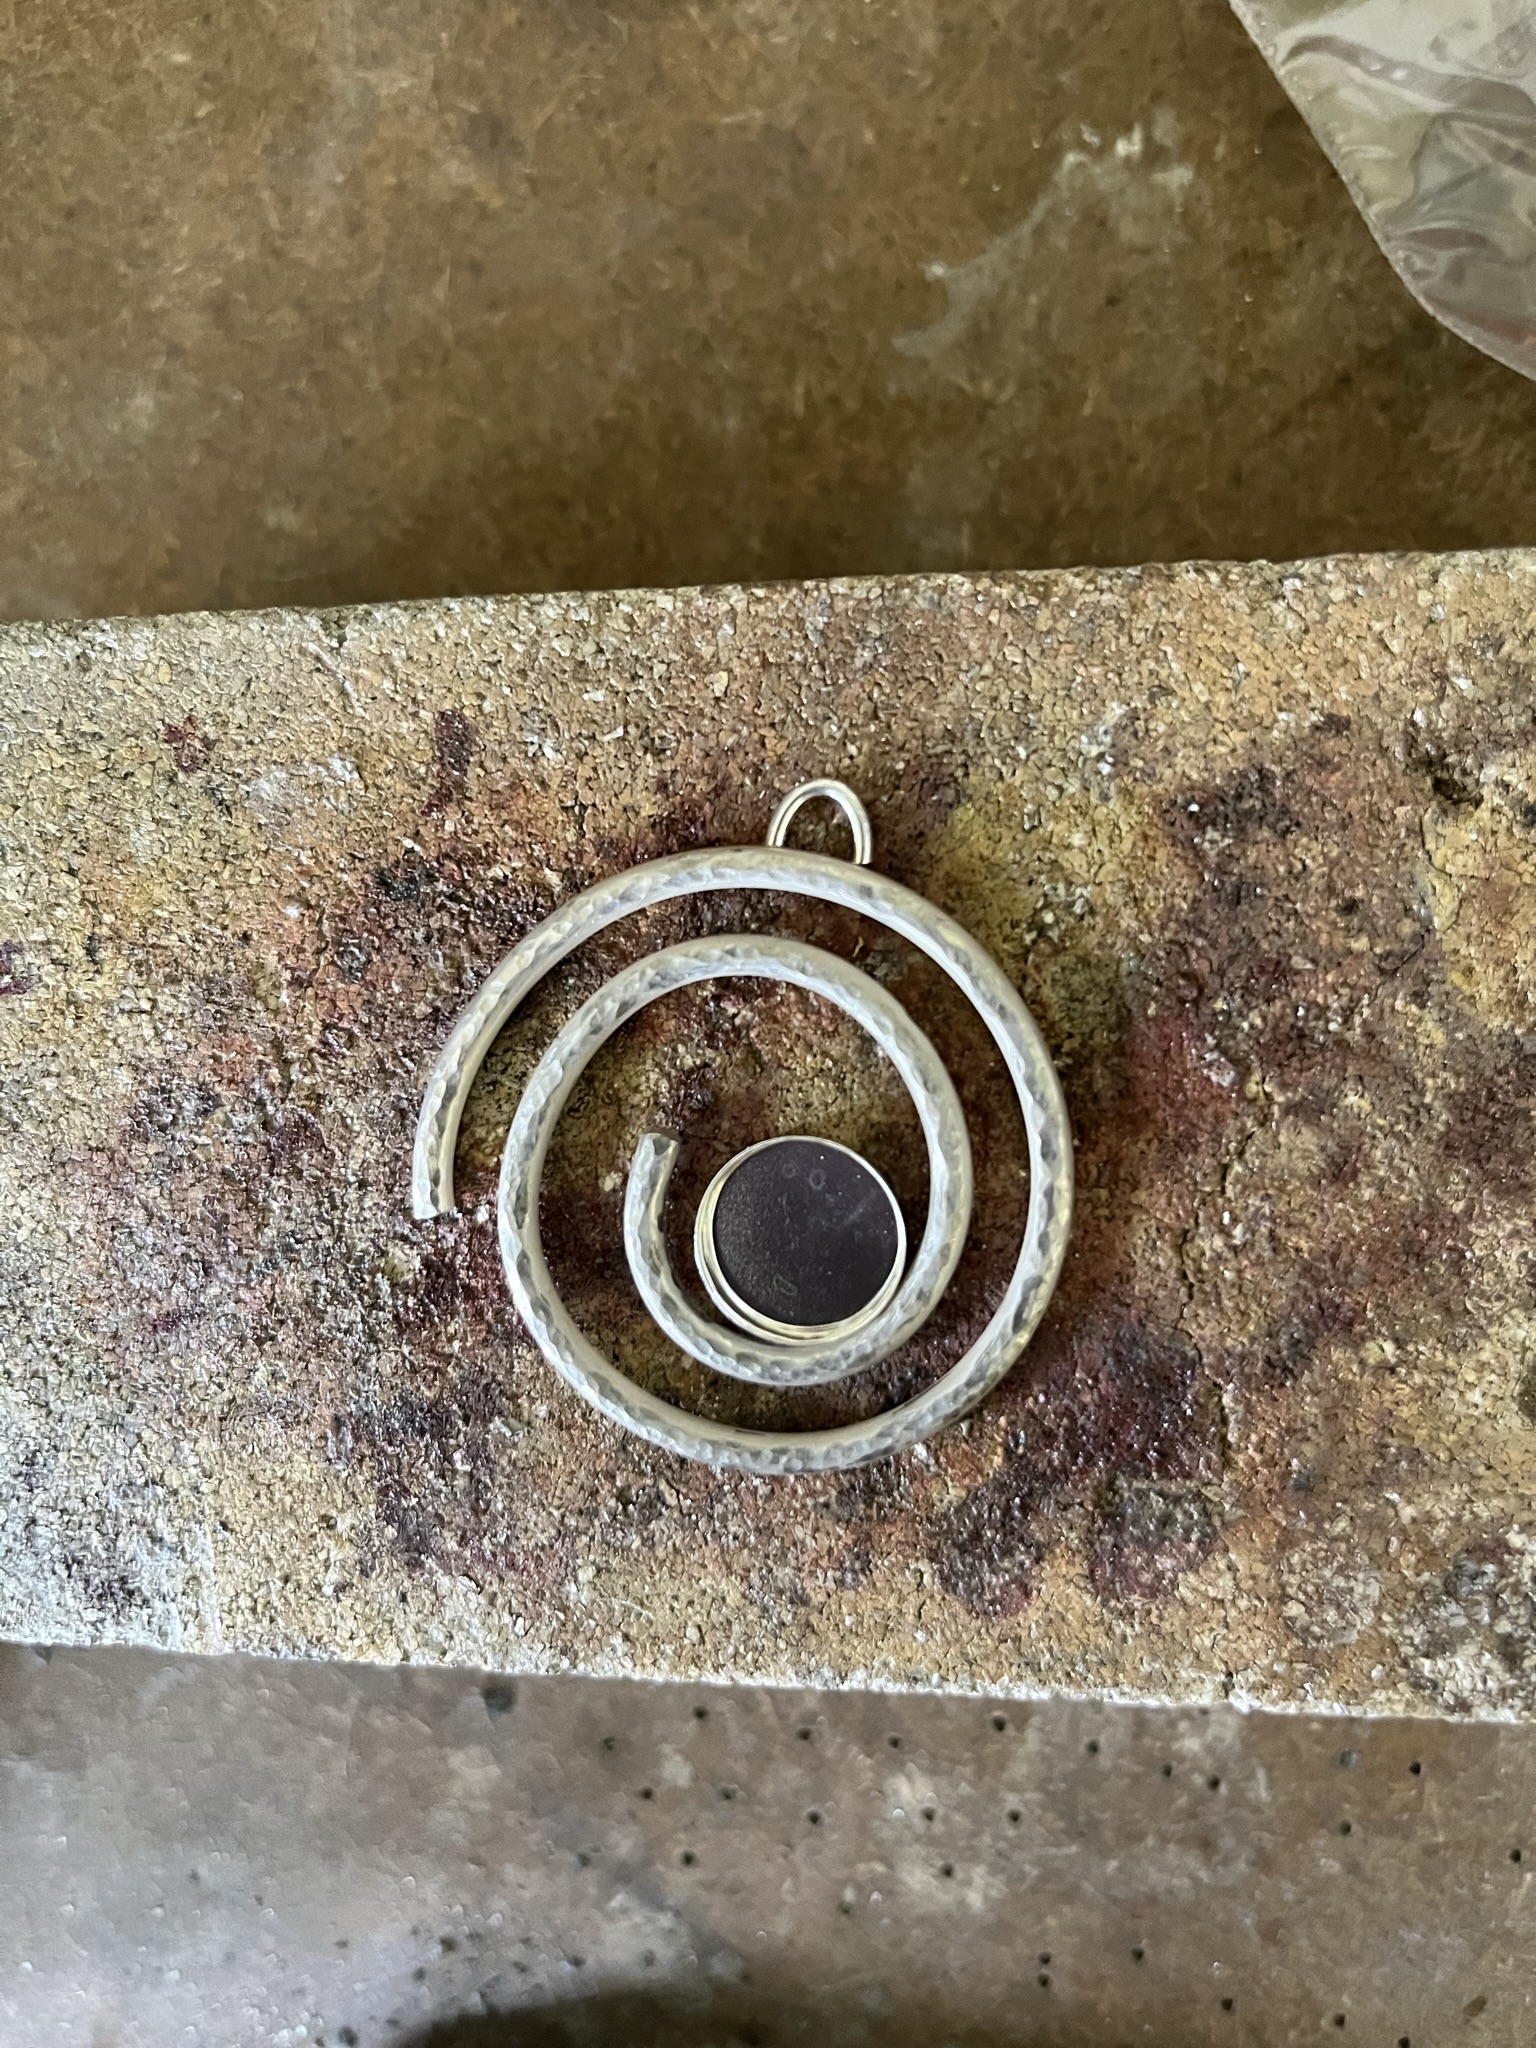
Place the silver spiral on a heatproof block and place the bezel cup so it is touching the curve of the spiral.
Place the ½ jump ring at the top of the spiral so both ends of the jump ring are touching the spiral.
It’s important that the sides of the bezel cup are raised over the spiral so they can be pushed over the stone when it comes to setting.
You could raise the bezel cup if needed by placing a jump ring or binding wire underneath the cup.
Ensure it does not come into contact with any solder however as you do not want to end up soldering it to your pendant.
Step 14
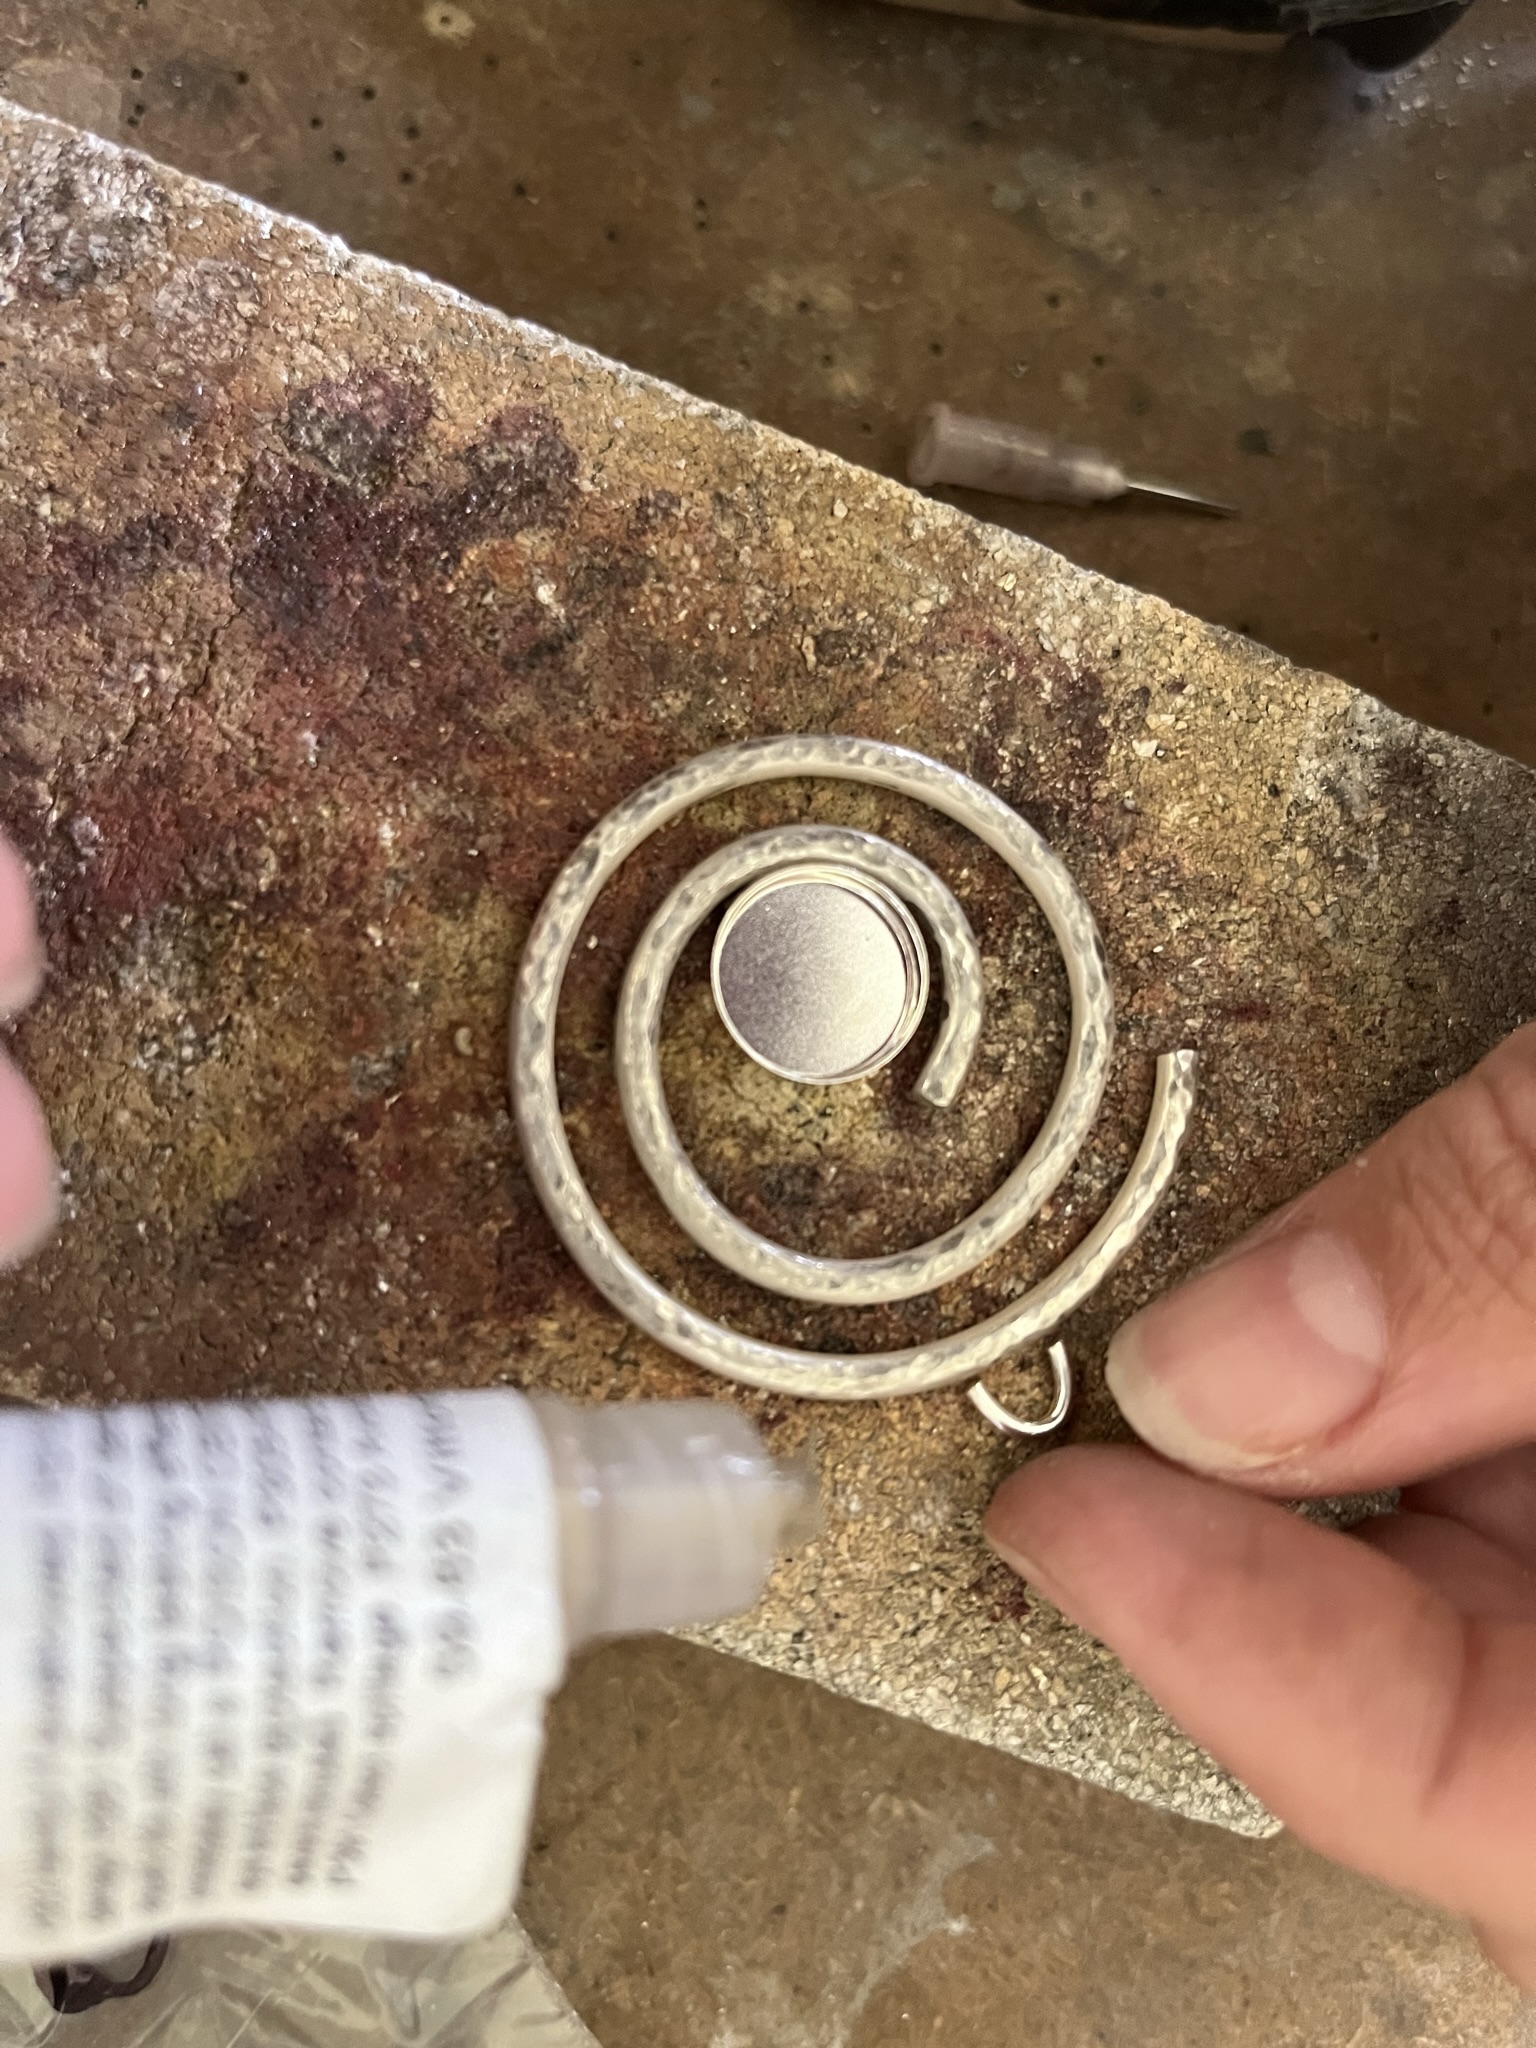
Add a little solder paste to both ends of the jump ring and ensure they are touching the spiral.
Also add solder paste to where the bezel cup touches the spiral.
Step 15
Heat the silver spiral with a blow torch until the solder melts and flows.
Leave the pendant to cool a little before quenching (cooling) in water using tweezers, then adding to a warm pickle solution.
Leave the spiral in the pickle solution for 5 minutes or until clean. Remove from the solution using plastic or brass tweezers.
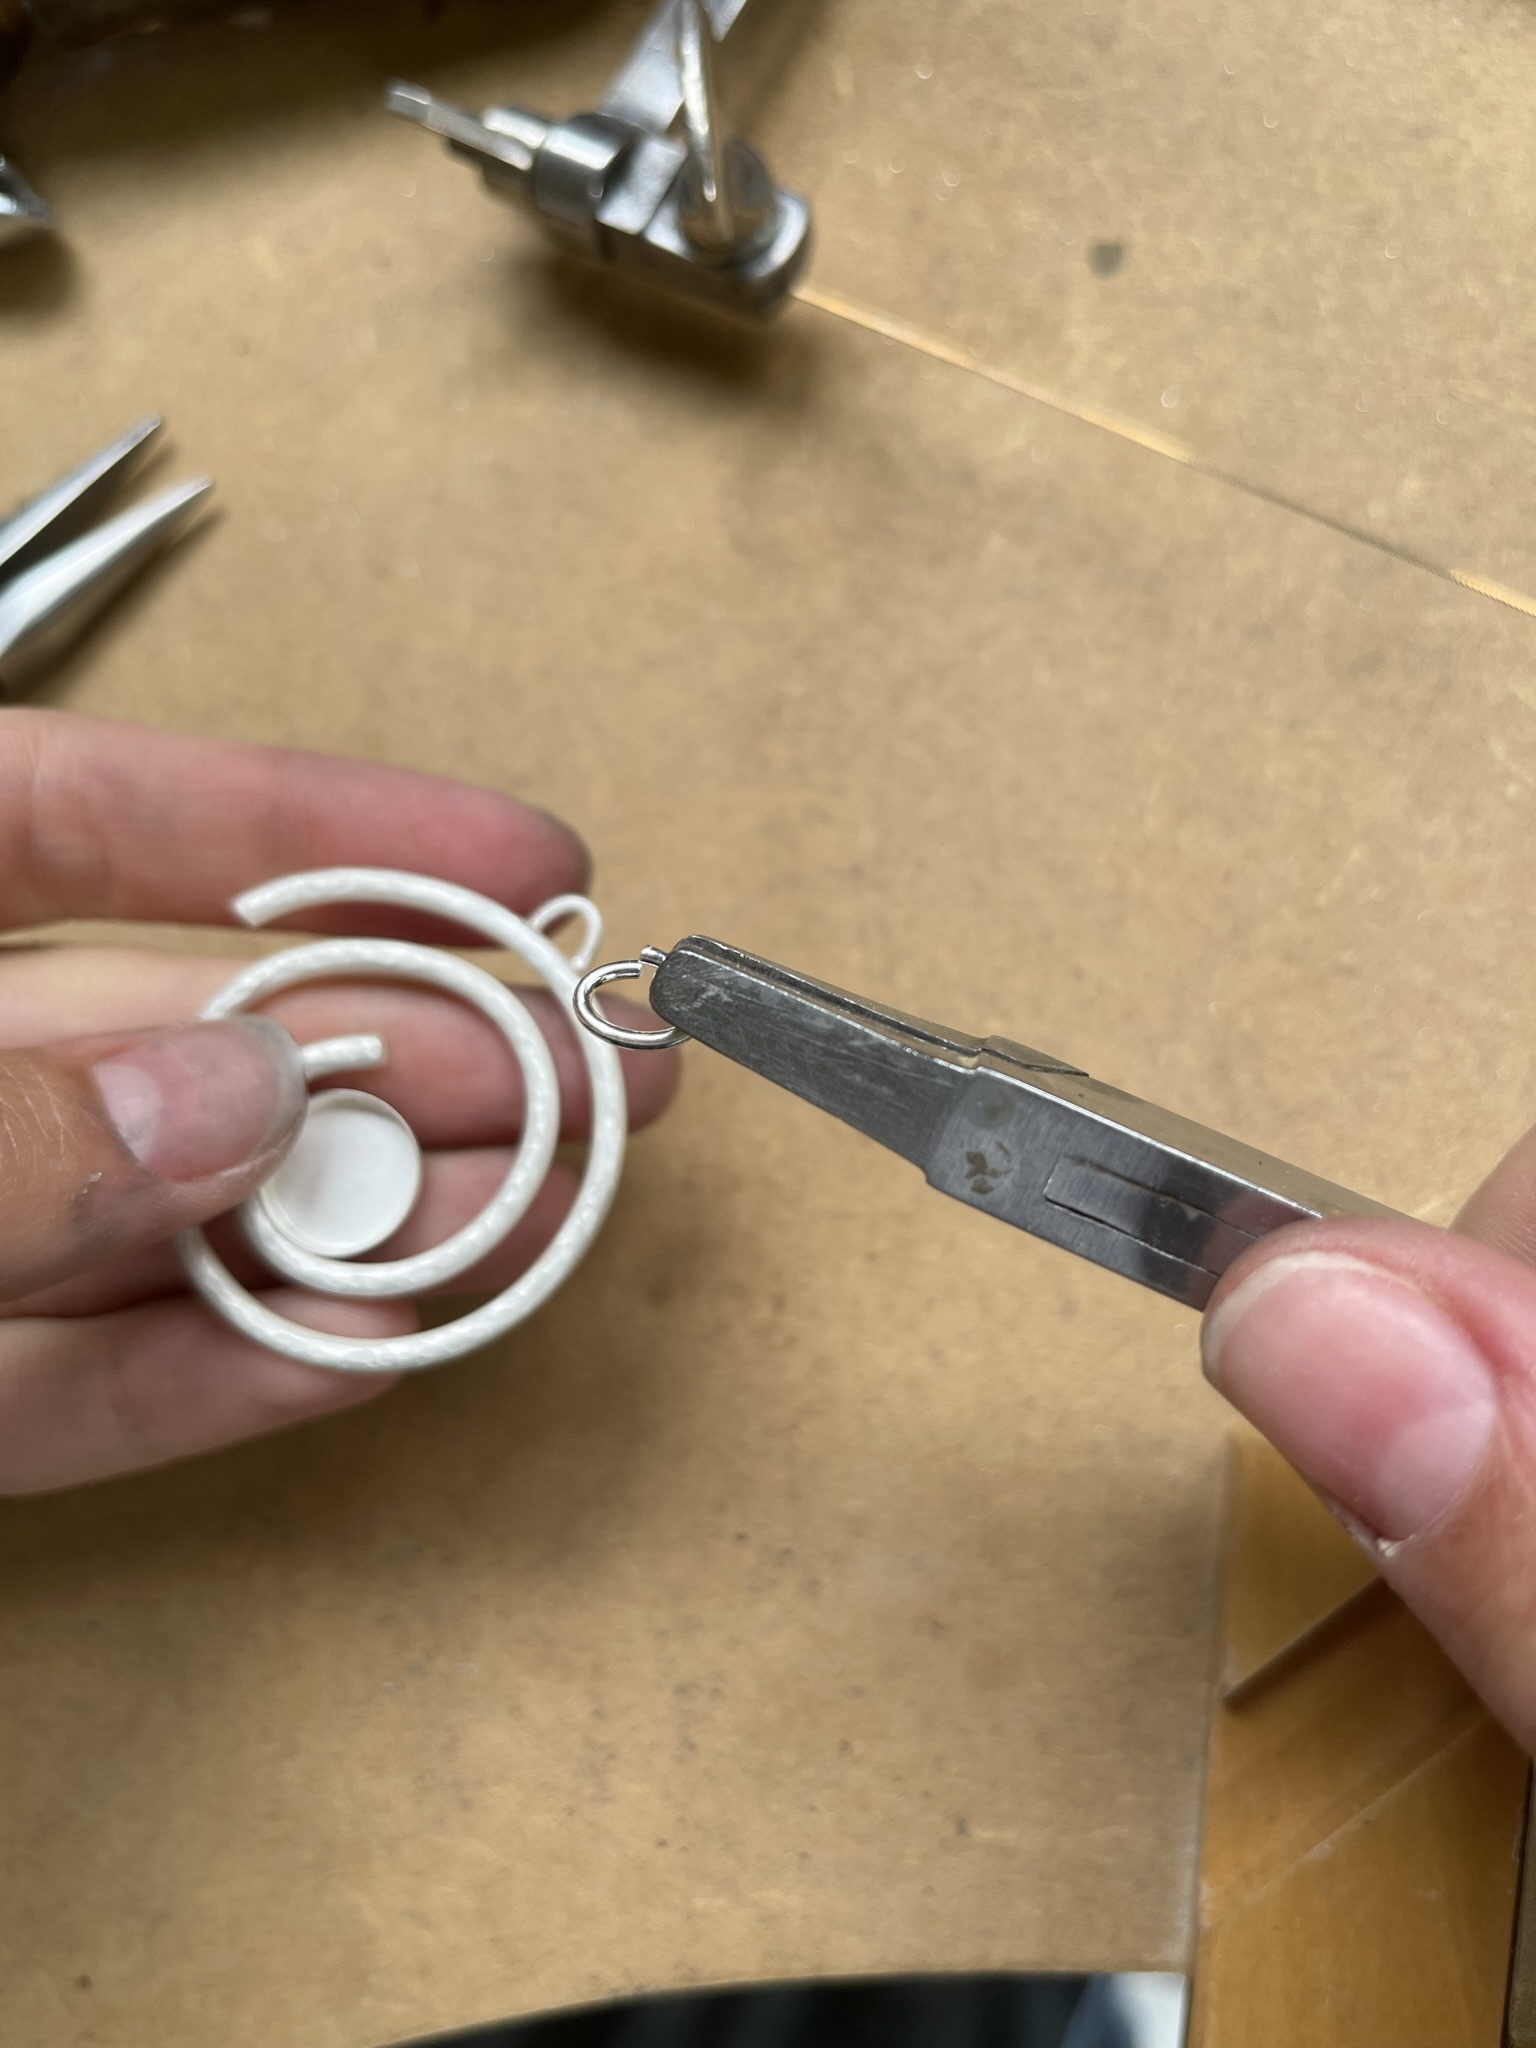
Step 16
Open an oval jump ring by gripping it with a pair of snipe nose, flat or chain nose pliers on one side and a pair of snipe nose, flat or chain nose pliers on the other side. Twist one pair of pliers forwards to open.
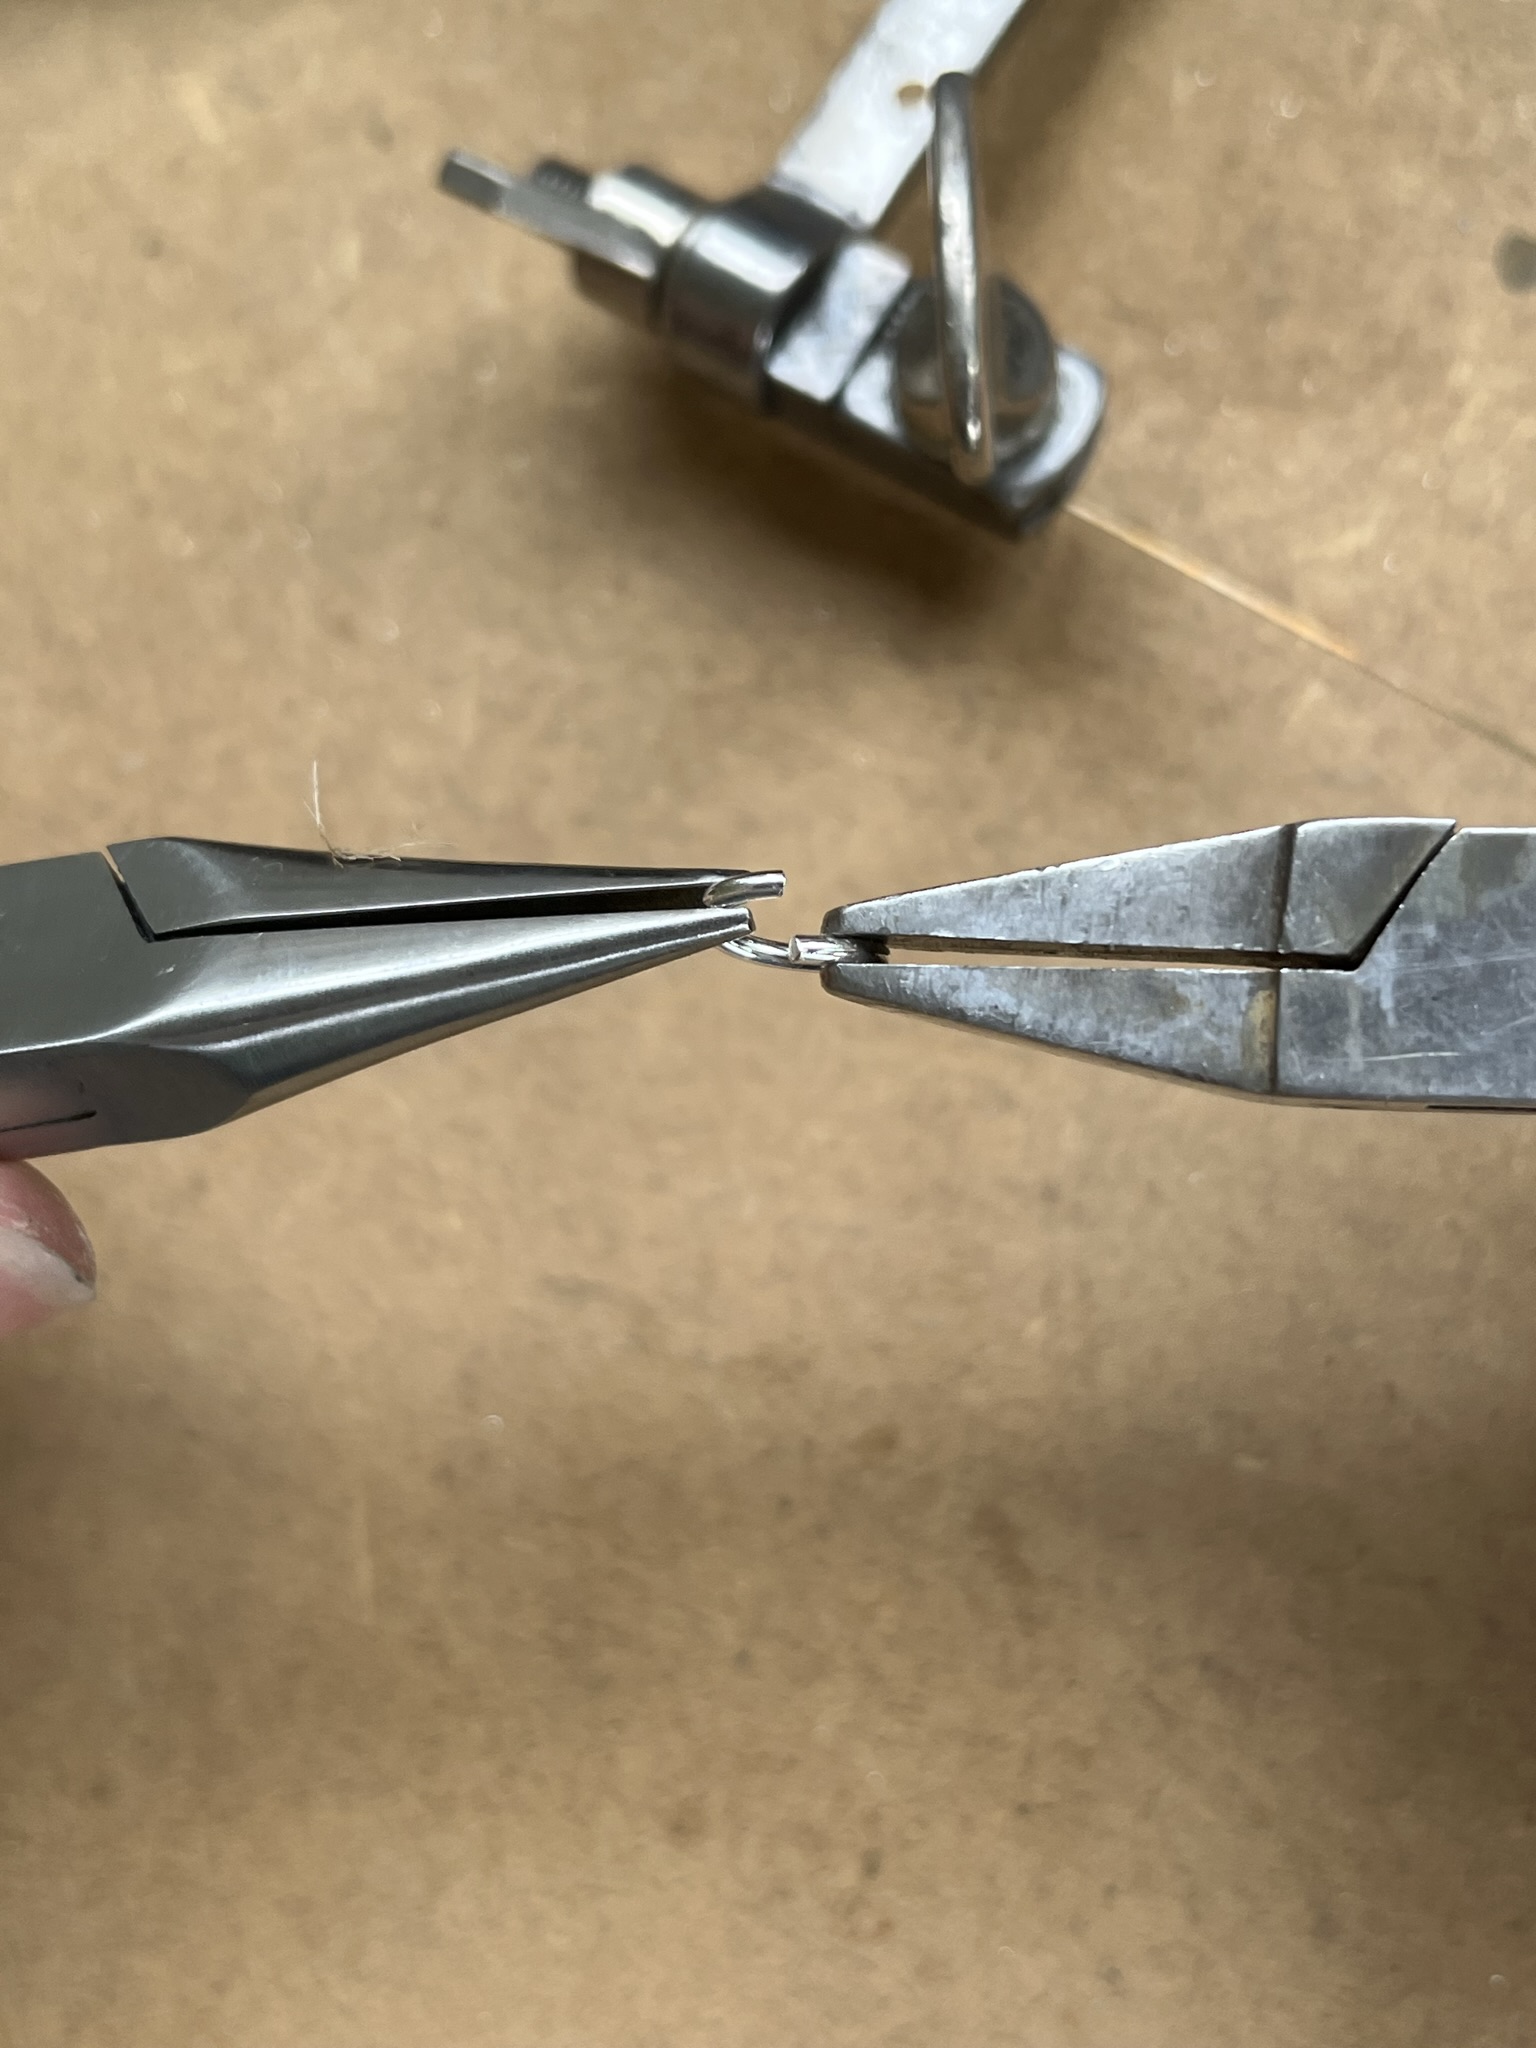
Step 17
Thread the open jump ring through the ½ jump ring on the spiral pendant.
Close the jump ring by gripping it with a pair of snipe nose, flat or chain nose pliers on both sides.
Twist one pair of pliers back to close the jump ring flush.
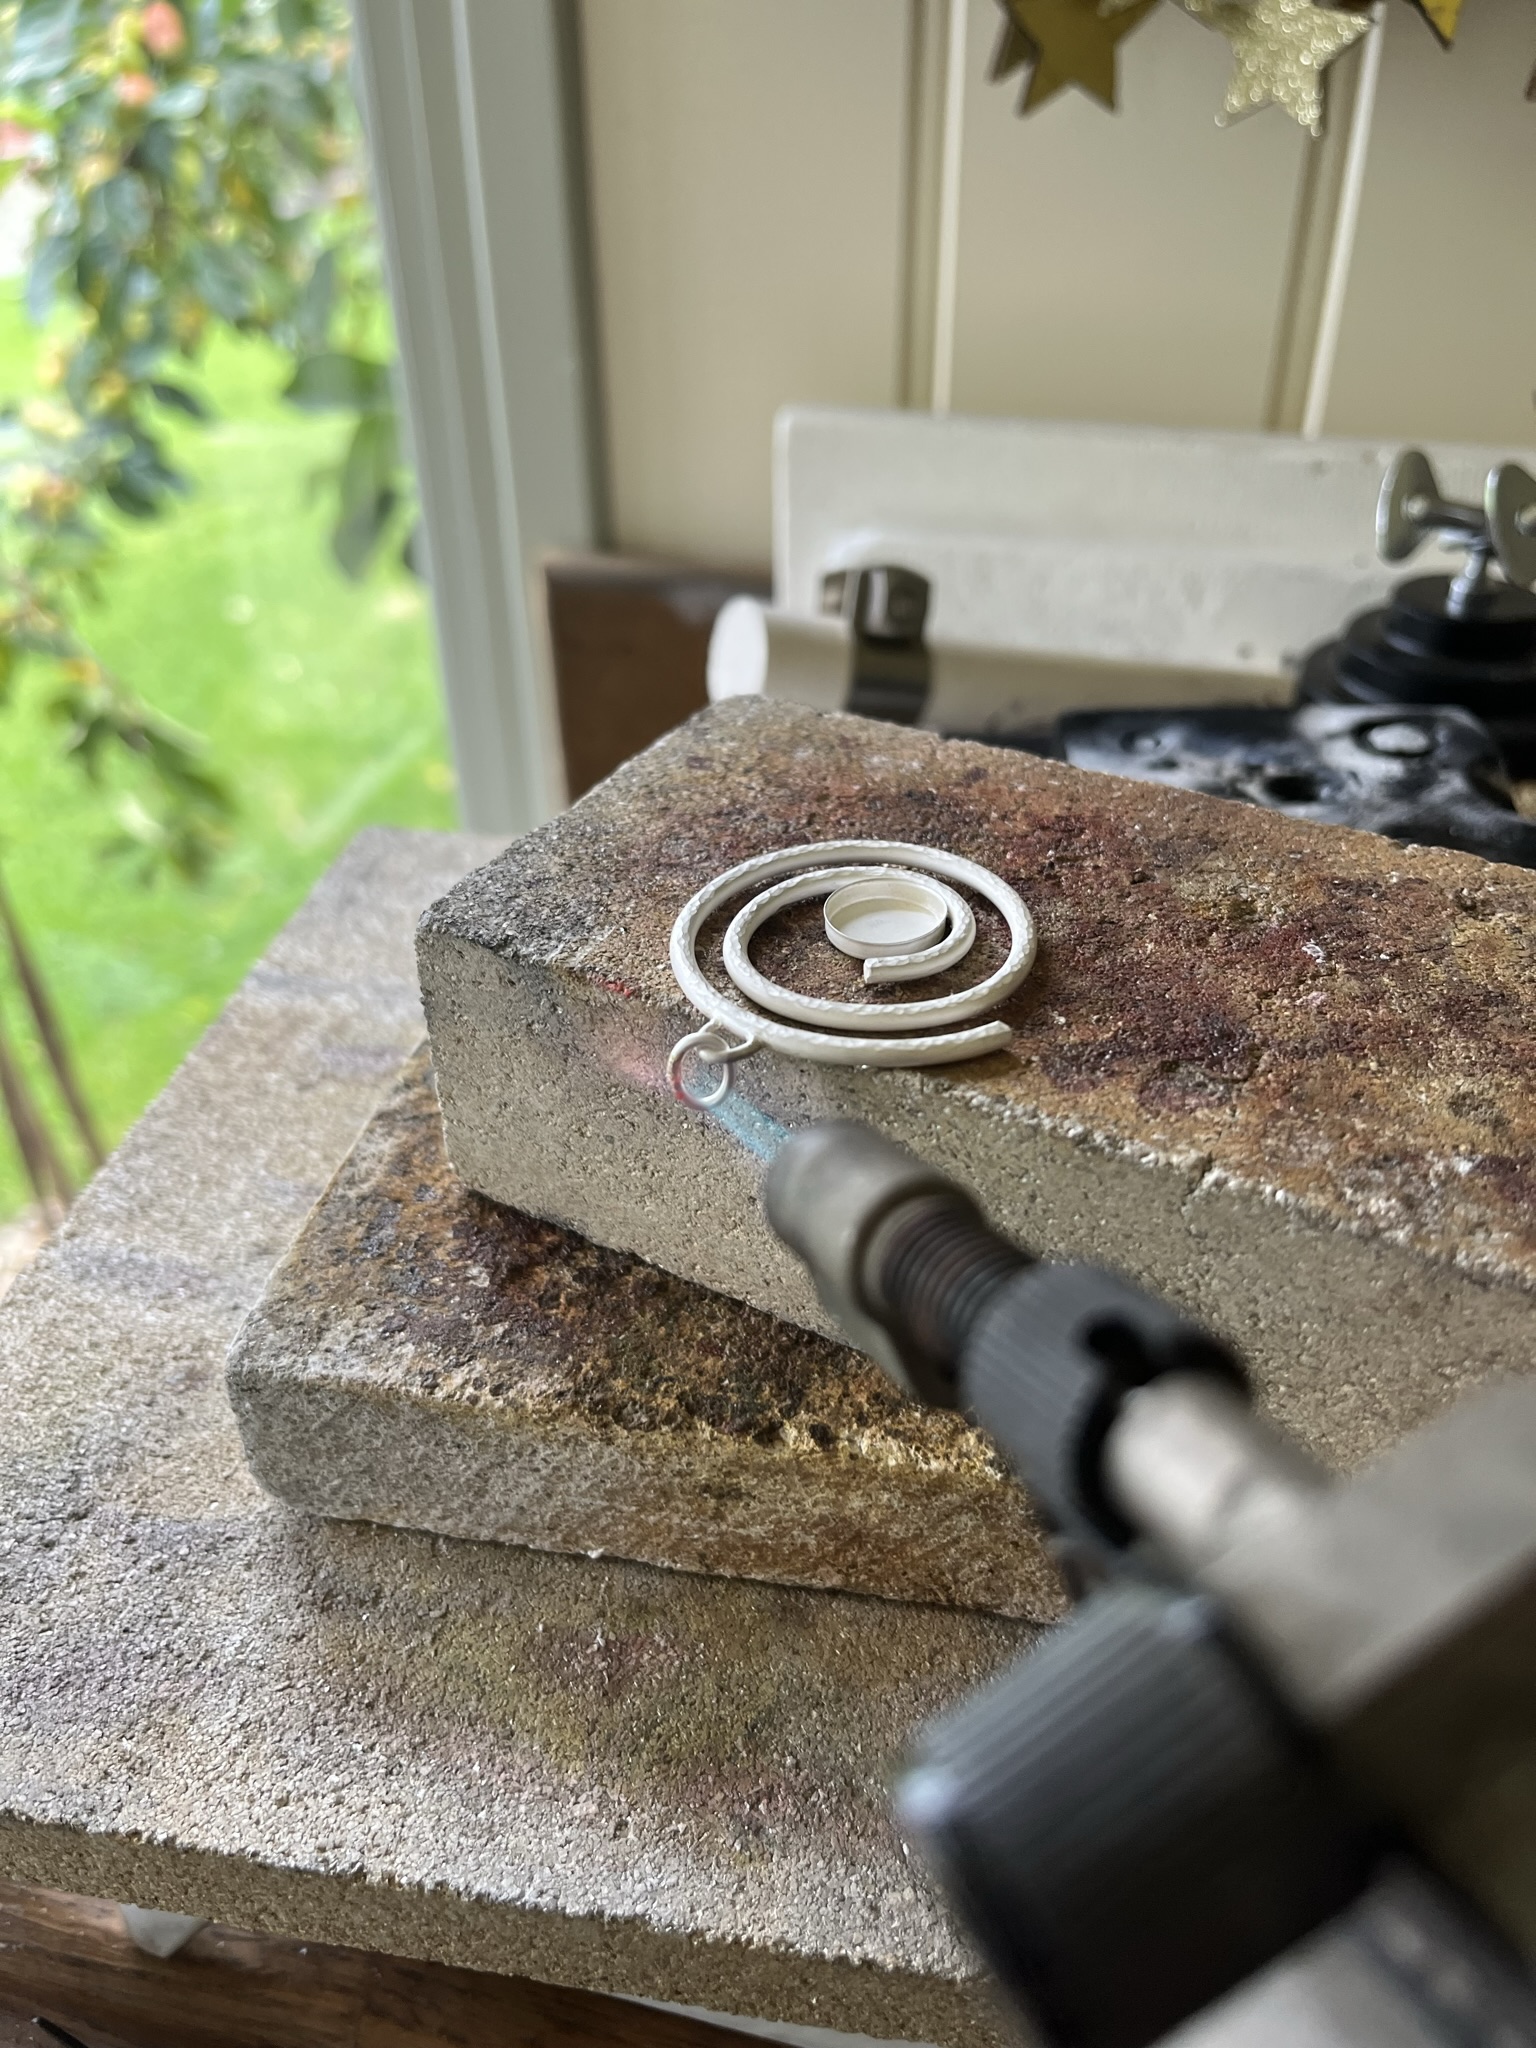
Step 18
Place the silver spiral on a heatproof block and add a little solder paste to the join on the jump ring. Using a blow torch heat the jump ring until the solder melts and flows.
Leave the pendant to cool a little before quenching (cooling) in water using tweezers and adding to a warm pickle solution.
Leave the spiral in the solution for 5 minutes or until clean. Remove from the pickle solution using plastic or brass tweezers.
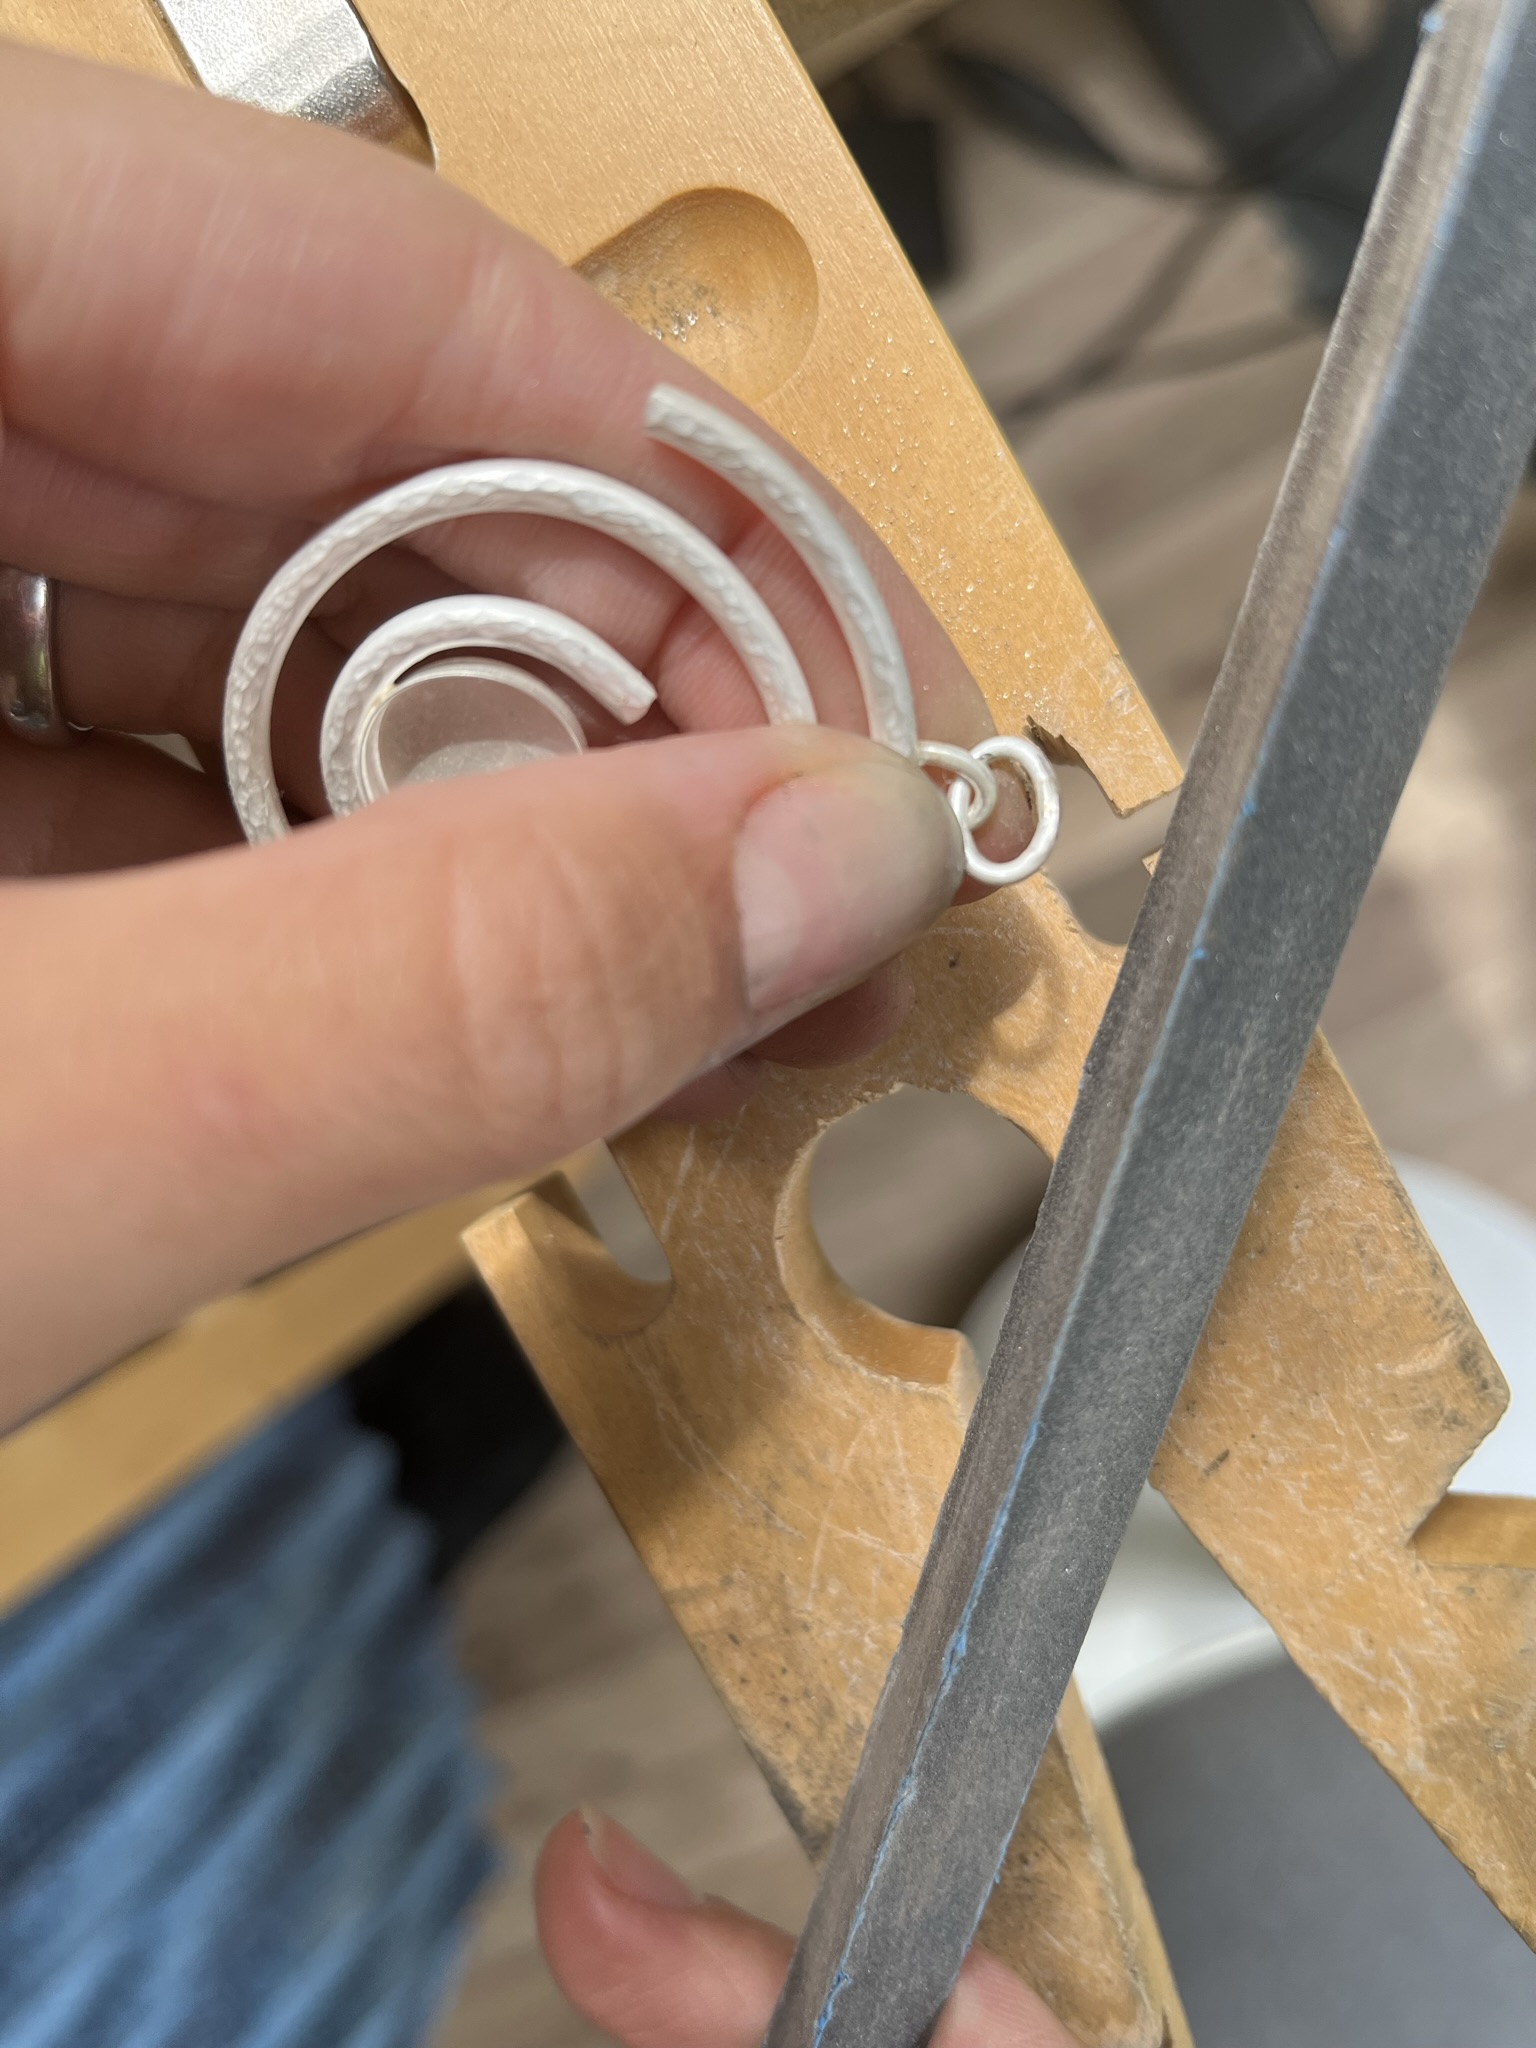
Step 19
When clean and dry use an emery stick or paper to remove any excess solder.
Work from 240 coarse emery board grit to 1200 fine emery board grit.
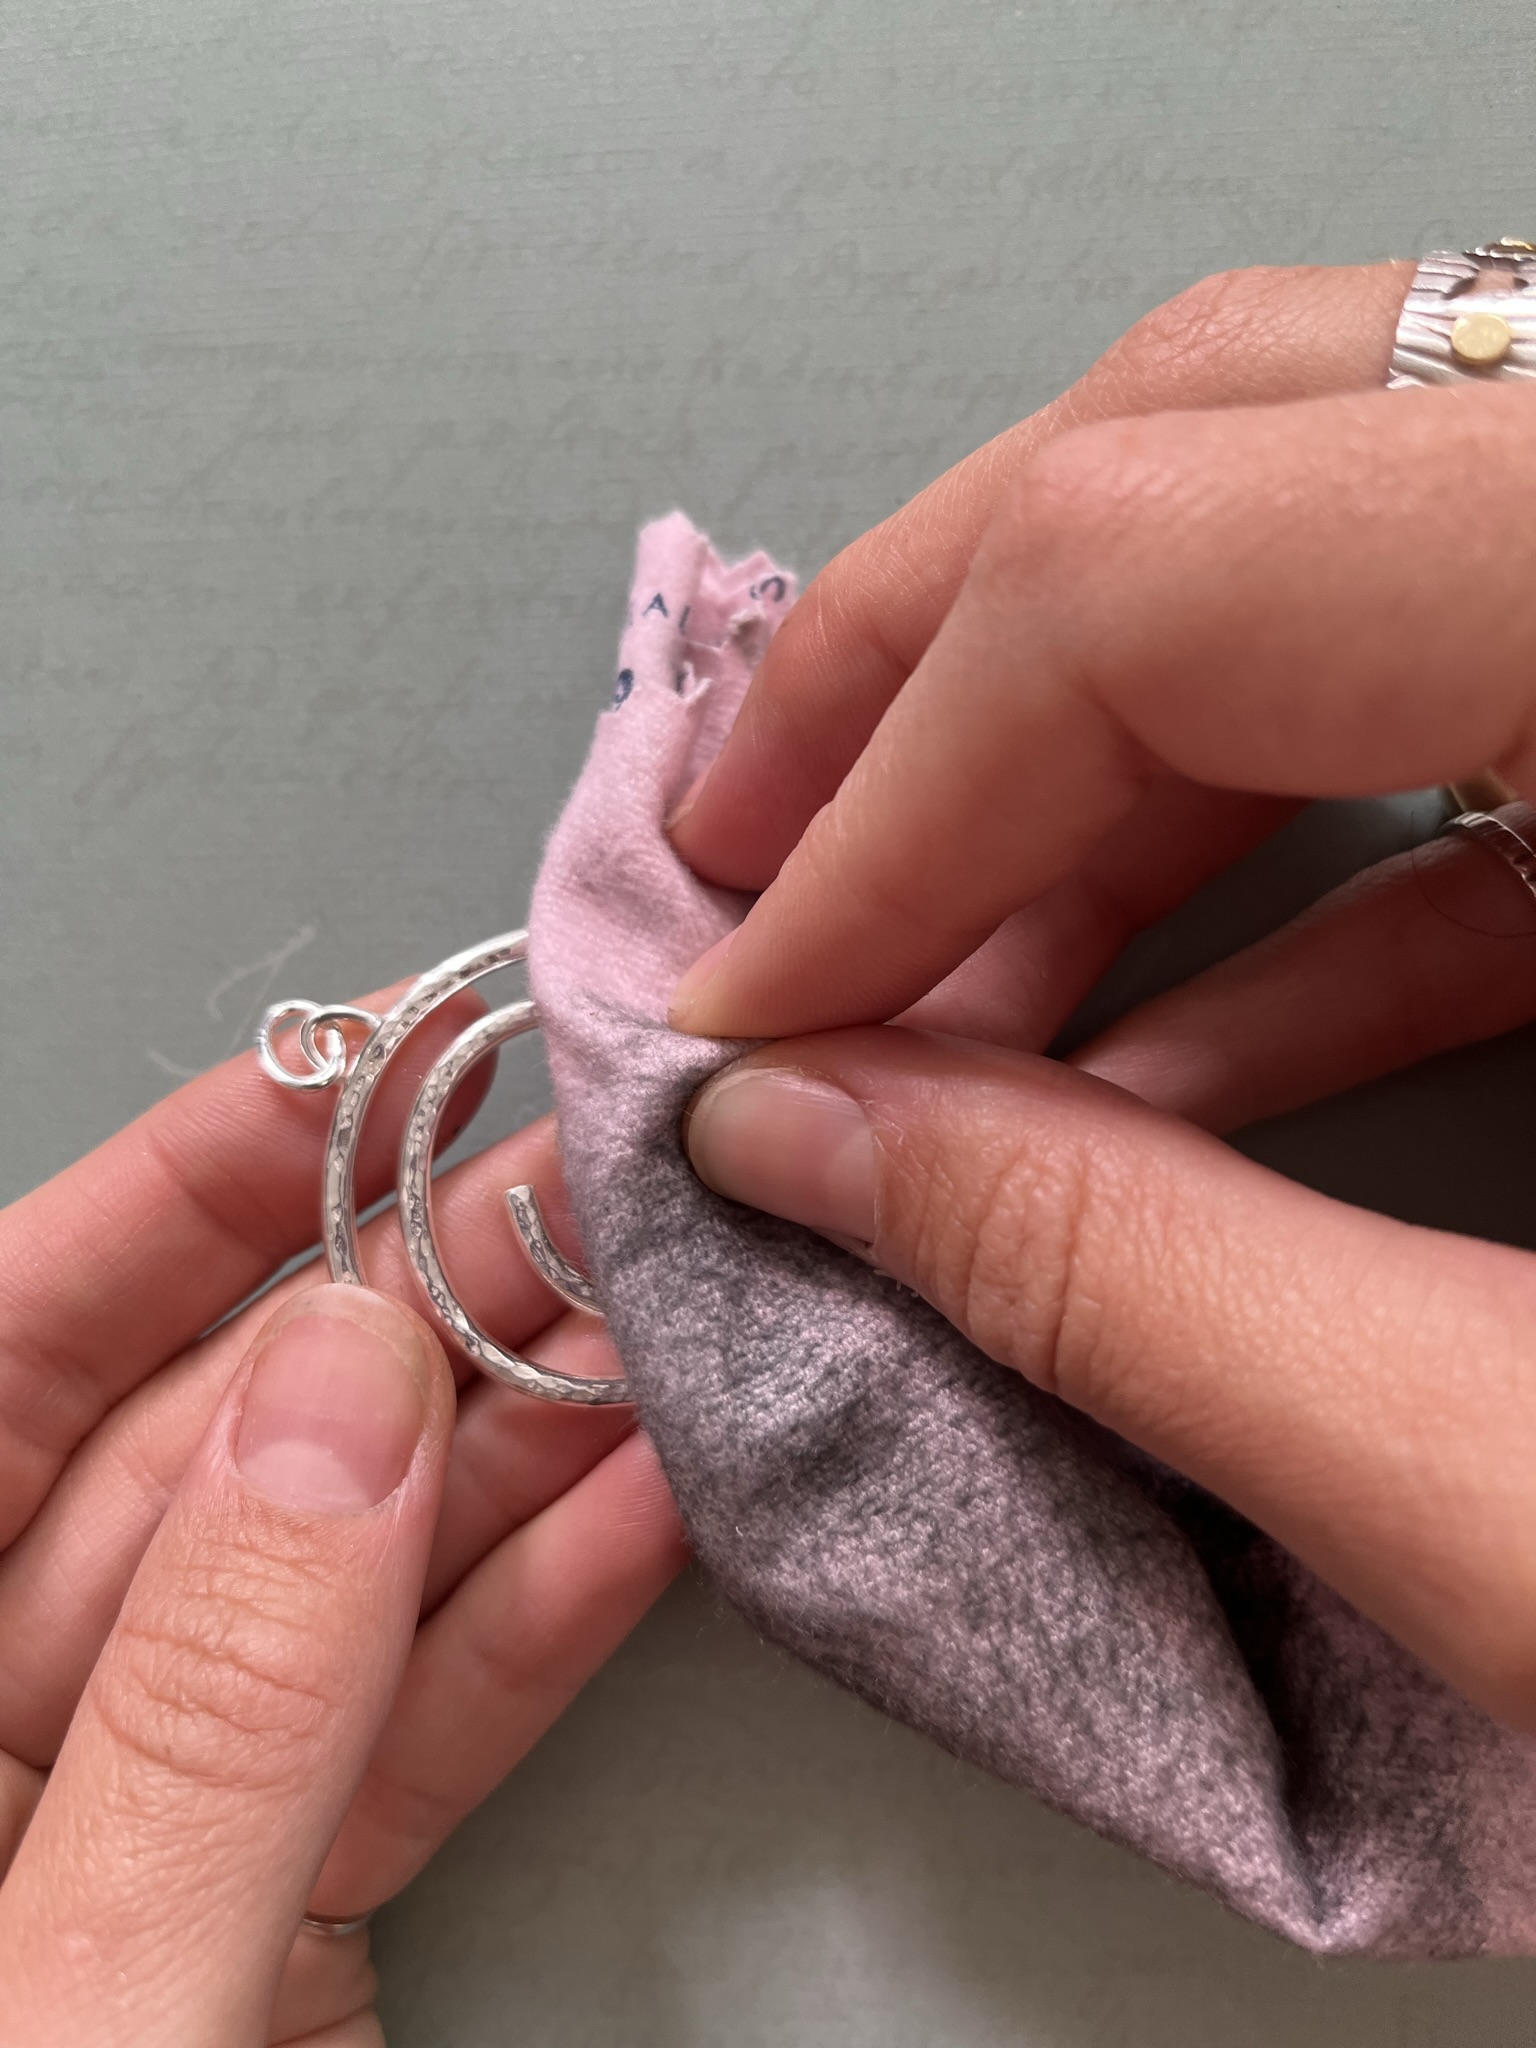
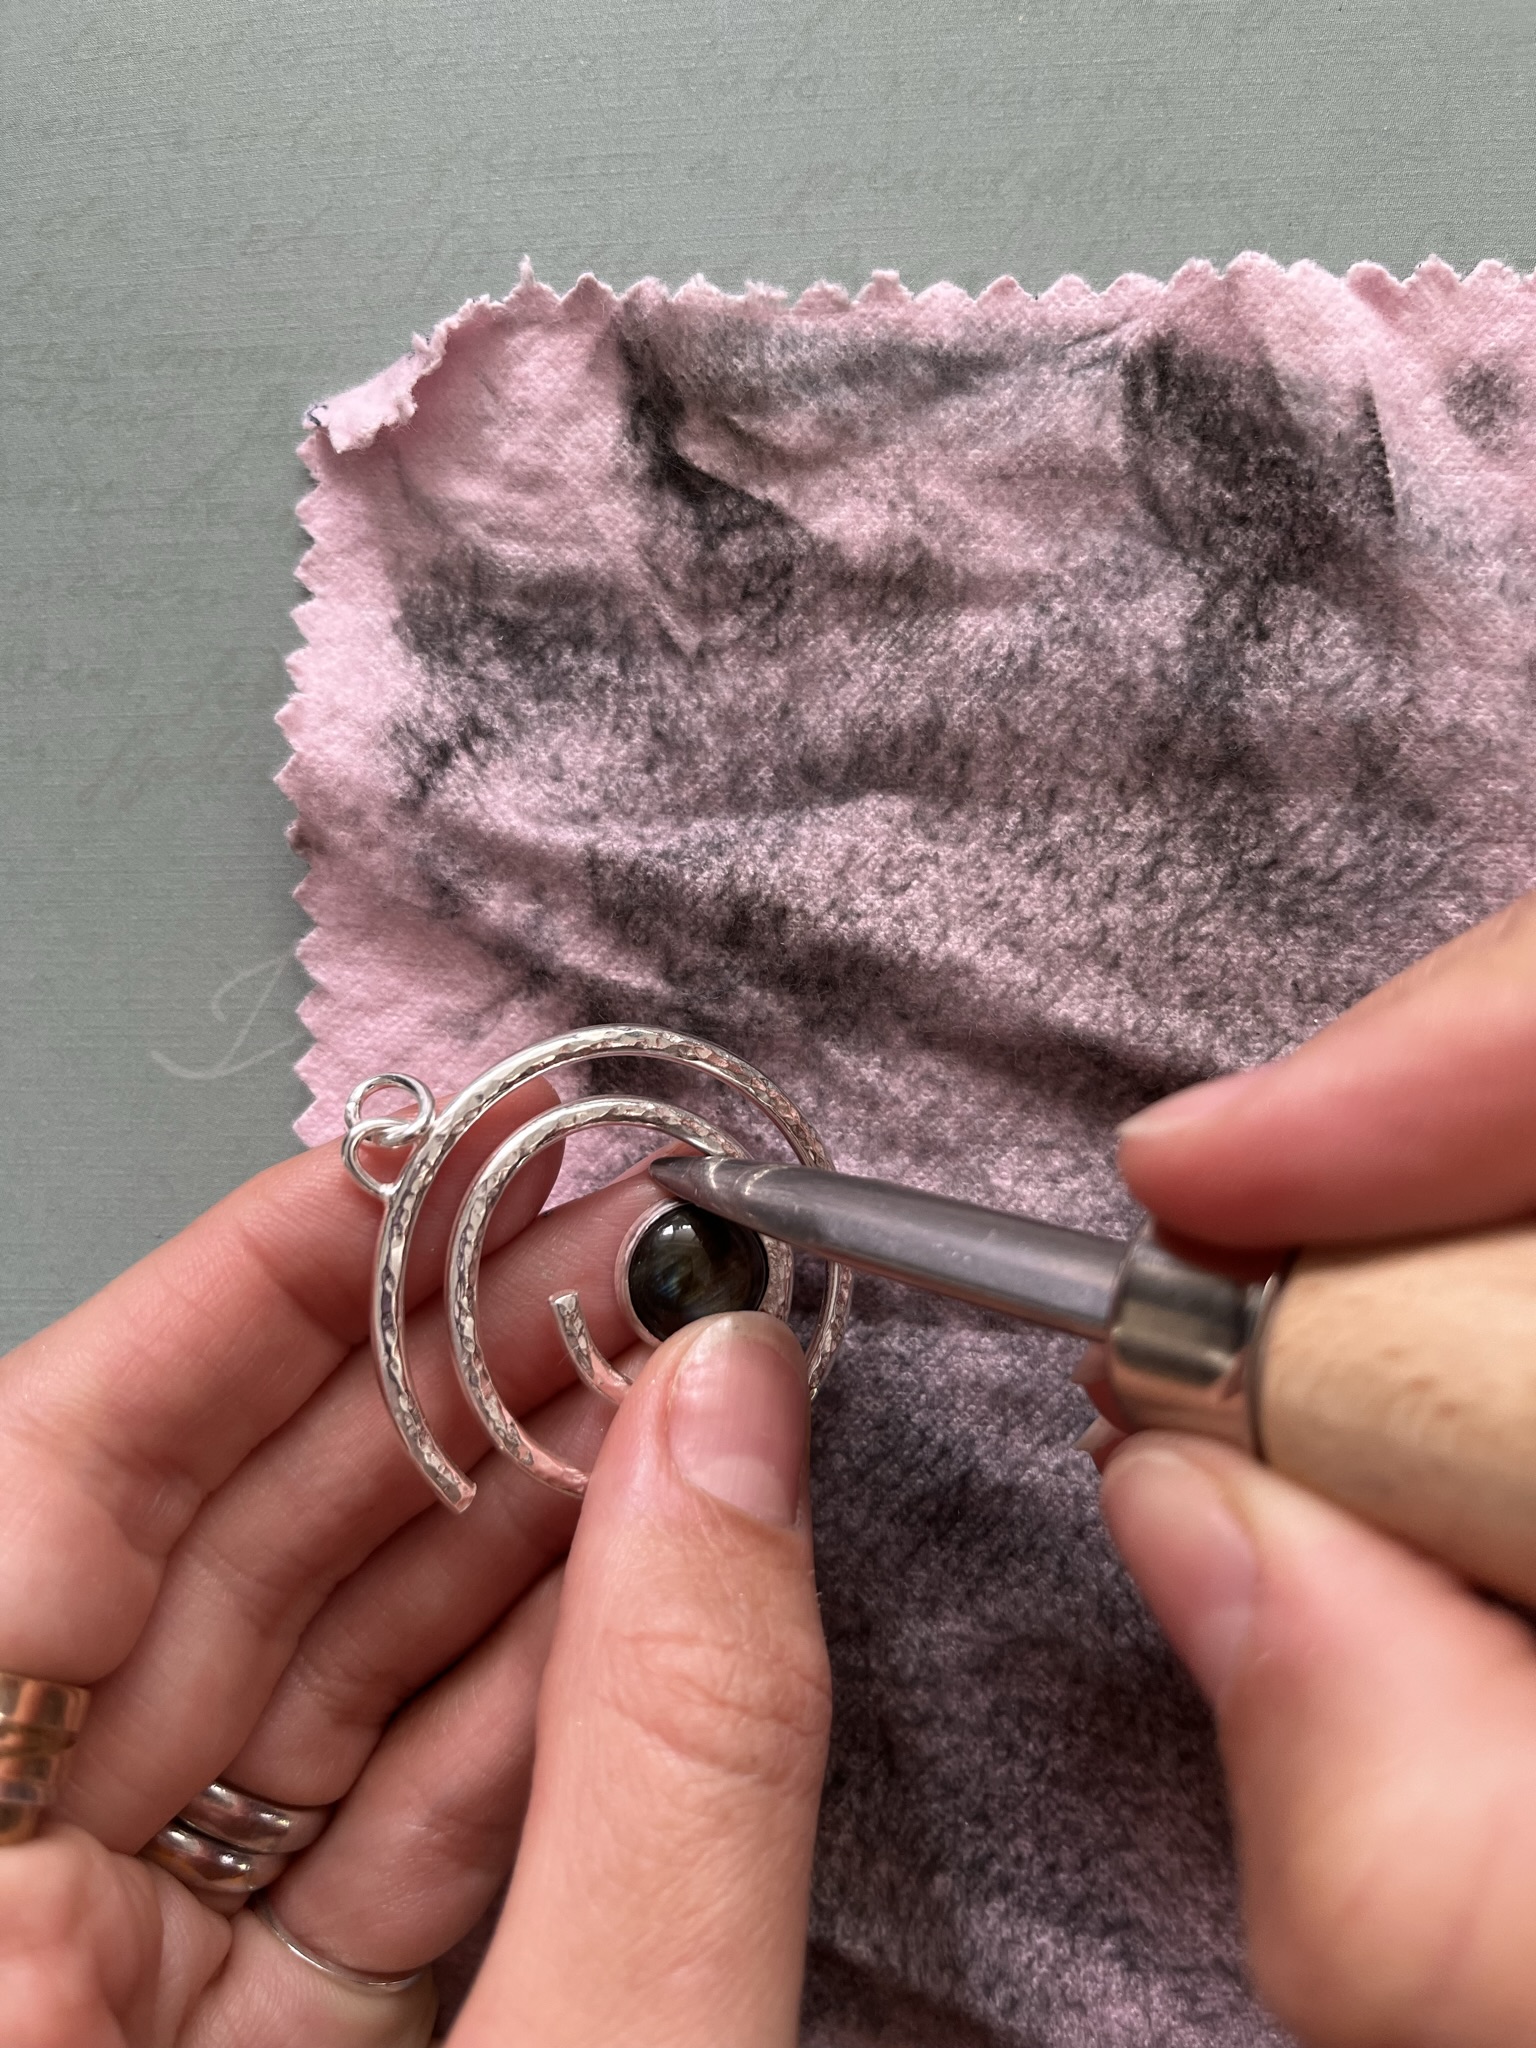
Step 20
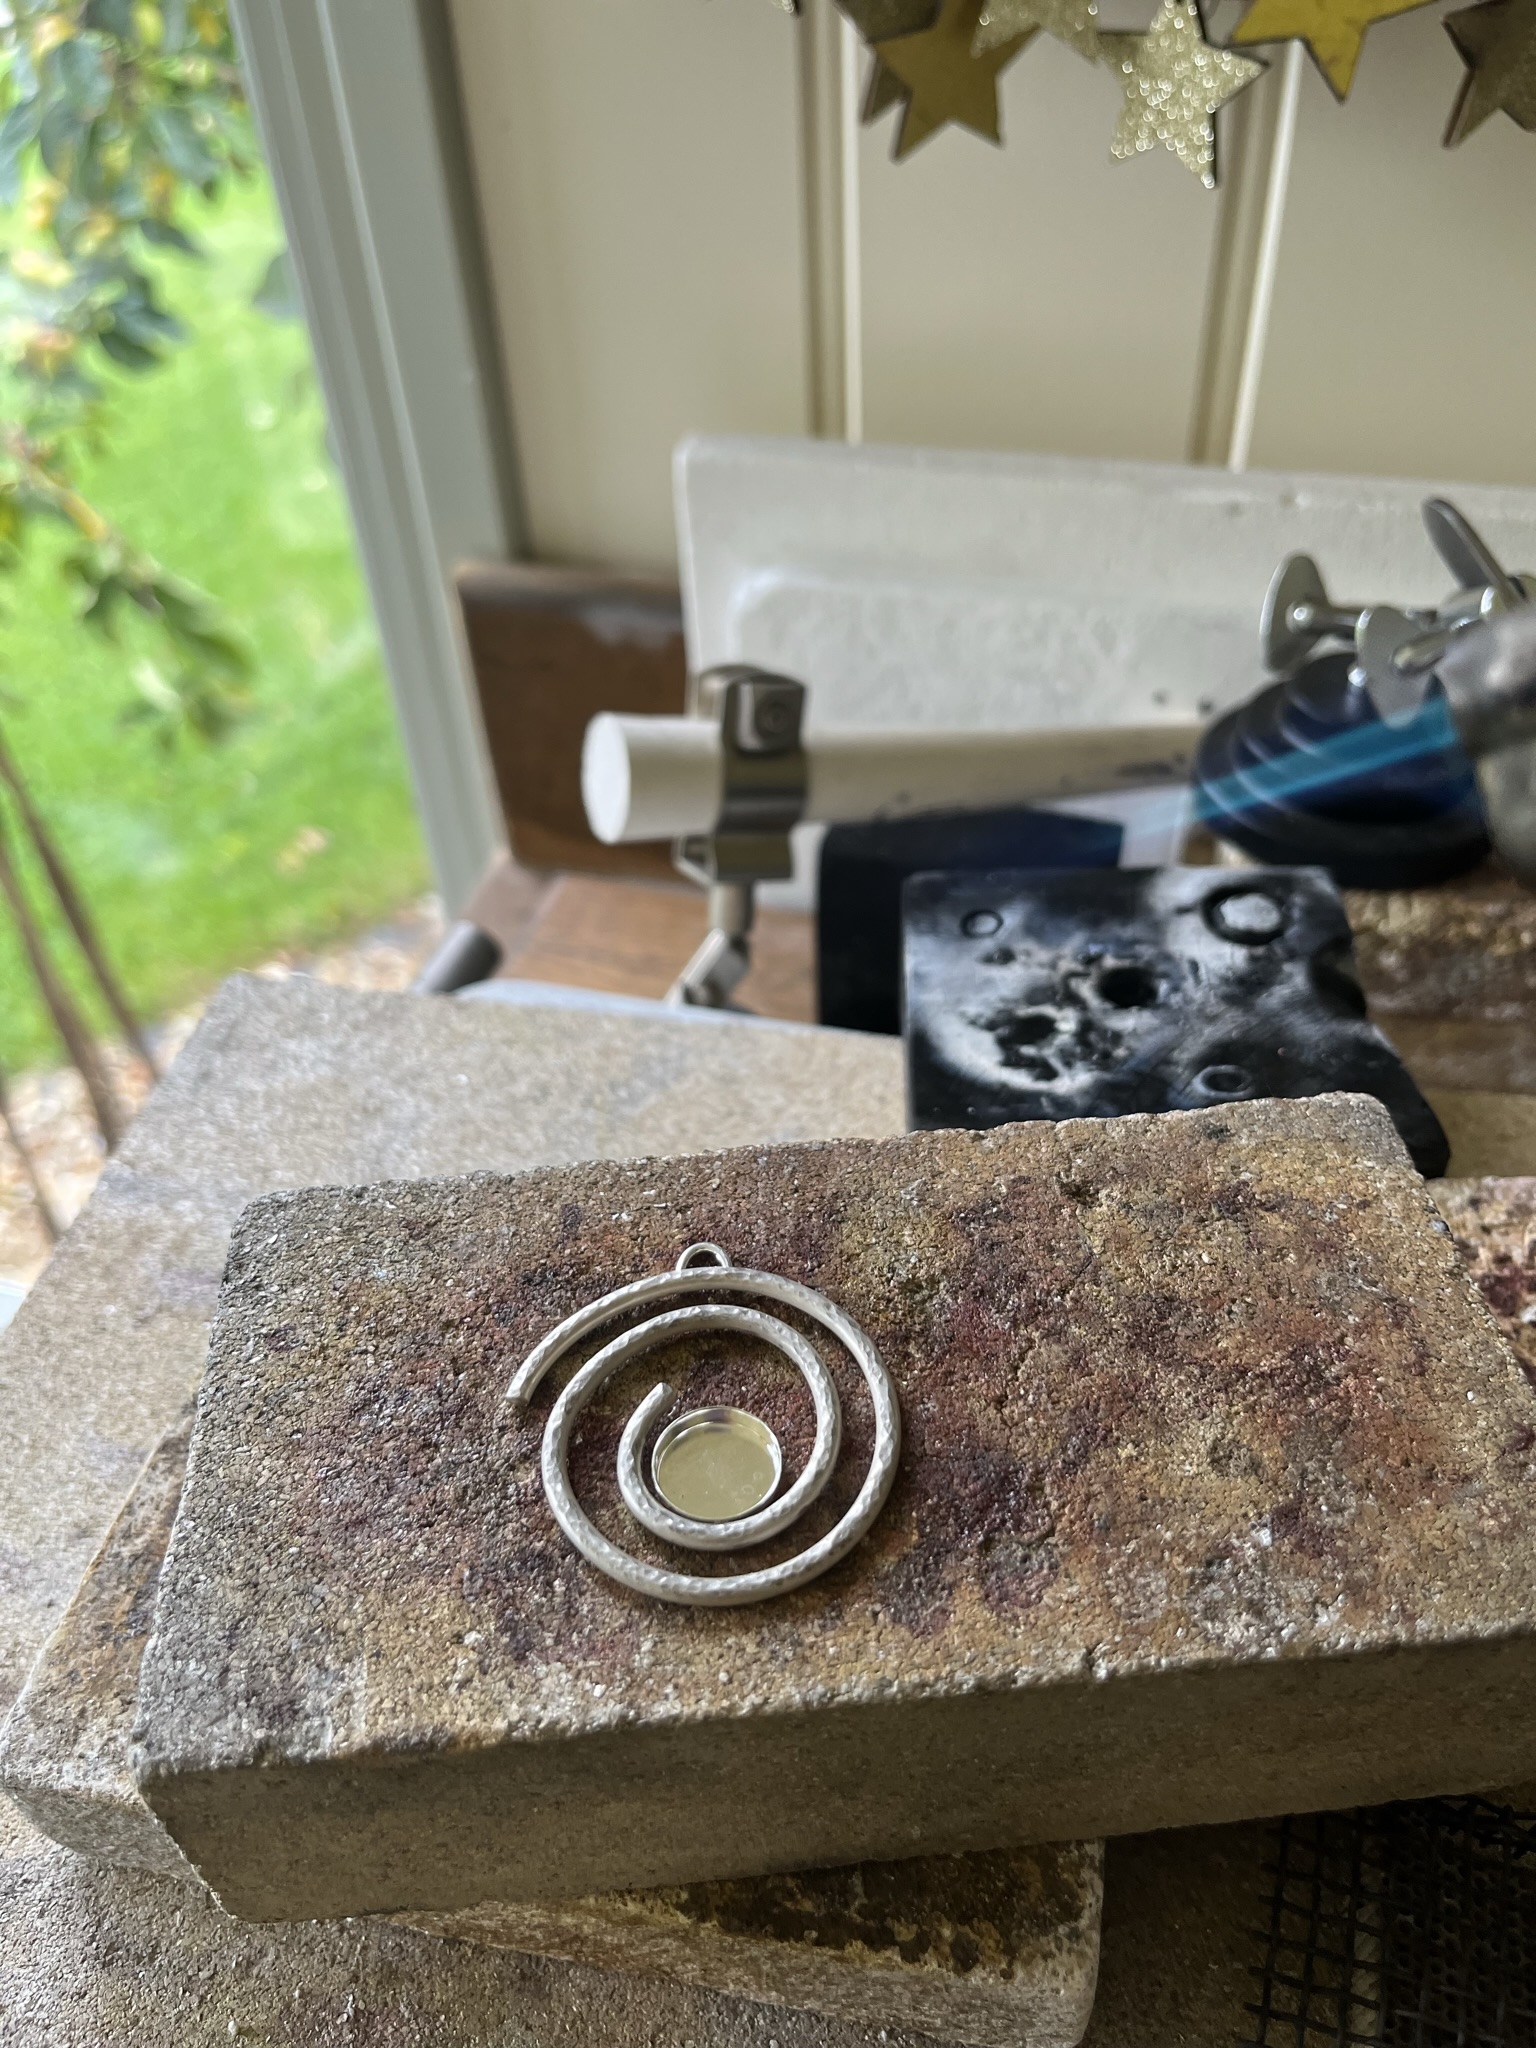
Polish the spiral pendant using a silver polishing cloth or in a barrel tumbling machine with shot, barrelbrite and water.
You could also use a pendant motor with mops and rouge as well as silicone polishing wheels to add shine.
Step 21
Set the stone in your silver pendant by placing the stone in the bezel cup. Using the bezel pusher push the silver over the stone on one side and then push the silver over the stone from the opposite side.
Repeat this process of pushing the sides of the bezel cup until the stone is secure in place and there are no gaps.
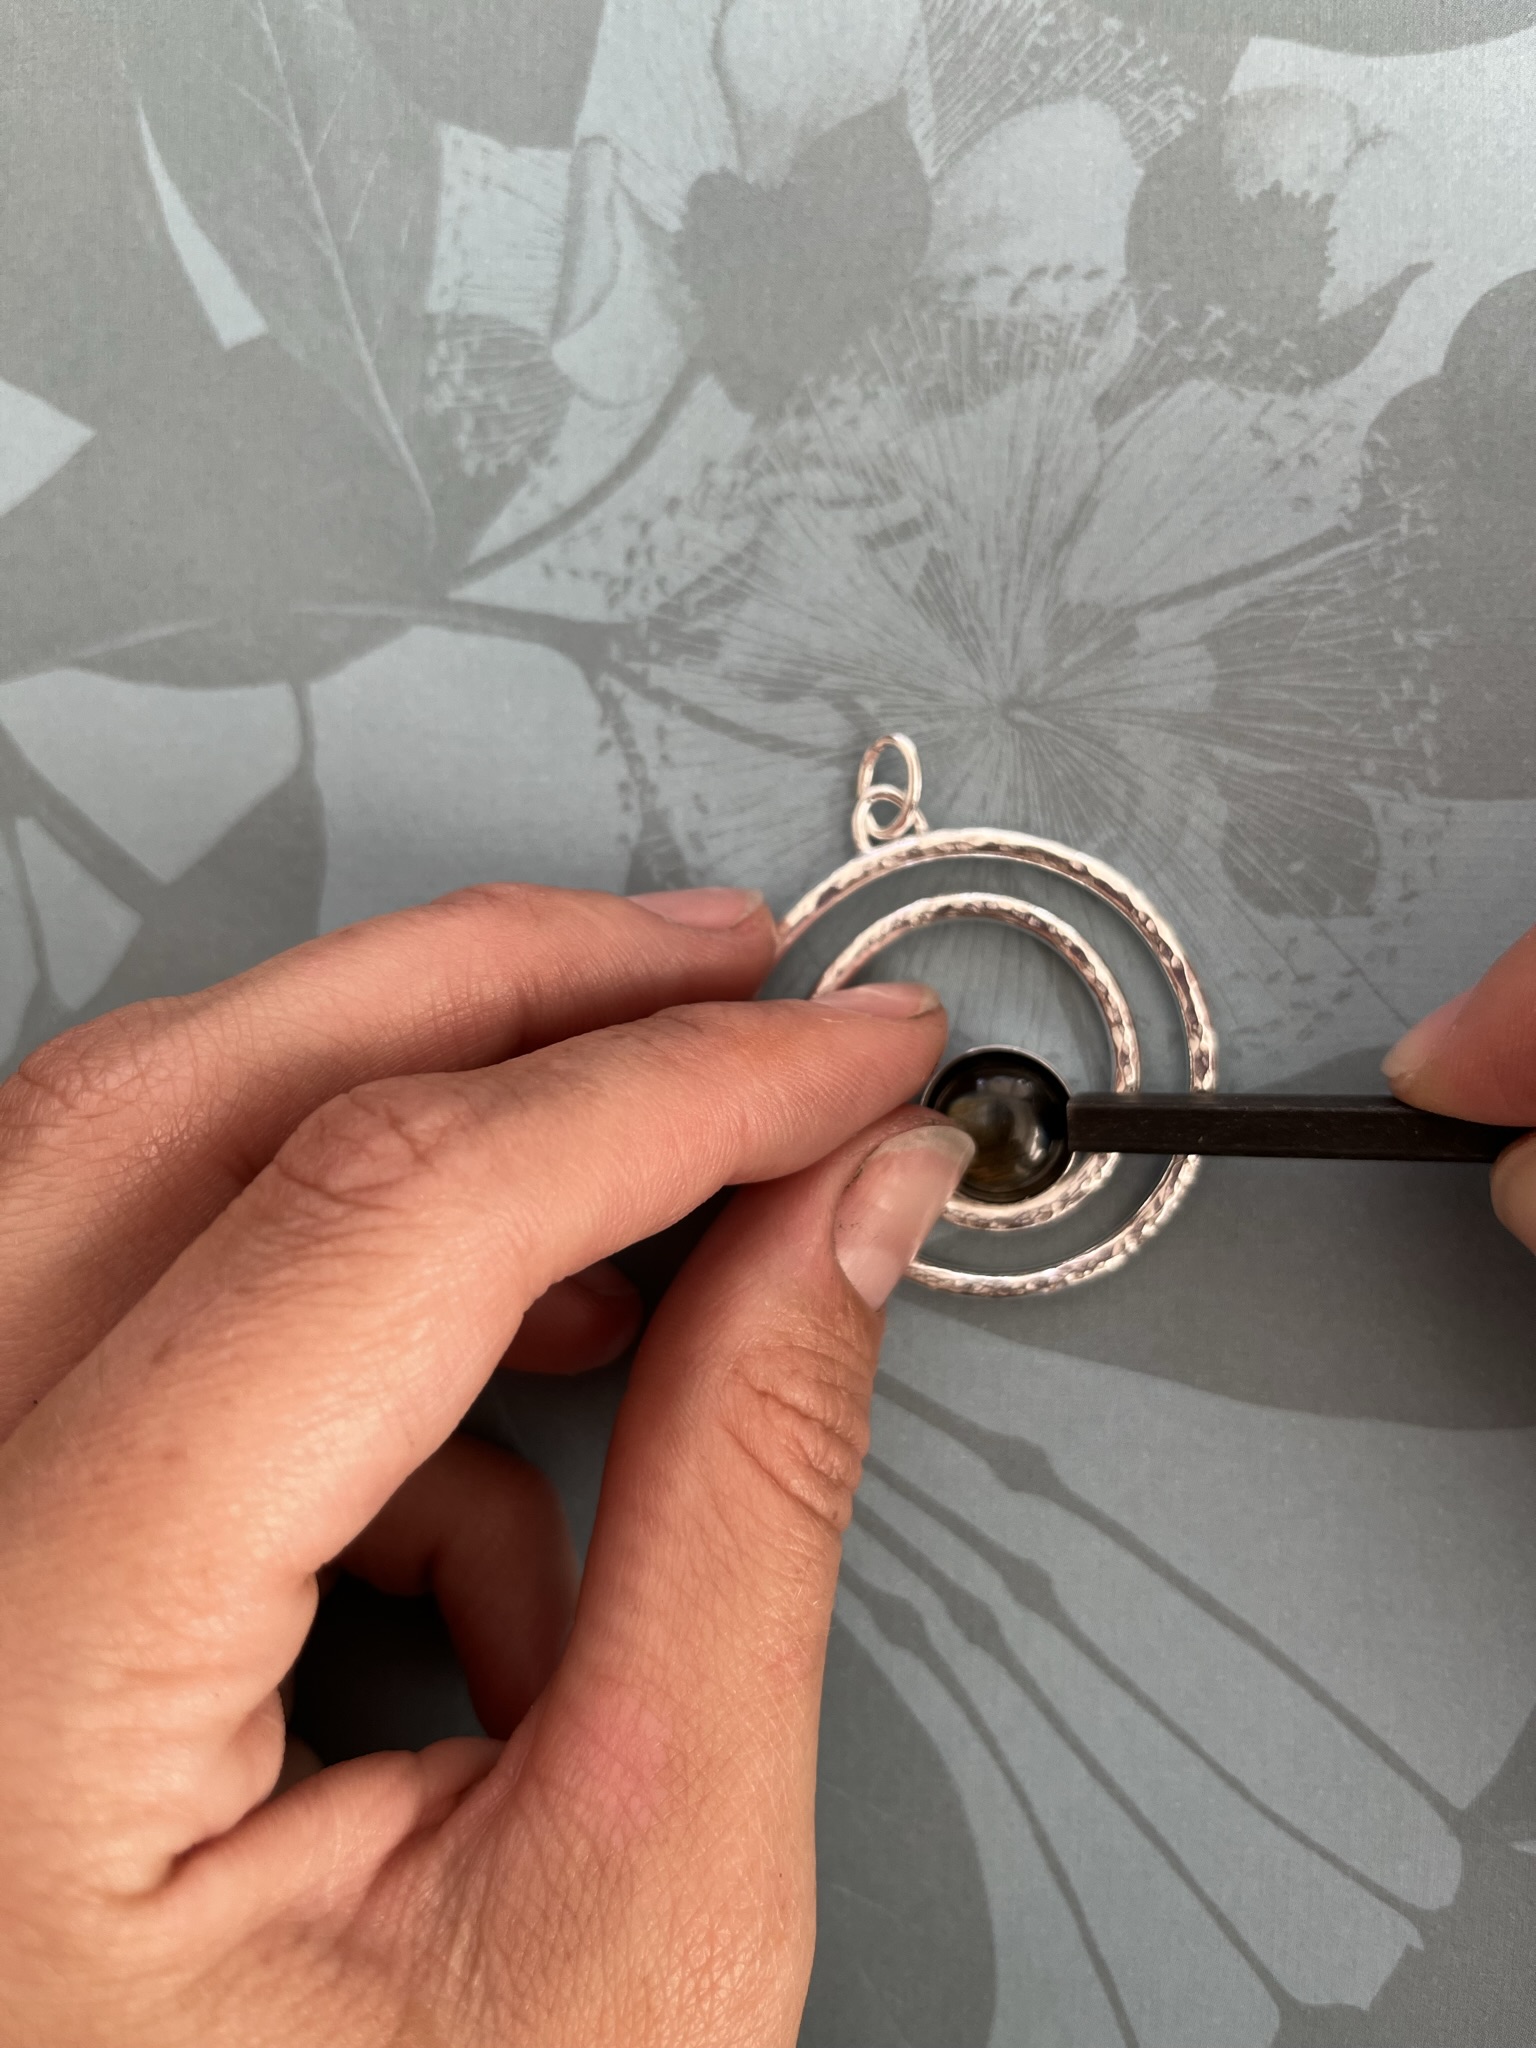
Step 22
Rub the burnisher around the silver bezel cup to smooth the silver.
Step 23
Thread the silver chain through the jump ring.
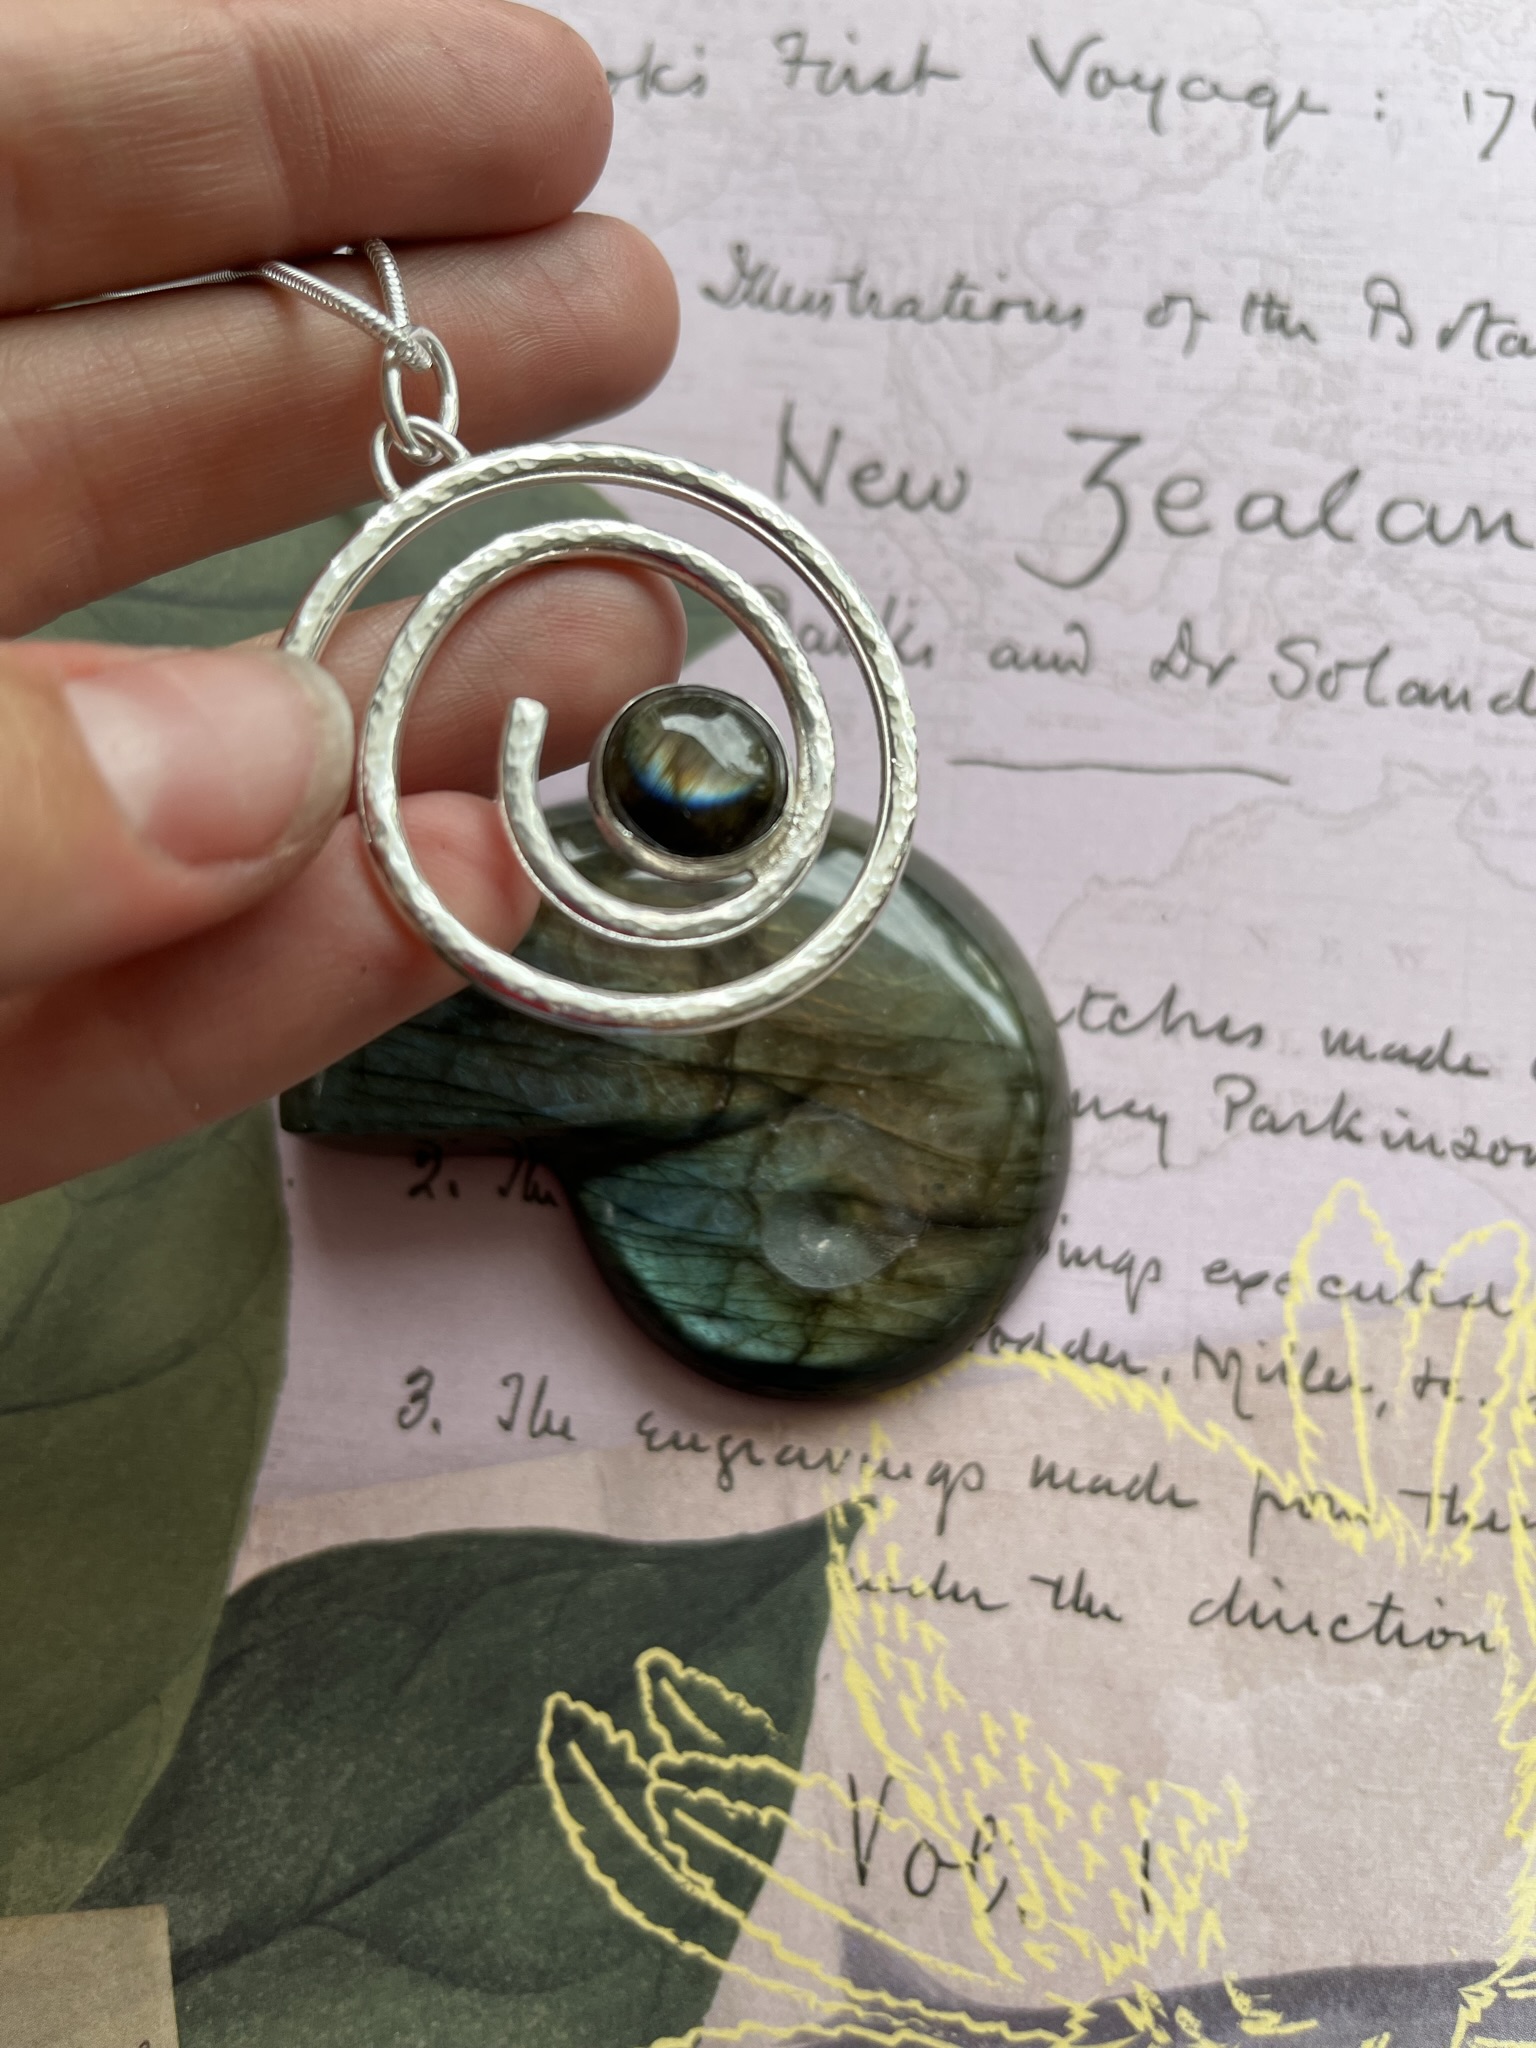
We hope you enjoyed making your labradorite hammered swirl sterling silver pendant. If you have any questions or want to know more, get in touch with us on Facebook and Instagram. We’d also love to see what you’ve been making so please share pictures of your creations with us too, tagging Cooksongold.

Sian Brown
Sian has been hand making her award winning jewellery in the West Midlands for over 12 years. Sian spent 10 years in Birmingham’s historic Jewellery Quarter before relocating to a quiet Worcestershire village.