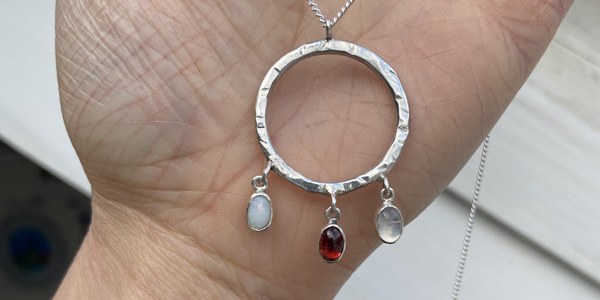
This project is a modern take on the traditional Mother’s ring – typically featuring the birthstones of her children – and is infinitely adaptable and truly unique. It also comes without the difficulty of finding out your mum’s ring size in secret!
Although the project requires some tricky soldering and setting techniques, whether you’re a keen beader a seasoned stone setter, this design can be adapted to suit all levels of skill. Read on to find out more!
Step 1: Make your bezels
Begin by making the bezels in which to set you cabochon gemstones, using this step by step guide if needed. If using more than one gemstone, you’ll need to make each bezel individually and remember which bezel fits which stone their exact size and height can vary. Keep the gems and their bezels organised by storing them in individually marked pots.
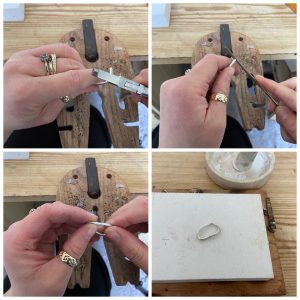
Step 2: Prepare to add the jump rings to bezels
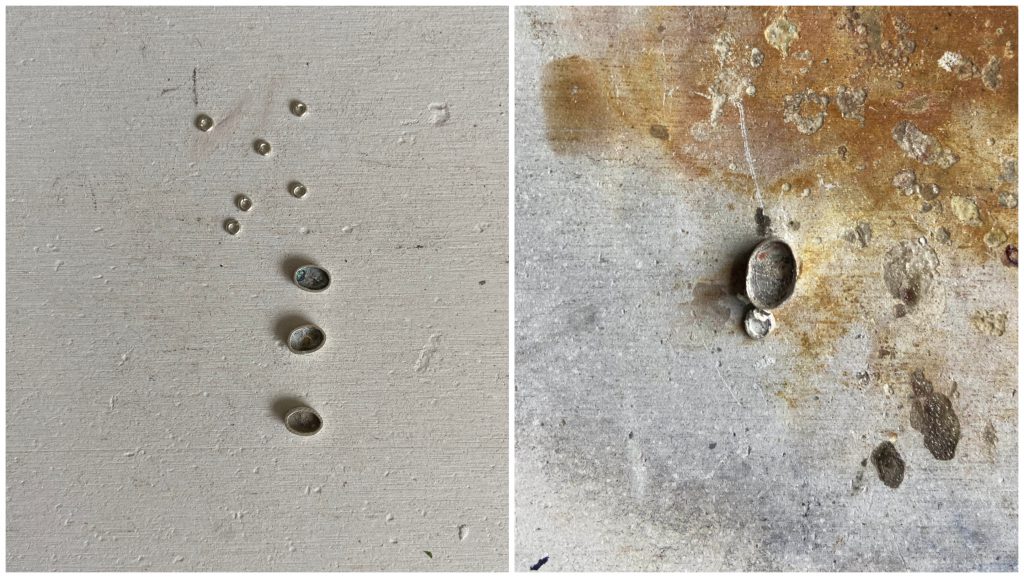
With the individual bezels completed, you now need to solder on the 3mm jump rings. Set up your soldering station, making sure that your soldering block lies completely flat. Now add flux to the top of your bezel and the ‘join’ of the jump ring, placing the two components so they touch each other on the soldering block.
Step 3: Solder jump rings to bezels
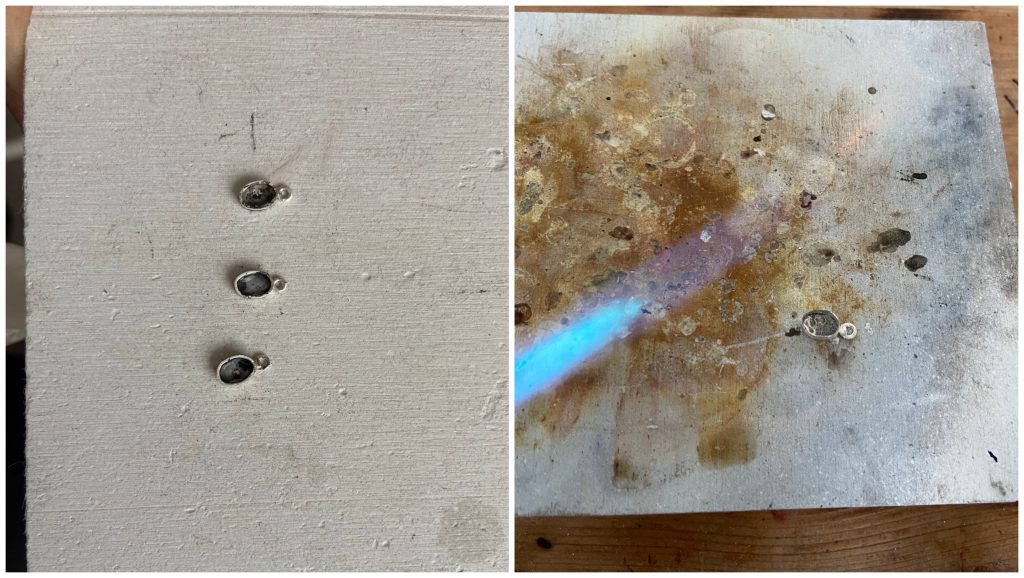
Add a tiny pallion of fluxed solder to where the jump ring and bezel base meet. Then solder the jump ring and bezel together, taking time to heat both components equally. Once soldered, pickle and rinse, completing this step for each bezel so that each has a jump ring attached to the top of its bezel.
Step 4: Forming the pendant ‘ring’
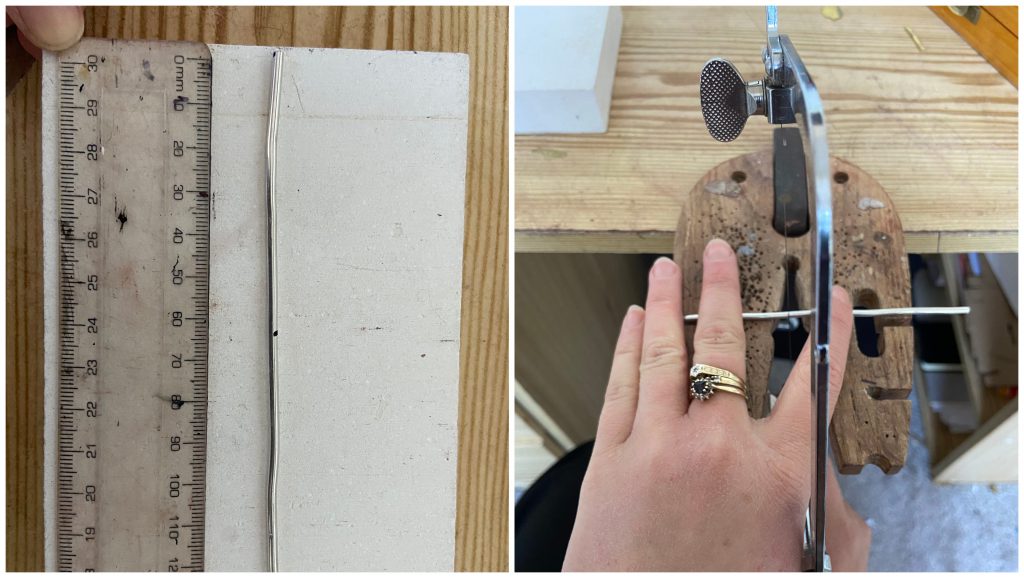
Next, take your 2.5mm round wire and mark out the desired length for the ring that forms the pendant. For this project, I used 80mm of wire, but you can use any length you like. It’s a good idea to check the proportions against your bezels if you’re using larger gemstones than mine. Now, saw your wire to your desired length.
Step 5: Soldering the ring
To form the ring, first file the ends of the wire flat, so that when you join them with pliers they touch without any gaps. With the ends meeting, coat them in flux and place a fluxed solder pallion beneath them on the soldering brick. Carefully solder to form a continuous ring, and then pickle and rinse.
Step 6: Texturing the ring
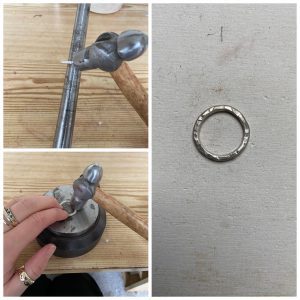
Here’s the fun bit! With the wire pickled and rinsed, use a flat or ball pein hammer and an anvil, steel block or mandrel to shape, hammer and texture the ring to your desired finish. If you’re wanting a simpler, more contemporary feel, you could instead add a satin finish using abrasive paper.
Step 7: Attaching the bail to the pendant
Mark out where you’d like the chain to attach to the pendant with a bail. File a notch where you’ve made the mark and place a 5mm jump ring vertically in the groove – you could use a third hand to hold it in place. Flux the jump ring and the notch, and add a fluxed solder pallion, then solder with care until the jump ring has been joined to the pendant.
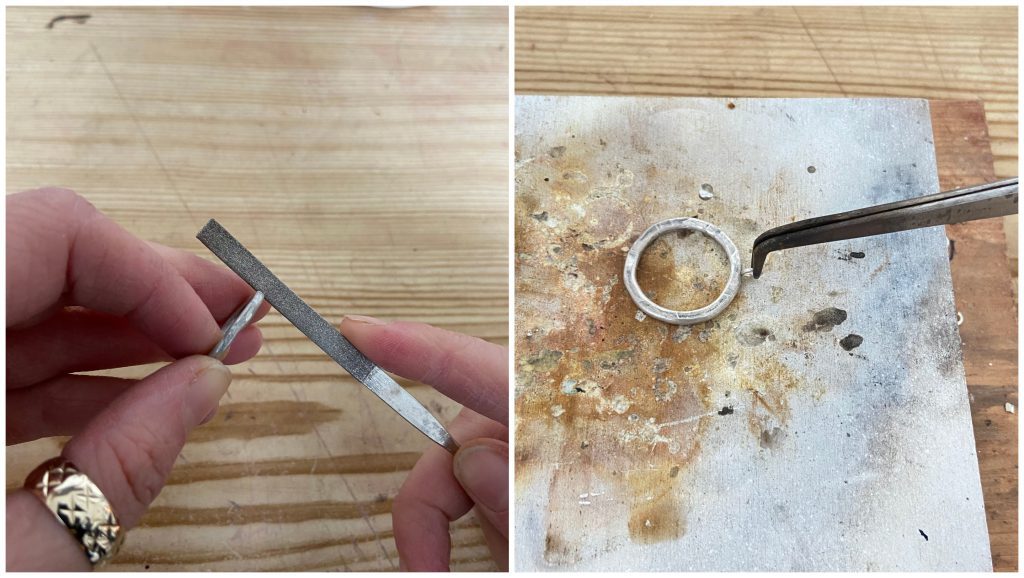
Step 8: Preparing to attach the bezels
Take your ring and mark out where you’d like the bezels to hang – I spaced my three bezels equally along the bottom third of the ring. As with the last step, mark out where you’d like them to be spaced and file a small notch in the ring at these points.
Step 9: Soldering the bezels to the pendant ring
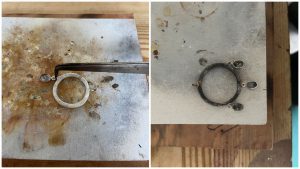
Flux these notched points in the ring, and taking your larger jump rings, thread the bezels through their own jump ring. Take the jump rings individually and place them in the notches, fluxing where the jump ring meets the pendant. Add a fluxed solder pallion and carefully solder each jump ring to the pendant individually.
This step is tricky, so you could modify by soldering the jump wing to the pendant, leaving an opening and then thread the bezel on with the gem set.
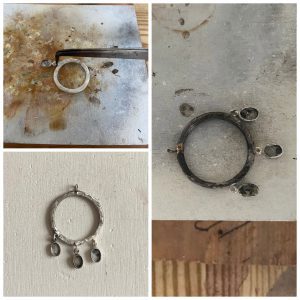
Step 10: Polish the pendant
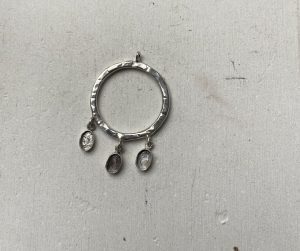
The bezels should now be attached and hanging from the pendant. Using either a barrel polisher or pendant drill, polish the pendant to a high shine, making sure the bezels especially are shiny and free of firescale.
Step 11: Set the stones

To make the pendant really come to life, individually set the gemstones in their bezels. Place the gemstone into its corresponding bezel and use a bezel roller to ease the bezel over the stone – starting at the cardinal points and then working evenly round the stone. Burnish the setting for a shiny, flush edge and repeat the process with each gemstone.
Step 12: Thread the chain
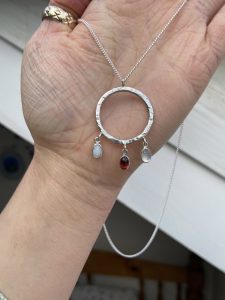
With the gemstones neatly set, all that’s left to do is thread the chain through the bail to finish your piece. Finally, place it in a box ready to present on Mother’s Day for a truly special gift that will be treasured for years to come!
TIPS AND TRICKS
For a quicker and simpler take on this design, choose gemstone bead which you can attach to your pendant using wire-wrapping techniques – you can either solder jump rings to the pendant ring or forego this step completely.
This design is intended as a jumping-off point so have fun with it! You could even include a stone for each member of the family. Experiment with different finishes, textures and chains. Make your Mother’s Day gift as individual as the women herself!
Elizabeth FJE Design
Elizabeth is a silversmith and student whose works are inspired by the ancient art and techniques of Classical Antiquity, which she studies as an undergrad. Her practice centres on unique ready-to-wear and bespoke pieces and looks to produce jewellery as sustainably and ethically as possible.