If you’re starting out in your journey as a jewellery maker, our how to make jewellery hub is the place for you. We’ve collated the perfect collection of guides and resources to help you learn a range of different jewellery making areas including how to make jewellery with silver clay.
One of the best materials for a beginner is silver clay (or Art Clay). With that in mind, we’ve created a handy introduction to silver clay to help you get started. In this blog, we’ll talk you through how to use silver clay and the essential pieces of kit for your silver clay projects.
Watch our YouTube video for an introduction to silver clay. As a visual guide, you’ll discover the different tools and how to use them, techniques and top tips from an Art Clay expert, Lori Ridgway, at one of Cooksongold’s Demo days.
Your Silver Clay
Before you start using precious metal clay, there are a few essential things you’ll need to get started. Here’s what to include in your precious metal clay kit:
- Art clay silver
- Sealed box and baby wipes – to keep clay moist
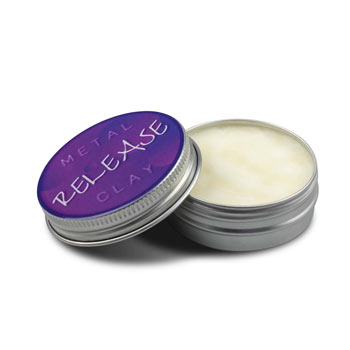
- Balm – so the clay doesn’t stick
- Spaces (or metal rulers)
- Roller
- Moulding compound
- Needle tool/scalpel
- Buffet plate warmers/dehydrator/mug warmer – for drying the clay
- Sanding pads
- Kiln
- Gauze
- Blow torch
- Brass brush
How To Use Silver Clay
When using Silver clay, it is important that you fully understand the process behind making jewellery with Silver clay – we can help with that. Follow our advice on how to use Silver clay, and you’ll be ready to start in no time.
Planning. Whether you’re making a pendant, a ring or earrings, you’ll want to plan your design first. Think about textures, shapes, sizes, patterns and whether you’d like to add gemstones and other finishing touches.
Prepare the clay. Break off the amount of clay you need with a spacer and roll it in your hands. Once done, place it into a sealed tub with baby wipes to ensure the clay stays moist (so the clay doesn’t crack).
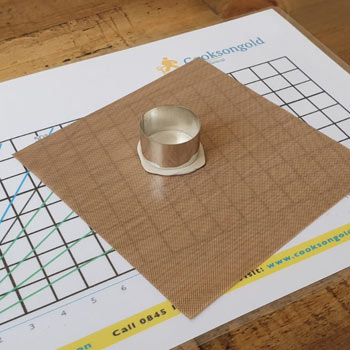
Prepare your workplace. When creating intricate designs, the last thing you want is for your clay to stick to your workplace. To prevent this, use an olive oil based balm on your tile, roller and template. A metal clay balm is ideal for this and will keep your clay from sticking to your work surface.
Get the right size. Using your spacers, you can get a rough idea of the size of your piece. Place two spacers on your tile with a gap in between for your clay. Then roll it to get an idea of the size of your design and repeat on the other side.
Add texture. If this is something you want to add to your design, now’s the time to do it. To add texture one of the best tools to use is a moulding compound. With this tool, you’ll be able to get the exact texture you require. Place under and over your clay, then roll once in one direction – if you roll back and forth you’ll lose the sharpness of your design.
Get the right shape. There are a few ways you can do this. The easiest is to use cutters, but you can also use anything else as a template. You’ll need to cut around it using a scalpel or a needle tool which requires a little more precision. Top tip – remember to add balm to your template to avoid it sticking!
Cutting the clay. When using a scalpel or a needle tool, make sure you’re using it at a 90° angle. This means that you’ll get a straight edge rather than a beveled edge (which is fine if that’s what you’ve planned for your design).
Dry the clay. There are a variety of ways that you can dry your clay before you fire it. A buffet plate warmer, the drying setting on your kiln, a mug warmer or even your radiator. Just don’t put it on something over 150° C.
Sand the clay. Once it’s completely dry, you can start sanding. Using sanding pads or nail file blocks, gently sand down your design so you won’t have to polish it as much once it’s finished. When you’re happy with it, you’ll be ready to fire the clay.
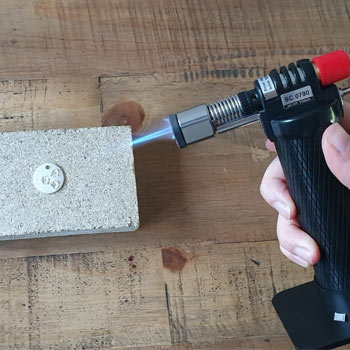
Fire the clay. Before you start firing, make sure the clay is completely dry, otherwise it’ll fire bubbles into your design. If it’s ready, you can choose one of many ways to fire your clay. You can use a kiln, gas stove or a blow torch– just choose the best option for you. Once finished, your design should be salmon pink colour before turning white away from the heat.
Finishing touches. To make sure your design is finished to the highest standard, there are a couple of things left. First, dip it in a bowl of cold water. Then to get rid of the white colour, use a brass brush until your piece turns silver.
And there you have it! After reading our introduction to Silver clay and watching our video, you should be feeling ready to give it a go yourself. Just make sure you have all the right Art clay tools and materials and you read up on some more of our resources as well as our projects to help you along the way.

Cooksongold