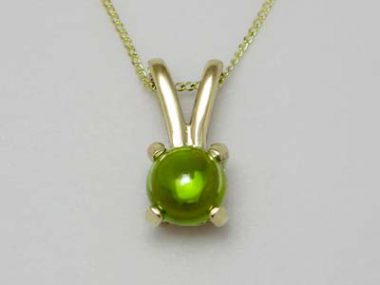
Looking to mix up your ring designs a little? If you’ve been working with bezel set rings and want to move on to a new project, why not try your hand at a prong setting? While bezel settings are neat and easy to accomplish, a prong setting will show off the stone even more, making it ideal for jewellery pieces where the stone is the focal point.
The beauty of prong settings is that they can be any shape you like. What’s more, you can fix your stone with as many prongs as you feel necessary – will you create a six prong setting? Or an eight? It’s completely up to you.
Read on to discover how to make a prong setting, in a few simple steps.
Making a prong setting
For this example, we’ll look at how to make a six prong setting.
You will need:
- Soldering set
- Wire (in whichever style you prefer)
- Gemstone of choice
- Pickling solution
- File
- Cutters and pliers
- Prong pusher
- Anvil
Step 1: Create a jump ring
Place your stone on a flat surface and create a circle of wire around the widest part. Once you’re happy with the shape, remove the wire and gently solder the ends together.
It’s important to measure your wire (jump ring) around the widest part of the stone, as this will provide the support for the prongs and stone once completed. Need to save some time? You can use pre-made jump rings as a quicker way to get started with your prong setting project.
Step 2: Cut your prongs
Start this step by measuring the height of your stone and adding a little extra to the height at which you’ll cut the wire for your prongs. For example, if your stone measures 5mm in height, you should cut your prongs at approx. 9mm in height. This will allow you plenty of room to bend your prongs and secure your stone.
Step 3: Solder your prongs
Now it’s time to solder your prongs to the jump ring. You may have already soldered your jump ring closed, but if not, you can use the gap as a starting point for your first prong.
Make sure your prong ends are filed flat so that they have a good surface for soldering. Add your flux and gently solder, use a soldering pick if the solder moves. Try and use hard solder for the prongs and be careful with the soldering heat as it could melt your wire. When finished, pickle.
Working on your soldering technique? Read our step-by-step guide to soldering for expert hints and tips.
Step 4: Bending your prongs
Insert your gemstone into the jump ring and mark the edges on each prong using a felt tip pen (Sharpies work well, as they transfer onto any material).
Using your jewellery pliers, grasp each prong and push the setting against your anvil, while bending your prongs upwards into a 90-degree angle.
Step 5: Solder to your ring
If you’re adding your prong stone setting to a ring straight away, make sure you file a flat section on the ring surface and solder carefully. Make sure you remove the stone before doing this, as the solder could cause unnecessary damage. Then pickle.
Step 6: Set your stone
Placing your stone inside the 90-degree prongs, take your prong pusher and push them right against the stone, slowly but with a little force. You don’t want to accidentally snap your prongs! Try pushing the prongs in a north, south, east and west order to avoid putting too much pressure on one side of the stone. This will also help to secure the stone.

Step 7: Trim your prongs
Using your cutters, trim your prongs from where they meet at the centre of the stone. If you want to achieve a pointed shape, use the reverse side of your cutters. You can always file the prongs slightly if you wish.
All that’s left to do is polish your six prong ring and admire your handiwork! Making a prong setting can be tricky, but by following our seven simple steps you’ll be able to create beautiful prong stone settings for your own collection or your jewellery making business.

Cooksongold

