Saw piercing is likely to be one of the first major tasks you attempt as a jeweller. It is the first step in the transformation of a simple sheet of metal into something entirely different and holds endless possibilities. Although most of us are familiar with the concept of sawing wood, many find metal a little temperamental at first, which is why we have put together this guide. Our aim is to help you with both tools and technique, which will, (in addition to some patience and practice), start you off on the correct path to successful sawing every time.
Sawing
Saw frames: A jewellers saw frame is similar in style to a small fretsaw and is made of springy steel which holds the blade in position under tension. Blades are held in place by wing-nut clamps at either end of the saw which are tightened by hand. The size of the saw is dictated by the depth from the blade to the back of the frame and they range in size from 3 inch to 6 inch. A 3 inch frame is a good general purpose size for small scale projects, but the choice is down to personal preference.
Another decision you need to make when purchasing your frame is whether you want an adjustable or a fixed design. An adjustable frame allows you to alter the size to accommodate broken blades where as a fixed design will only take standard size blades as they are sold.
There have been some new developments in frame design over the past few years and it is now possible to purchase more advanced versions which create the tension in the saw blade for you. One such design is from a company called Knew Concepts who have a range of lightweight aluminium frames which do not flex. Instead the tension is created via a cam-lever mechanism within the blade clamp, which enables a quick release and positioning of the blade with the flick of a lever. These particular clamps can also be turned 45 degrees which facilitates sawing into difficult areas.
Saw blades: Blades for a jewellers piercing saw are sold in bundles of 12, or by the gross (144) and come in a selection of grades which range from very coarse to extremely fine. Blades are characterized by the number of teeth per cm so for example the coarsest would be grade 4 which has 15 teeth per cm and the finest is grade 8/0 which has 30 teeth per cm. As a general rule, the thicker the metal, the coarser the blade you will need to cut it and vice versa. The table below contains all the information you will need to select the correct blade for the metal in question:
| Saw blade Grade | Blade Thickness mm | Teeth per CM | Drill Size mm | Recommended gauge Of metal mm |
| Saw blade Grade 4 | 0.38 | 15 | 0.8 | 1.0 to 1.3 |
| Saw blade Grade 3 | 0.36 | 16 | 0.8 | 0.9 to 1.2 |
| Saw blade Grade 2 | 0.34 | 17.5 | 0.7 | 0.9 to 1.1 |
| Saw blade Grade 1 | 0.3 | 19 | 0.7 | 0.8 to 1.0 |
| Saw blade Grade 1/0 | 0.28 | 20.5 | 0.6 | 0.6 to 0.95 |
| Saw blade Grade 2/0 | 0.26 | 22 | 0.55 | 0.6 to 0.8 |
| Saw blade Grade 3/0 | 0.24 | 23.5 | 0.5 | 0.6 to 0.7 |
| Saw blade Grade 4/0 | 0.22 | 26.5 | 0.5 | 0.5 to 0.6 |
| Saw blade Grade 5/0 | 0.2 | 28 | 0.4 | 0.4 to 0.55 |
| Saw blade Grade 6/0 | 0.18 | 32 | 0.4 | 0.35 to 0.5 |
| Saw blade Grade 8/0 | 0.17 | 30 | 0.3 | Up to 0.4 |
You will not need to purchase every grade of saw blade; a basic selection of coarse, medium and fine should be perfectly adequate. However, ensure you buy more of the medium grade (2/0 or 1/0) as these are what you will use most often.
Installing a blade into a saw:
- Sit at your bench with your saw frame supported between your chest and the edge of the bench or the ‘V’ of your bench peg. The wooden handle should face you and the blade clamps should be at the top of the frame.
- Position your blade with the teeth at the top, pointing towards you and clamp the end furthest away into your frame using the wing-nut. (Do not be tempted to tighten with pliers as this weakens the screw thread).
- Then push gently against the handle with your chest which will cause the frame to flex, and tighten the second wing-nut to secure the blade.
- Release the frame and check the tension of the blade by plucking it. You are looking for a distinctive ‘ping’ to show the tension is correct. If you don’t hear the ‘ping’ simply undo and repeat the process again until it’s right. (Failure to secure your blade with the right tension will result in it breaking as soon as you start to saw)
Marking out and measuring: Before starting to saw, your metal must be clearly marked and measured so you have a guide to work to. Lines can be scribed onto metal using a scriber or a set of dividers (which are similar to a compass but with two points). If you want to transfer a more complex design onto metal, copy it onto tracing paper and cover the reverse with graphite as normal. Then before transferring to the metal surface, rub it over lightly with Plasticine so that a sticky film is left, which will show up the pencil marks created when you re-trace. Once you have re-traced the design onto the metal, remove the tracing paper and go over the pencil lines with a scriber.
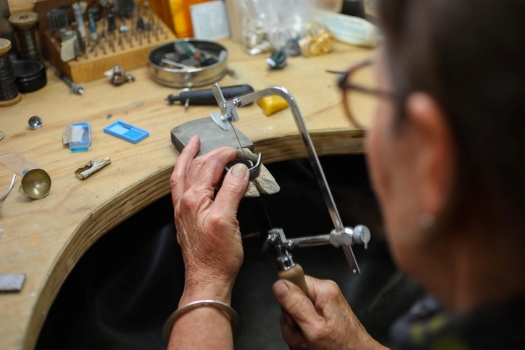
Starting to Saw:
- Seat yourself at the bench and hold the work in position on the bench peg, holding the saw in your opposite hand.
- Your saw should be held in a vertical position with the blade facing forward, and you should be seated so that your working area is around mid-chest height.
- Position the blade on the outside of your marked line and gently draw the blade down. Remove the saw and repeat a couple of times until you have a small indent to guide the blade.
- Now start to gently move the saw up and down remembering that the blade cuts on the downward motion and simply re-positions on the upward. If you are having trouble getting the blade to ‘bite’ you can apply some beeswax which is sold in blocks, to help ease the motion.
- Saw on the outside of your marked line and try to maintain a steady and gentle action.
- Once the cutting is complete, undo the clamp at the top of the saw and pull the frame down to remove it from the work, or simply bring it back along the cutting line if that is possible.
- File the rough edge to finish.
Sawing straight lines: Straight lines are best tackled with the saw tilted slightly forward using long, smooth strokes.
Sawing curves: Curves call for much shorter strokes and require an upright sawing position. You need to gently turn the saw along the curve with each cut, taking care not to force the blade.
Troubleshooting:
My saw blades keep breaking: Don’t despair this is perfectly normal and practise makes perfect. However, check the tension of your blade for slackness and make sure you are using the correct blade size/metal combination.
My saw blades keep sticking: Apply some form of lubricant to ease the sawing motion. Some jewellers use spittle, but you can also use beeswax. Just run it along the blade and continue to saw.
My arm is hurting: Check your seating position is correct and try to relax. Also don’t be tempted to ‘force’ the saw, you are simply guiding it so let the blade will do the work.
Piercing
Why Pierce? Piercing is required when you need access to an area which would otherwise be difficult or impossible to reach e.g. the centre of a circle. By drilling a small hole you provide access to the saw blade which can then be fed through and re-clamped into the frame, allowing you to saw from the inside out, rather than the outside in.
Tools for Piercing: There are many different ways to drill a hole. You can use hand tools or mechanised tools; the principle is much the same. The most important thing to remember when drilling a hole is to keep your drill bit completely vertical and upright. This is why all drilling tools have an adjustable chuck to grip the drill bit tightly, whilst keeping it fully vertical. Chucks are either fully adjustable to take all sizes of drill or interchangeable, meaning you will need to alternate to accommodate different drill bits.
Scriber: A scriber is a fine marking tool with a long and narrow tip. It is used to scribe designs onto metal and can be used to mark the positions for drilling.
Centre punch: A centre punch is also a steel marker with a sharp point similar to a scriber. It has a shallow tip and is used in conjunction with a hammer to mark the position for subsequent drill holes. It is also possible to get automatic centre punches which don’t require a hammer and instead have a push button action.
Bow drill: A bow drill is a traditional hand drill which can be used with one hand. It has a simple twisting mechanism which is created with a pull/push motion using a wooden baton and a piece of string. It is easy to control and is ideal for a beginner.
Archimedian Hand Drill: This is a small spring loaded drill, which works using a handle at the top which is pushed down and pulled back up to rotate the chuck at the tip. This requires both hands to use effectively.
Pendant Drill: A pendant motor is a multi-purpose, mechanised tool which has a suspended motor and a flexible shaft attached to a hand piece, which contains the chuck. It is controlled by a foot pedal and can be used with a huge range of different attachments including drill bits.
Rotary Hand Drill: Rotary hand drills have the motor contained within the hand piece and either run off of the power supply or can be charged up to use cordless. They have the same multi-purpose functionality of a pendant drill and can be used with a wide range of accessories. Rotary hand drills can be used in conjunction with a drill stand to ensure vertical drilling.
Bench Mounted Pillar Drill: This is the ultimate drilling tool and is used for solely that purpose. A sturdy base is combined with a movable chuck mounted on a column, which is controlled by a lever at the side. The base can facilitate a clamp to hold work securely helping to ensure a precise result every time.
Drill bits: The most common type of drill bits are twist drills which cut when rotated in a clockwise direction. They are made from a variety of toughened materials and range in size from 0.3mm upwards. Drills can become blunt surprisingly quickly so it’s advisable to buy multiples of the sizes you use most frequently.
Piercing an access hole for sawing:
- Once your design is scribed onto the metal, identify a position within the waste material to drill a suitable hole.
- Mark the position with a scriber or centre punch.
- Select the correct drill size to correspond with the saw blade you intend to use, (please refer to chart) and insert into the chuck making sure it is gripped tightly.
- Drill the hole. Start slowly making sure the drill bit has found its position. Once in position increase the speed and push down with a gentle but continuous pressure until all the way through.
- Now, undo your saw blade at the clamp nearest the handle and thread the blade through the hole from the top. Once through, re-clamp your blade making sure the tension is correct.
- Saw out your shape.
- Once sawing is complete, remove the saw by un-clamping the blade nearest the handle again.
- File to finish.
Troubleshooting:
The drill keeps moving around and won’t find its position: Make sure you have marked the drilling position clearly with a tiny dent to guide the drill. Also ensure the drill is fitted correctly into the chuck, it may not be straight. Above all, ensure the drill itself is fully upright.
The drill is getting too hot: If the drill overheats you can cool it down using a small amount of water or an oil based drilling coolant. Failing that, simply stop and allow the tools to cool down.
My drill isn’t cutting: If the drill bit won’t ‘bite’ it may be because it is blunt or that the metal you are using is too hard for that particular type of drill. Some drills are tougher than others so check their suitability before you buy.
My drills keep breaking: A blunt drill bit will break more easily, as we instinctively apply more pressure if it doesn’t appear to be cutting. They are also prone to breakages if not secured correctly in the chuck.

Cooksongold