Thinking of investing in a jewellery rolling mill? The Cooksongold rolling mill is an excellent option for beginners who are just starting out and professionals who need to update their equipment with a new, affordable option.

Already picked up the Cooksongold rolling mill? Watch our video tutorial and use our step by step instructions to set up your rolling mill correctly and safely, so that you can get to work.

How to set up the Cooksongold rolling mill

So you’ve purchased your Cooksongold rolling mill, and now it’s time to set it up. Not sure how? Just follow the instructions in our visual guide below.

  1. Make sure your rolling mill is fixed to your workbench before you start to piece everything together. This will help you to quickly fix all of the rolling mill components together without it shifting about.
  2. Before you piece all of the components together, you’ll find that some of them may be a little greasy. This is completely normal. Simply use a paper towel to remove excess grease that could interfere with your bar rolling mill process.
  3. To add the handle of your Cooksongold rolling mill, you’ll first need to remove the nut and washer from the lowest small cog at the side of the mill.
  4. Pop the lever into place and reattach the washer and nut, until it’s finger tight. Follow up with a wrench to fully tighten.
  5. For easier access, lift the lever to its highest point and add the handle by screwing into place. Add the bolt to the back of the handle and continue screwing until it’s fixed firmly in place.
  6. Now take the working handle and place this between the screw gears at the top of the rolling mill. Twist to make sure it’s properly in place.

How to use a rolling mill for jewellery making

Now that you’ve safely set up your jeweller’s rolling mill, you can get to grips with the basics and start to experiment with texturising techniques. Read our guide on how to use a rolling mill for jewellery making to discover more information on rolling sheet, shaping wire, and more rolling mill techniques, tips and tricks. Or, watch our video below on some of our top hints and tips on using your Cooksongold rolling mill.

What else comes with the embossing rolling mill?

So, what other rolling mill accessories come with our embossing rolling mill?  are several different components that come with our mill so that you can use the tool for lots of different techniques. Here’s what you can expect to get from the rolling mill accessories that come with your tool.

You’ll receive:

  • Two smooth rollers: Use to flatten out bent sheet metal and add texture along with other materials sandwiched between sheet metal.
  • Two textured rollers: Each roller has two different textures to add to sheet metal. Use to create a cracked, leathery effect, a subtle lined effect, a subtle square check effect, or a subtle cross hatched effect.
  • One wire roller: Use to form wires into a d shape or v shape cross section.

Some textures to try with your embossing rolling mill 

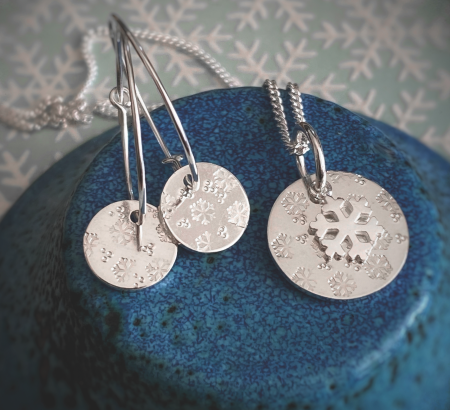
Don’t forget to experiment with more textures and objects that could be embossed into your sheet metal. For a closer look at how each roller works and for more inspiration, watch our video with Dave Wilson on texturising below.

How to service your jeweller’s rolling mill

Stripping down and servicing your rolling mill is simple. With just a few tools and the right know-how, it should only take ten minutes. Follow along with Dave Wilson in our video below and make sure that you keep your rolling mill in good condition.

  1. Remove the key at the top of the rolling mill.
  2. Take a 13mm spanner and loosen the screws at the top of the rolling mill. Once loose you should be able to remove the top section completely.
  3. Remove the top and bottom rollers, leaving the springs to one side.
  4. Now take the cogs off the rollers, keeping the washers and bolts safely stored together.
  5. Grease the end of the rollers but do not get any grease or oil on the working surface of the roller. This will ruin the roller. You only want to move the ends of the rollers that will be moving inside their blocks.
  6. Reattach the washers and bolts once you’ve greased the ends of the rollers. As you do add a little grease to the ends of the bolts.
  7. Repeat this process for all of the rollers.
  8. Take the main unit and run some grease on the inside channels that are not painted. This is where the rollers move up and down on their blocks.
  9. As you piece the rolling mill back together, make sure that you wipe any excess grease off the roller surfaces as you go.
  10. Grease the springs between the rollers if you think they need it, and don’t forget to grease each bolt as you piece the tool back together.

And there you have it! Now you’ve digested all of our information on the Cooksongold rolling mill, we hope you’ve found our video guides useful. Now you’re fully equipped to use the Cooksongold rolling mill to create some new and interesting textures for your latest jewellery making projects.

Save this for later

Author: Cooksongold
Written by

Cooksongold