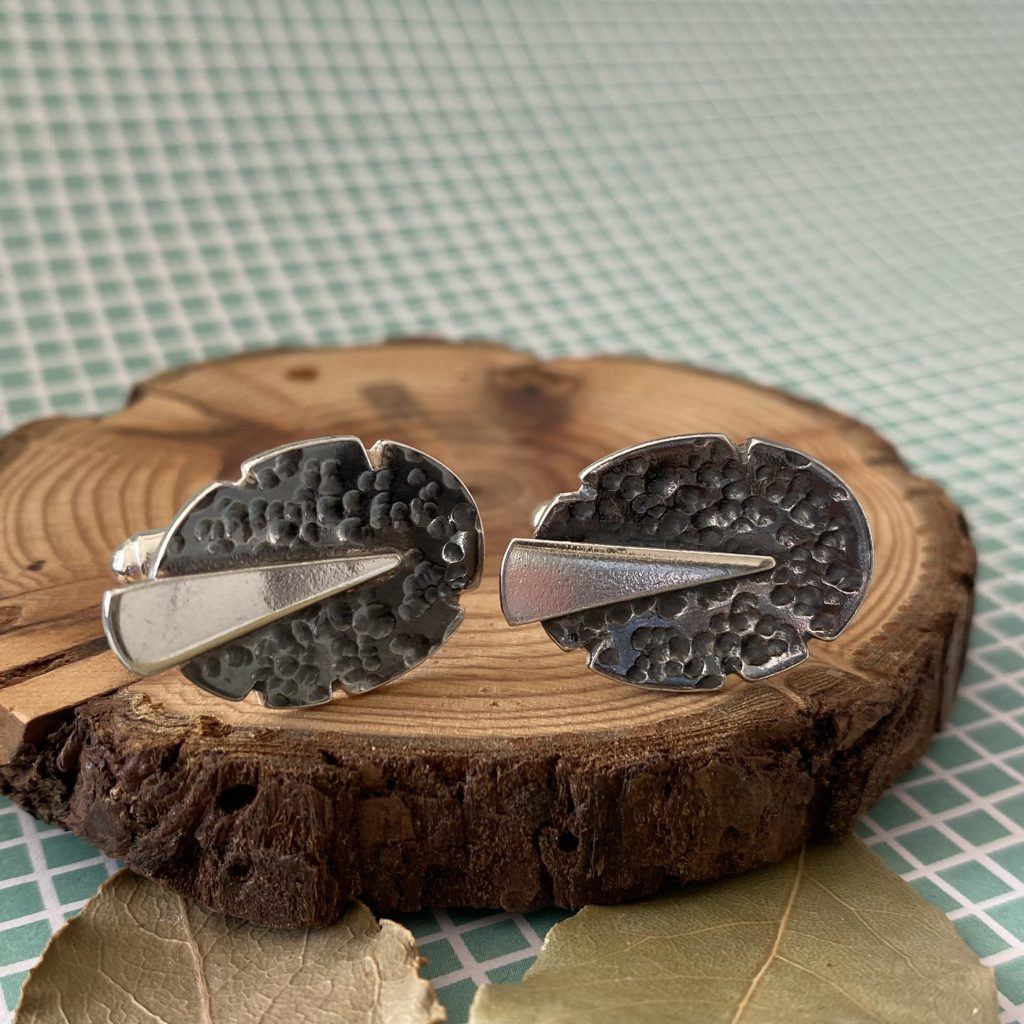
Create something different with these winter-leaf inspired cufflinks. Gift a unique handmade present or create something special for yourself.
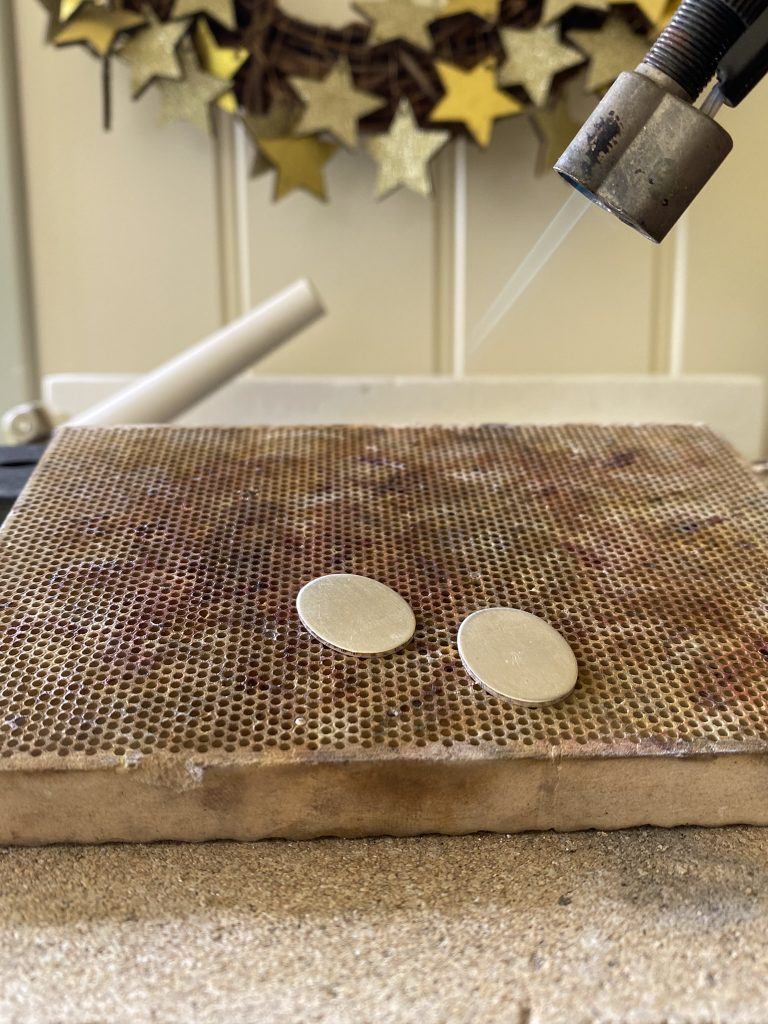
Step 1
Place each oval blank on the soldering block and use a hand blow torch to heat each one evenly until the Silver glows. Quench in water and add to a warm acid pickle to clean.
Heating the metal oval softens the metal and makes it more malleable before hammering.
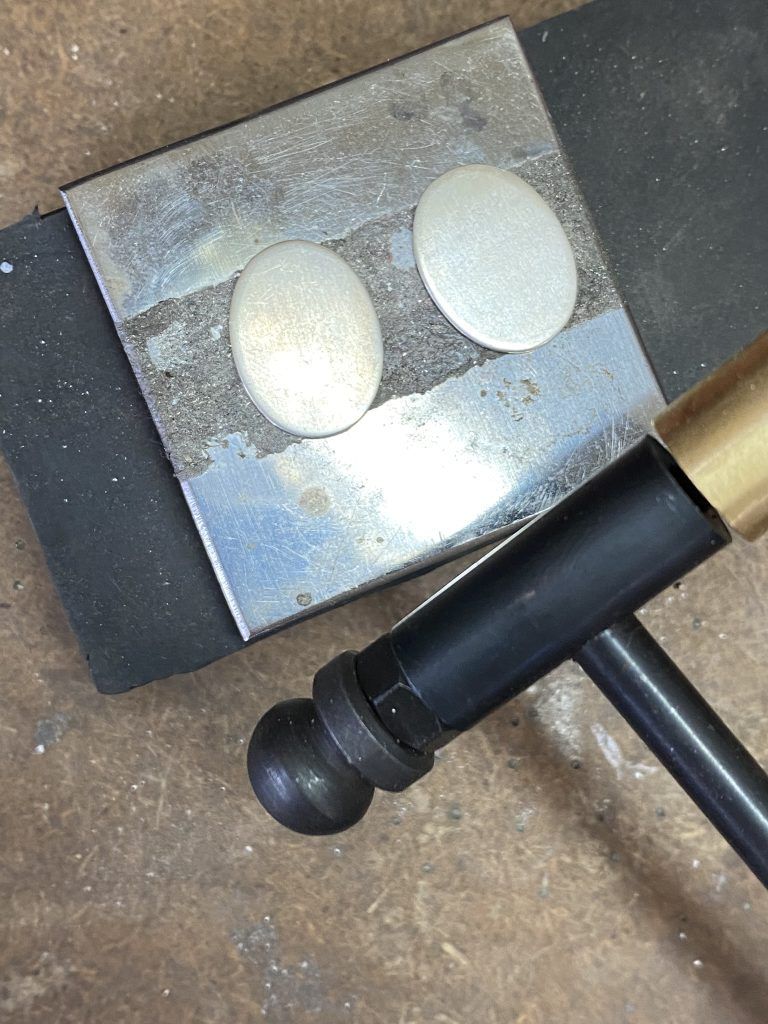
Step 2
Place an oval blank on a flat stable surface or metal block and use a craft hammer or ball ended hammer to hammer texture all over the oval. Repeat on the next oval.
Experiment with how hard you need to hit the oval to add the amount of texture you desire.
Step 3
When clean and dry, take an oval Silver blank and use a needle file to file away sections of the sides and add detail. Repeat on the other oval blank.
Think about where you file and if you want the cufflinks to be a mirror image of each other and match, or not.

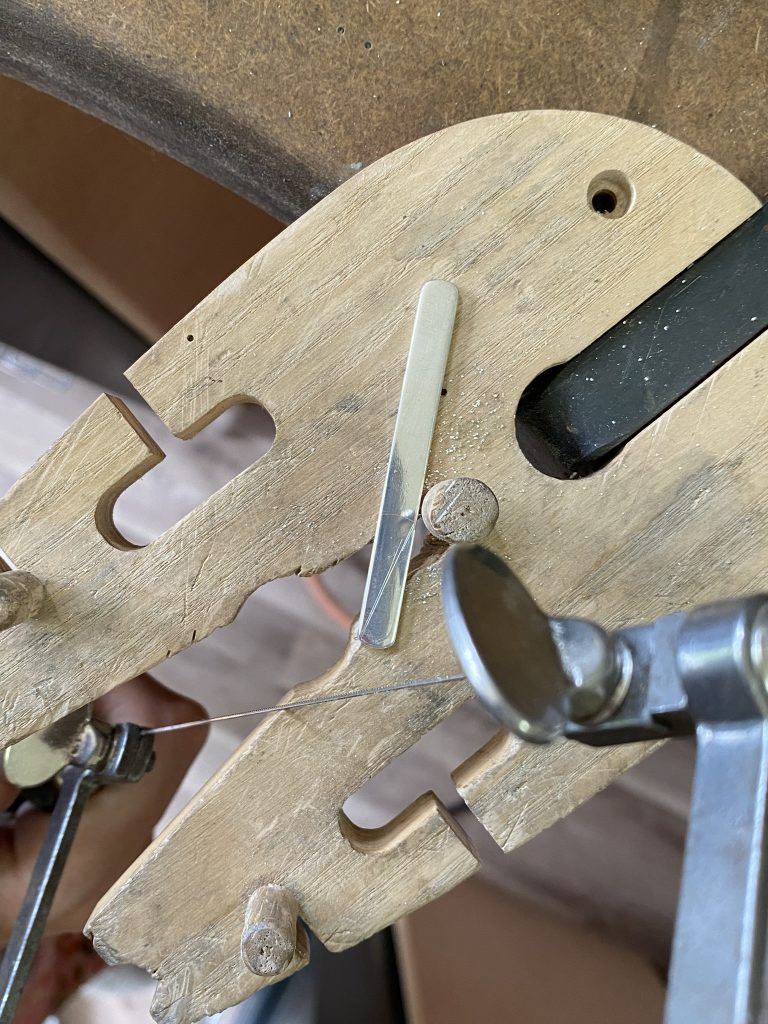
Step 4
Take the Silver ring blank and draw out a diagonal line across half the length. You can use a scribe or a pen. Then, rest the length of Silver on your bench peg and use your piercing saw to cut along the line and create a thin triangle. Cut off the remaining piece.
Step 5
File the edges of each piece of Silver smooth with the flat side of a needle file and use micromesh or emery sticks to ensure they are completely smooth.

Step 6
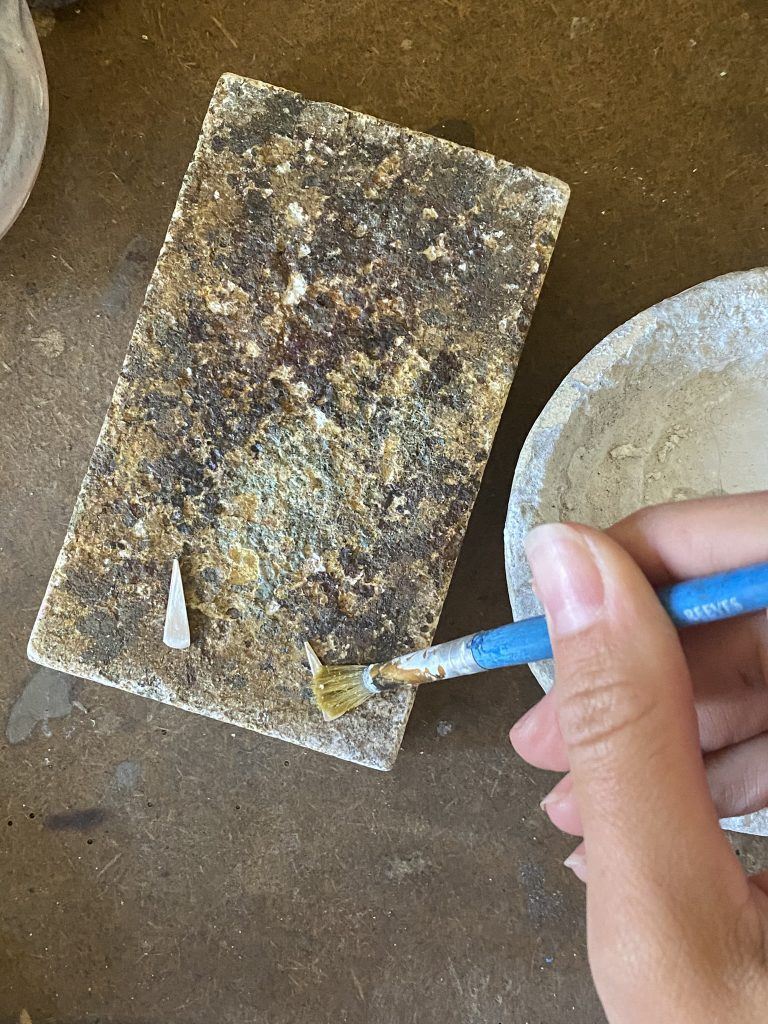
Gently clean the top surface of each length of Silver with micromesh or an emery stick and place both pieces on the soldering block. Apply a layer of flux using a paintbrush.
To make your flux, add a small amount of water to your borax dish and rub the borax around the dish in circles until you create a thick yoghurt consistency.
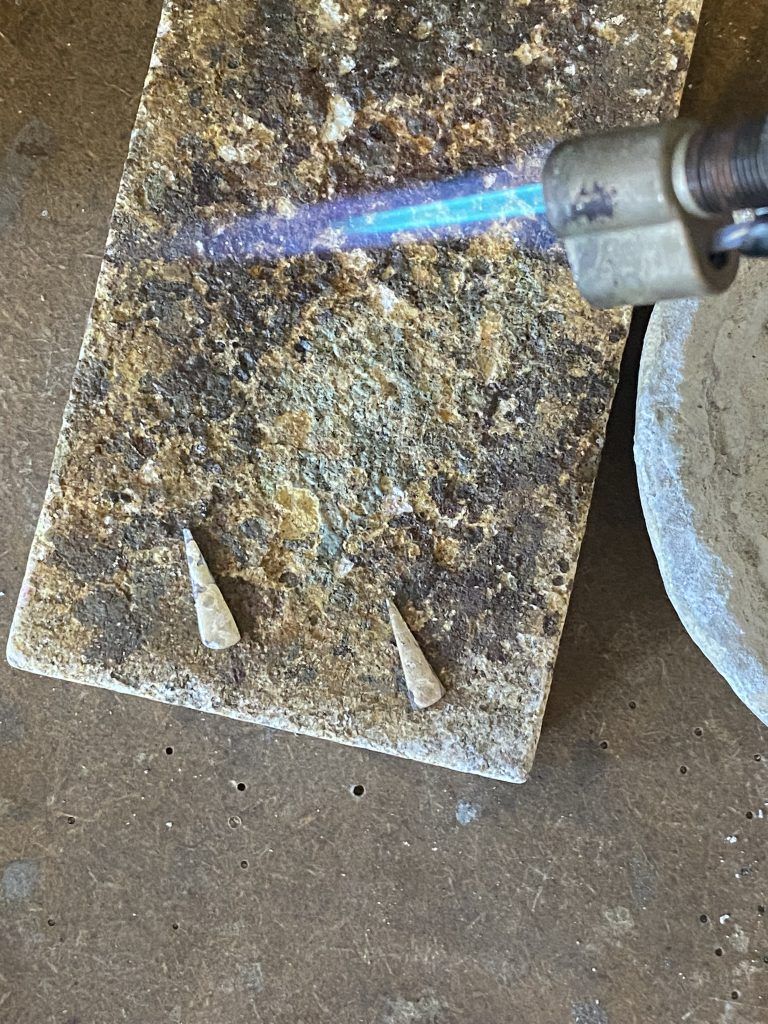
Step 7
Cut off three small pieces of medium solder and add a piece to both ends and one in the middle. Repeat on both pieces of Silver.
Gently and evenly heat each Silver piece with a hand blowtorch until the solder melts and flows across the entire piece of Silver. Quench the Silver pieces and add to a warm pickle. When clean and dry, use the micromesh and emery sticks to remove any lumps or uneven solder from the surface of the Silver pieces.
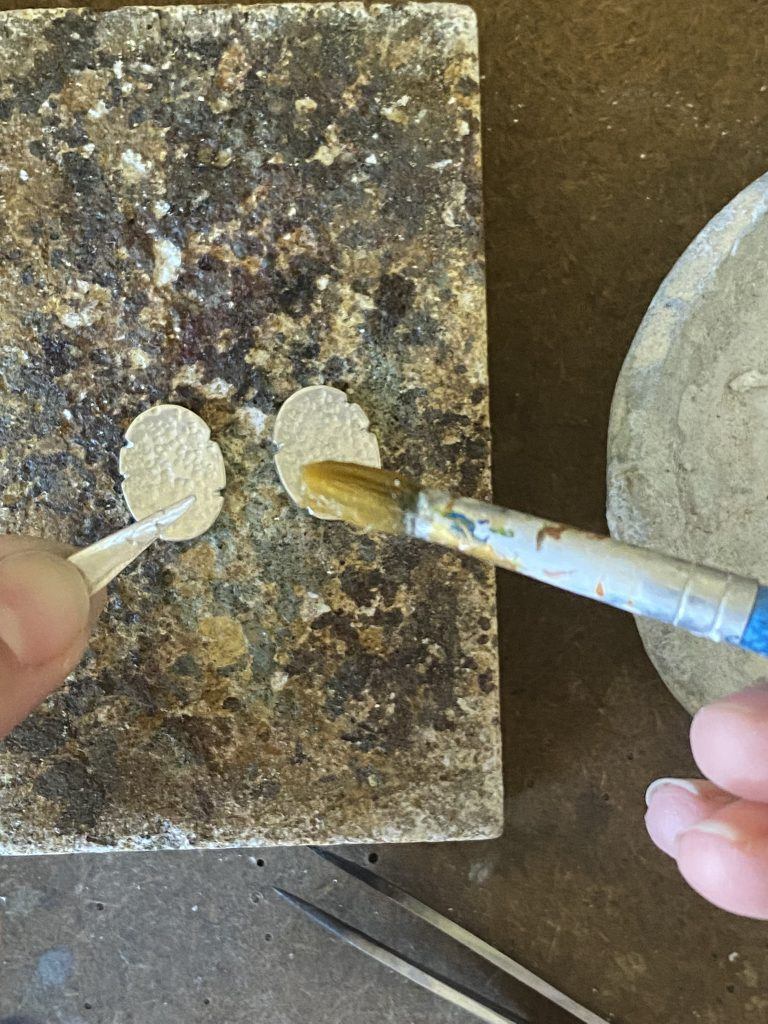
Step 8
Add the Silver ovals (texture side up) to the soldering block, add flux to the solder side of the Silver pieces and place these face down on the ovals. Check that all of the Silver pieces sit flush on the oval.
Then heat each oval evenly with a hand blowtorch until the Silver melts and flows joining to the two pieces together. Repeat on the other oval. Quench in water and add to a warm acid pickle.
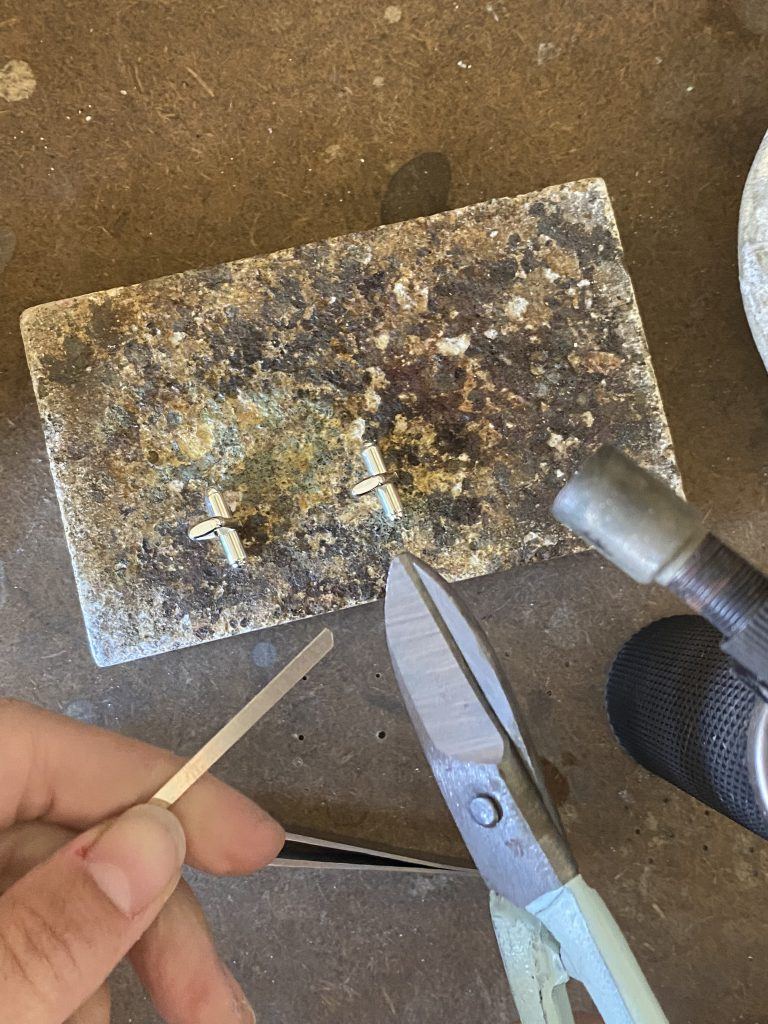
Step 9
Place the fittings on the soldering block. Add flux to the top and a small amount of easy Silver solder.
Gently and evenly heat the cufflink fitting with a hand blowtorch until the solder melts and flows across the top. Leave to cool and add the fittings to a warm acid pickle.
Step 10
When clean and dry, gently remove any uneven solder with micromesh or an emery stick.
Step 11
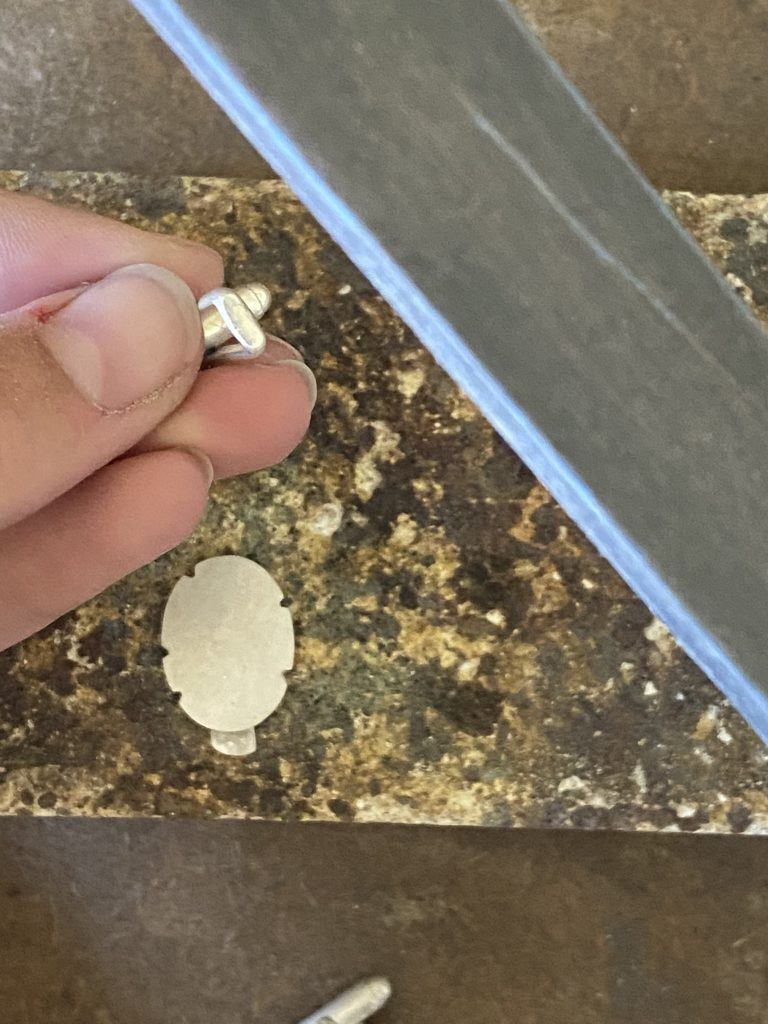
Place the Silver oval face down on the soldering block. Position the cufflink fitting top down to sit flush on the top of the oval in the centre and secure with reverse action tweezers.
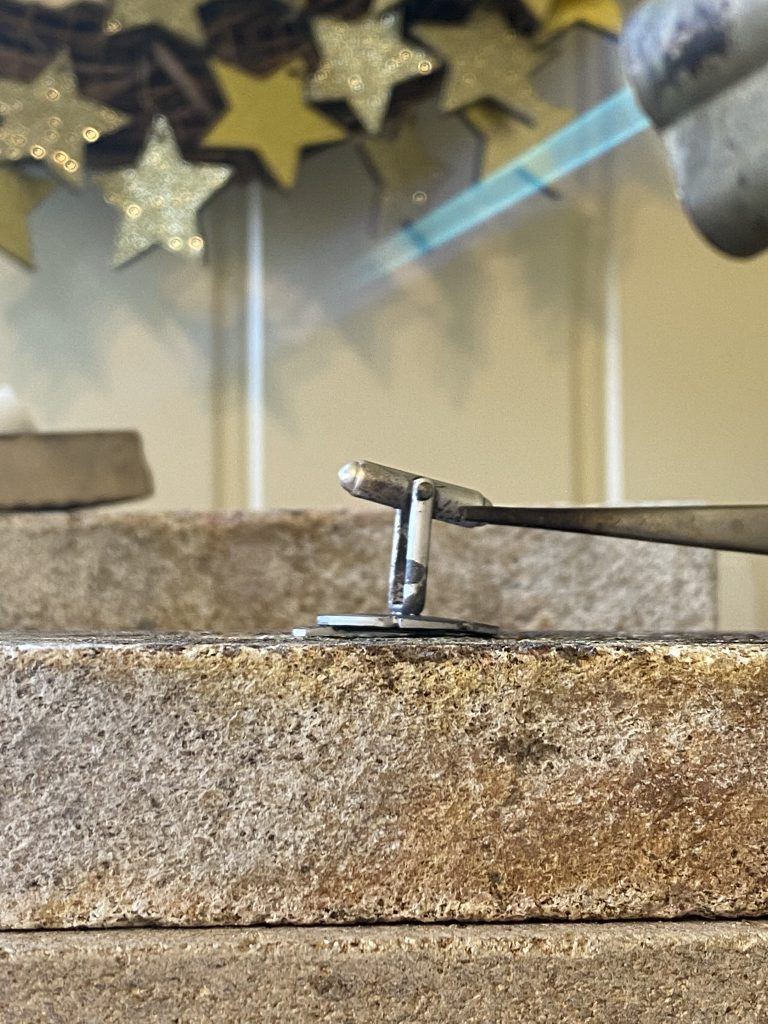
Step 12
Heat the oval Silver first with the hand blowtorch and then the cufflink until both are up to temperature and the easy solder melts and flows to join the cufflink fitting to the Silver oval. When cool, add to a warm acid pickle.

Step 13
When clean and dry, use a polishing cloth to bring out the shine to the Silver or add to a barrel tumbling machine with shot, barrellbrite and water for ½ an hour.
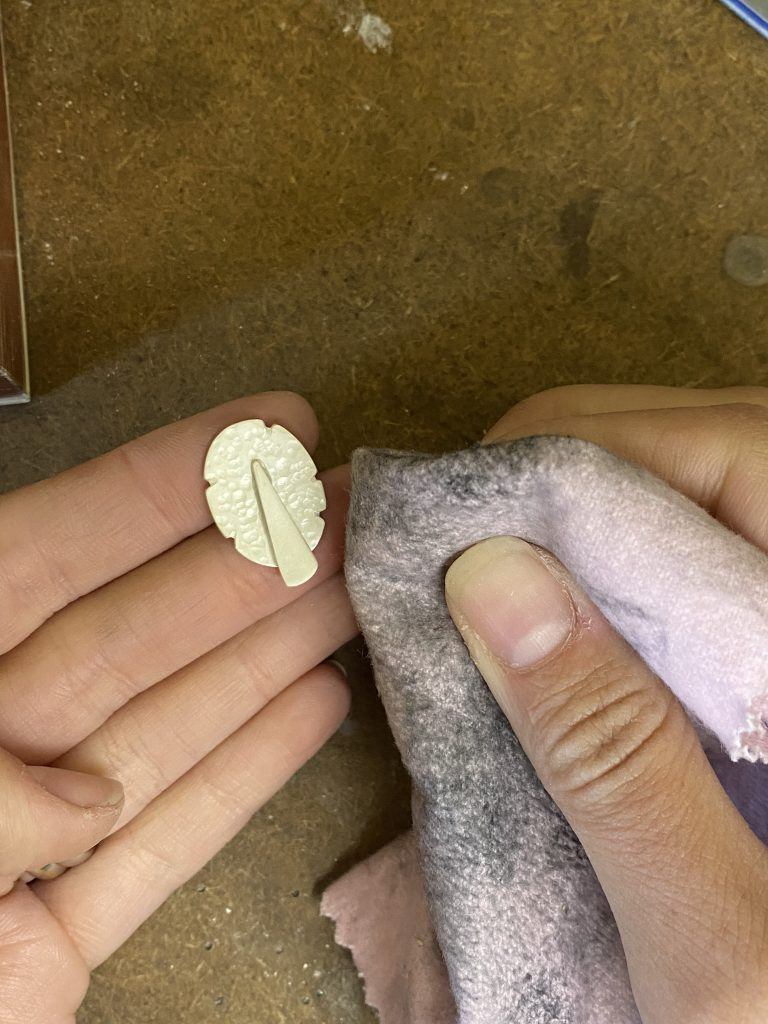
Step 14
To oxidise, use a synthetic brush to apply Platinol to the surface you wish to darken. Carefully follow the instructions on the bottle.
You can also use other oxidizing solutions on the Cooksongold website. Always follow the instructions.

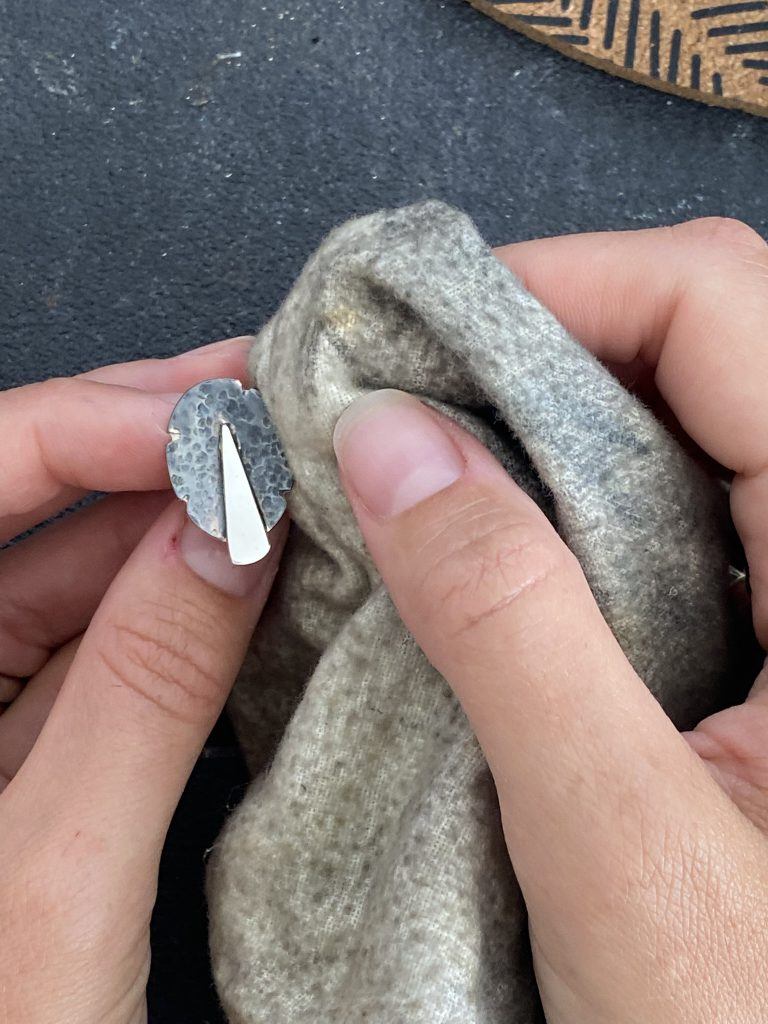
Step 15
When dry, polish with a polishing cloth to bring out the detail and texture.
You’re done! We hope you enjoy wearing or gifting your Textured Leaf Cufflinks. If you have any questions or want to know more, get in touch with us on Facebook, Twitter and Instagram. We’d also love to see what you’ve been making so please share pictures of your creations with us too, tagging Cooksongold.

Sian Brown
Sian has been hand making her award winning jewellery in the West Midlands for over 12 years. Sian spent 10 years in Birmingham’s historic Jewellery Quarter before relocating to a quiet Worcestershire village.