Step 1:
Start by cleaning your work surface and tools with a damp soft cloth (baby wipes also work great for it!) make sure there is no dust left. It will get into your clay and it will make your piece porous/fragile after firing.
Step 2:
Lubricate the roller, Teflon sheet and your hands, take half of the clay and roll it out to get an even surface where you can draw your heart shape twice. Do not roll all the clay on the same direction, rotate it so you can get a uniform shrinkage when firing.
On one of the heart shapes, draw a circle. Remove all clay excess and keep it on some wrapping film on the storage pot.

Step 3:
With the water brush, paint the surface of the heart with no hole. Carefully lift the heart with the hole and place it over the wet one. With the same brush “paint” the sides and the hole to make sure they glue together.
Step 4:
Make a hole where you want to put your jump ring.

Step 5:
Let it dry.
Step 6:
Sand it until you are happy with it. Remember that the more work you put before firing, the beter your finished piece will look!
Step 7:
Fire as per clay manufacturer instructions (torch fired or kiln fired).

Step 8:
Brush it with the steel brush to remove the excess of material from firing and use the burnisher to make it shine!
Step 9:
Apply pebeo paint on the hole and wait until it is completely dry, re-apply if needed.

Step 10:
Put the jump ring on.
Step 11:
Add the chain.
Step 12:
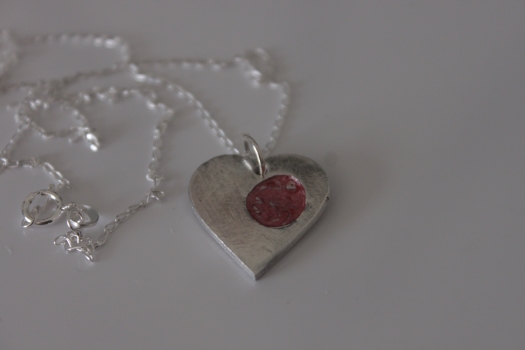
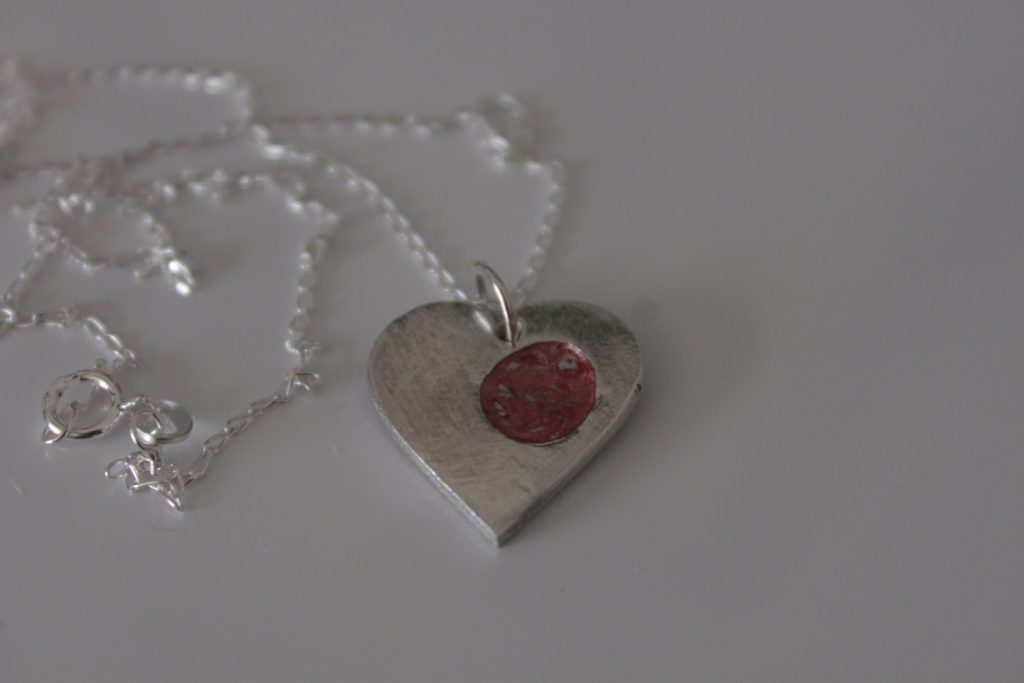
Ready to use!


Silvia Argüeso