Want to make your someone a more meaningful gift this Christmas? Why not try creating this Christmas tree and star pendant which can be customised for a unique design that is truly yours.
Step 1: Shaping Up
Using a Christmas tree and a star template, draw around the designs on silver sheet with a scribe. Then, cut the shapes out carefully with a piercing saw. Refine and neaten the edges with a selection of needle files and round off any sharp edges.


Step 2: Stamping the Sheet
Place the tree shape onto a steel bench block and strike the ImpressArt star stamp onto the shape using a hammer. Repeat up to 3 times. You may need to re-flatten the metal with a wooden mallet.

Step 3: Drill
Drill a hole at the top of the tree shape and near one edge of the star. Avoid drilling too close to the edge of the metal.

Step 4: Sand the Surfaces
Sand the surfaces using various grits of sanding papers and then attach the oval jump rings to the star and tree shapes. Use a needle file to enlarge holes if needed. Then join the two with one round jump ring.

Step 5: Solder and Sand
Solder the jump rings closed and place in a pickling bath. Don’t forget to sand off any excess solder!

Step 6: The Big Finish
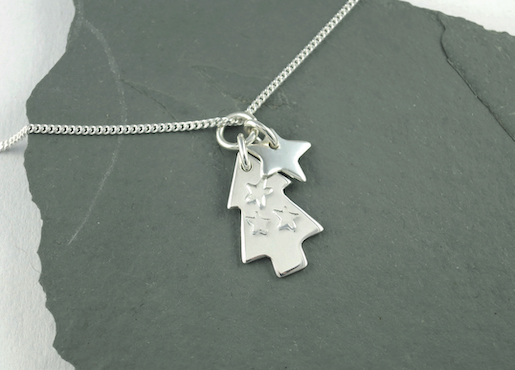
Polish your items to a high finish, clean and finally run the chain through the round jump ring. And, there you have it! A wonderful Christmas tree and star pendant necklace!

We hope you’ve enjoyed our article about how to make a Christmas tree and star pendant. If you have any questions or want to know more, get in touch with us on Facebook, Twitter and Instagram. We’d also love to see what you’ve been making so please share pictures of your creations with us too, tagging @Cooksongold!

Zoe Davidson Jewellery
Zoe Davidson draws much of the inspiration for her unique jewellery from Orkney’s seas, coastlines and rich history. She designs and makes all her pieces, mixing traditional silversmithing techniques with more unusual processes, including fold-forming and anti-clastic raising.