Here at Cooksongold we know how much skill it takes at creating and designing a model for precious metal casting.
You have all the flexibility of creating an innovative CAD design but casting in precious metal can still require certain design guideline elements to ensure that your design is printed to the best of quality.
This blog post will share our top tips to follow to ensure you have the perfect castable design.
Lets get started!
Our top tips to produce the perfect CAD design
- First of all you need to find the right CAD software for you! There are plenty of softwares you can choose from dependent on ease of use and cost. We offer the most popular options on our website with pros and cons to make it easy for you to choose. Explore your options and get comfortable with the software you have selected!
- Next envision your design and decide your base layout, this is key so your design can be built upon with the correct support
- Follow the correct design guidelines to ensure your design is printable: Some of the key things to follow include:
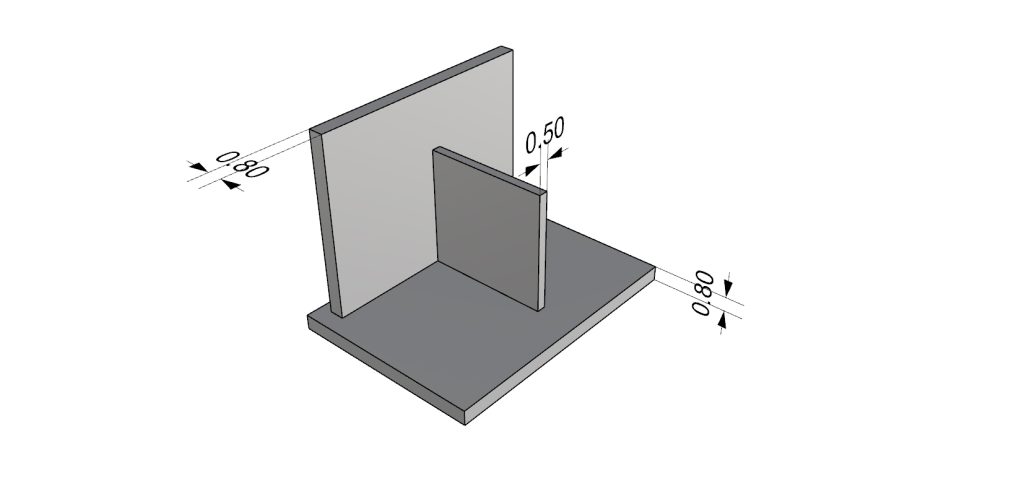
- Wall thickness: Your design needs to be a certain thickness to be able to withstand the casting process. We would advise structural and external walls to have a minimum metal thickness of 0.8mm with smaller elements such as claws or small setting bezels to have a minimum metal thickness of 0.5mm.
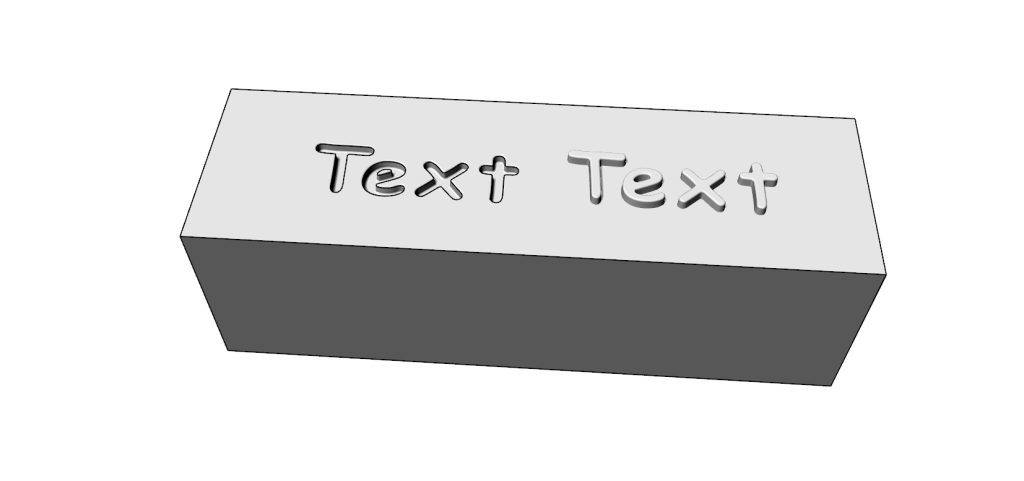
- Detailing: When adding detail to your design e.g text Raised text must be 0.30mm thickness at a minimum and no more than 0.60mm high with a spacing of 0.30mm between letters. Recessed text must be 0.30mm thickness at a minimum and no more than 0.50mm deep with a spacing of 0.30mm between letters.

- Edges: Create softer and rounded edges for the best results in your design however: If you do have a sharp external edge, we would recommend either thickening the edge to 0.30mm or using the fillet tool to create a soft 0.30mm radius. The same applies to a sharp internal edge.
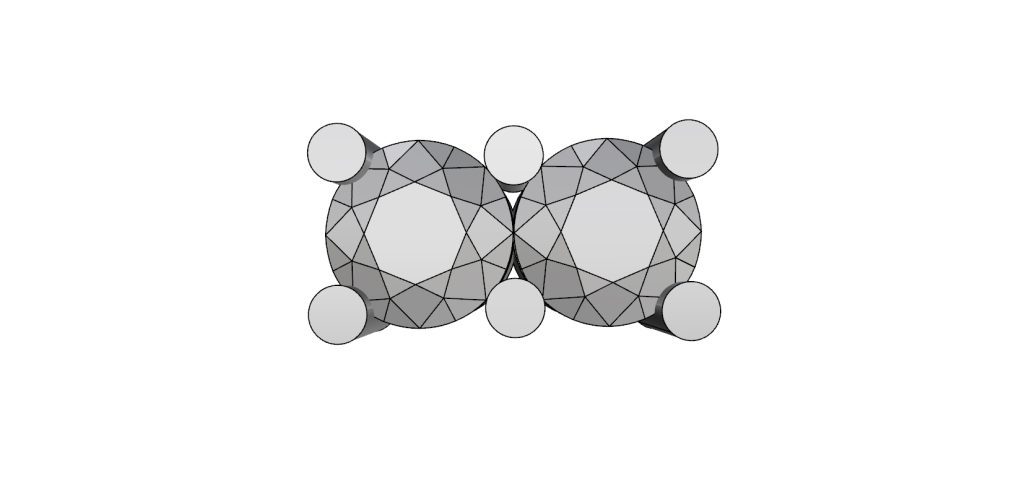
- Small holes: Small holes should be avoided as they will cause issues during the process. Holes should be no smaller than 0.50mm at a minimum. Fill the holes during the CAD process and if you do need to create pilot holes for setting then use a conical/spherical shape to create a guide for a drill to be used once printed. It is better to keep the width of the pilot divot larger than the depth.

- Hollows: Unfortunately, we cannot process hollow pieces. To get around this you may be able to print two halves and solder/weld the two pieces together once printed.
- Check for file compatibility file types: we accept STL or 3DM
- Choose the correct size and material for you: We offer silver, platinum and 9ct or 18ct red, yellow and white gold
- Make sure your product is scaled correctly: Size matters! Take into account shrinkage.
- Finally once your design is ready, simply upload it here see your instant price quote and let us take care of the production process for you!
Written by
Ann-marie Robinson