
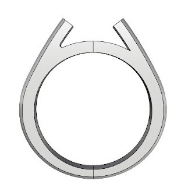
Designing jewellery pieces that align with our casting capabilities is essential for achieving high-quality results. By adhering to specific design guidelines, you can ensure your creations are both aesthetically pleasing and structurally sound. Here are some top design tips to optimise your pieces for effective casting with us:
1. Ensure Your Model is Watertight
Before uploading your design, make sure it is watertight, meaning it has no naked or non-manifold edges. These issues often arise from shared edges or points. Overlapping areas or thickening certain points can help resolve these problems, ensuring a seamless casting process.
2. Adhere to Size Constraints
Designs must fit within the maximum dimensions of 30mm x 50mm x 70mm. Files exceeding this size will not be processed, so it’s crucial to scale your designs accordingly.
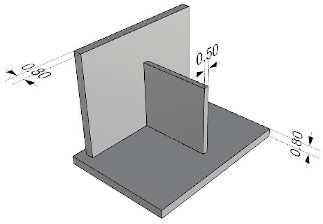
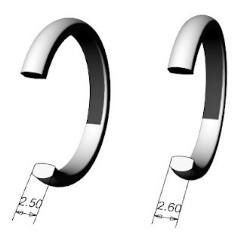
3. Wall Thickness
Ensure that external walls have a minimum metal thickness of 0.8mm. Smaller elements, such as claws or setting bezels should have a minimum thickness of 0.5mm. Note that earring posts are not recommended for printing due to their delicate nature; it’s advisable to solder these components after casting.
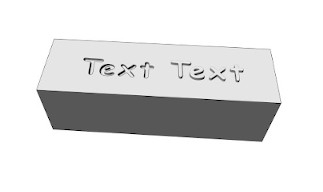
4. Optimise Text and Detailing
When incorporating text or intricate details:
- Raised Text: Should be at least 0.3mm thick and no more than 0.6mm high, with a minimum spacing of 0.3mm between letters.
- Recessed Text: Should be at least 0.3mm thick and no more than 0.5mm deep, with a minimum spacing of 0.3mm between letters.
Applying a negative draft angle (taper) and avoiding sharp edges by rounding or filleting can enhance the clarity and quality of these details.
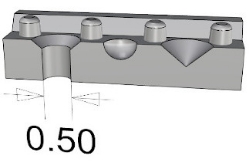
5. Avoid Small Holes
Holes smaller than 0.5mm can cause issues during casting. It’s better to fill these holes during the CAD process. If pilot holes are necessary for settings, use conical or spherical shapes to guide drills post-casting, ensuring the width of the pilot divot is larger than its depth.
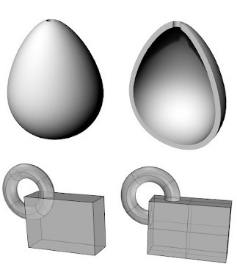
6. Design Solid, Single Pieces
We cannot process hollow pieces. If your design requires such features, consider casting two halves separately and then soldering or welding them together. Similarly, interlocking or multiple-piece designs should be cast as individual components and assembled afterward.
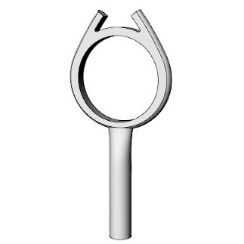
7. Leave Sprue Placement to Us
Sprues are channels that allow molten metal to flow into the moulds during casting. Our team determines the optimal placement for sprues based on your design. Adding sprues yourself can increase the STL file’s volume and consequently, the cost. If you have specific preferences for sprue placement, it’s best to communicate them directly with the team.
8. Account for Shrinkage
Shrinkage occurs during the printing process. Cooksongold applies a scaling increase to compensate for this, ensuring the final cast matches your intended dimensions.
9. Plan for Finishing
Cast parts are delivered in a semi-finished state, with the majority of the sprue removed. This allows you to finish the products to your desired quality. Keep in mind that polishing can remove approximately 0.1mm of material, depending on the processes used. Adding extra material to areas intended for a high-shine finish can help maintain the desired dimensions after polishing.
By preparing your designs with these guidelines, you are able to fully utilise our casting capabilities, resulting in high-quality, precise and beautiful designs.
For more information on our casting guidelines visit
www.cooksongold.com/precious-metal-casting/design-guidelines

Sian Brown
Sian has been hand making her award winning jewellery in the West Midlands for over 12 years. Sian spent 10 years in Birmingham’s historic Jewellery Quarter before relocating to a quiet Worcestershire village.