Does your jewellery need an extra boost to restore it to its former self before selling? Cleaning jewellery with an ultrasonic can provide just that, leaving your pieces looking as good as new. Whether you’re looking to clean a bracelet, rings or a necklace, just follow our step-by-step guide to find out what you need to do! Discover how to clean jewellery using Elma Ultrasonics by watching our video tutorial and reading our guide below.
How to use an ultrasonic cleaner video tutorial
What is an Elma Ultrasonic Cleaner?
An Elma Ultrasonic Cleaner is a jewellery cleaning device that uses a combination of ultrasound waves and chemicals to get rid of dirt, tarnish, oil and polishing compounds from your precious metal jewellery. To do so, high-frequency waves are used to remove any unwanted or foreign particles from your jewellery by creating bubbles that gently cling to the dirt. The bubbles then agitate the liquid, which produces high forces that eradicate said substrates, leaving it looking shiny and free from any contaminants.
Why should you use an ultrasonic jewellery cleaner instead of cleaning it manually?
The main reason is that the Elma Ultrasonic can reach all the particles that you couldn’t reach manually. Not only this, but an ultrasonic jewellery cleaner can clean most metals and gemstones – just avoid using it on any diamonds or gemstones that have been treated to give them a brighter colour, as this could damage them. For a high-quality, professional finish, invest in an Elma Ultrasonic jewellery cleaner.
What do I need for cleaning jewellery with an ultrasonic cleaner?
Before you get started, there are a few things you’ll need to prepare first. Make sure you have all the right kit and double-check that your piece is safe to go in the cleaner. Here’s what you’ll need for cleaning jewellery with an ultrasonic cleaner:
Kit list
- Elma Ultrasonic
- Elma Ultrasonic Basket
- Elma Ultrasonic Cleaning Solution
- Gloves
- Water
- Dirty Jewellery
- Measuring jug
How to clean jewellery with an Elma Ultrasonic: step-by-step
- Safety first. Put on your gloves to protect your hands from the chemicals in the solution. Then you’ll need to mix the water and solution (with a ratio of 9:1) in the ultrasonic cleaner.
- Settings. Consulting the manual, set the correct time and temperature for cleaning jewellery. Depending on the size, and how dirty the jewellery is, the amount of time can vary between 1 – 20 minutes. Then de-gas to clear any air bubbles before you begin.
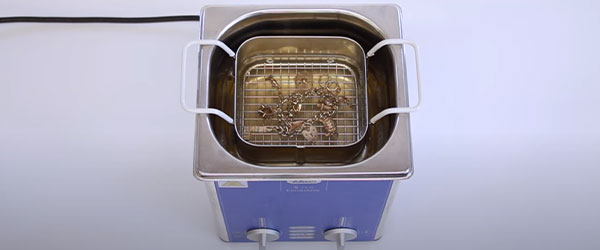
- Preparation. Before placing it into the tank, ensure that your jewellery is spread evenly in the basket and don’t overload it with too many pieces as this could lead to scratches. Also, take care to prevent the basket from touching the base of the cleaner.
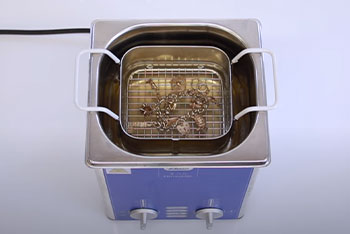
- Cleaning. Allow the cleaner to run until the timer goes off to make sure the jewellery is completely clean. Once it’s done, let the jewellery sit for 10 minutes to allow the leftover contaminants to settle.
- Rinse and clean. Next, remove the basket from the cleaner and rinse the jewellery under cold water to remove any excess solution left on the piece. Using a soft brush, remove any residual dirt then rinse again and dry with a soft cloth.
And you’re done! You can admire your newly clean jewellery. Now you know how to clean jewellery with an Elma Ultrasonic, you should be ready to give it a go yourself. Make sure you have all the tools you need in our Elma Ultrasonic Cleaning Technology range. Looking for more advice? Browse through our equipment & technique focus blogs for a variety of helpful jewellery making blogs.

Cooksongold