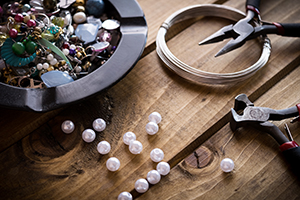
We know that starting your jewellery making journey can be overwhelming which is why, as a part of our how to make jewellery hub we’re giving you some helpful advice, tips, guides and more on a range of jewellery making. Here we’ve listed what we think are some of the essential tools that you will need as you start your beading journey…
Beading is a creative and fun activity to learn when you’re looking for a new hobby or wanting to expand your design repertoire. As well as there being a vast amount of beads to choose from, it can also be difficult to know which essentials tools and accessories you need. On this page, we have compiled a range of tools that are needed for beading.
Design boards have to be up there as one of the most useful beading accessories. In short, they allow you to plan and lay out your design prior to stringing. The grooves are where you place your beads, and they allow you to experiment with colour and design whilst maintaining an overall shape and length. The measurements around the edge allow you to calculate the total length of a piece providing the beads are placed tightly together. And finally, the containers simply hold the beads whilst you work. All in all, a brilliant piece of kit.
Good storage is absolutely essential when dealing with potentially hundreds of different colours and sizes of tiny beads. Ideally, you need containers within a container which will allow you to separate colours and sizes easily whilst remaining visible and within easy reach. Bear in mind that buying stackable options will minimise the amount of space you’ll need to store the bead and tools.
Although any soft material will help prevent your beads from rolling in all directions whilst you are working, a bead mat has been specifically designed for the job and will ultimately do it much better. Often with added cushioning and a sticky surface, they also make a very comfortable surface to work from.
Pliers form the backbone of most jewellery toolkits and beading is no exception to this. Pliers are used to shape, bend and loop wire. They come in a range of different profiles, but the most commonly used are flat nose and round nose, so this is a good place to start. Round nosed pliers can be used to make loops, curves and jump rings, and flat nose (as the name suggests) flatten and straighten but also create bends and right angles, all useful in beadwork. If you can get sprung versions, which simply bounce back when used which ease fatigue in the hands and make the action just a little easier.
A bead reamer is a long, narrow file that can be used to either increase the size of a bead hole or to tidy up the finish of a bead hole, removing rough edges and any excess debris that was created when the bead was formed. You can pick up bead reamers with long tapered edges to make bead holes large, or a cylinder reamer to touch up rough edges. Your cylindrical bead reamer is particularly useful when working with ceramic or glass beads where the holes need to be gently filed to remove any sharp edges around the bead hole. Look out for bead reamers with diamond tipped files. These will help you work more efficiently when it comes to filing and making bead holes larger.
Beading needles are invaluable if you work with beads on a regular basis, making threading quick and easy. Made with steel wire, and featuring a long eye at the top of the needle, you can buy these in sets ranging from very delicate, thin wire right up to larger, heavy duty needles. Choose smaller gauge beading needles if you’re working with very small, fiddly beads and opt for a larger beading needle if you regularly work with larger, more substantial beads and cord. If you can, always opt for a beading needle with a collapsible eye – this will simplify your beading process. With just a little pressure you can efficiently add beads to your cord with your beading needle.
A crimping tool is ideal for finishing off your beaded jewellery to a high standard. Although some jewellery may use pliers to secure a crimp bead, this may leave you with sharp edges. Whereas a specific crimping tool is designed to secure a crimp in place accurately.
When using wire, you must make sure that any exposed ends are smoothed off and comfortable to wear next to the skin and this can be achieved with small files or abrasive boards covered with fine grit. Very fine wire might only require a brief rub over with an abrasive board. However, when using thicker gauges, you will need to fully round the ends using files or a cup burr
There are a variety of wires you can use to make your beading creation. This varies from memory wire, elastic cord, silk thread, nylon wire, cord, artistic wire, metal wire and more. In order to pick the right one for you, you need to decide on the beads that are going to be used. The size, colour and weight of the beads will help you to decide. As well as the budget and finish you desire. For example, elastic wire is great for beginners and is the most affordable. Whereas, silk thread would be an ideal choice for someone that wants to work with pearls.
So, now you have the tools and the beads, what will you be making?

Cooksongold

