Create a beautiful pair of vintage pearl earrings for an elegant look by putting your beading skills to the test. The perfect project to add a simple but detailed piece of jewellery to your collection!
Step 1
CUT AND SHAPE YOUR WIRE
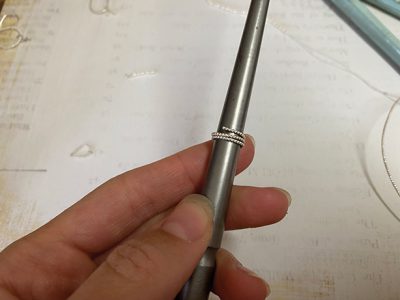
Cut two lengths of 3cm and two lengths of 7cm of the beaded Sterling Silver wire using side cutters. Curve each one around a triblet or tube to form a circle. You can use anything cylindrical to shape your wire – even a pen.
Step 2
SOLDER YOUR WIRE AND CLEAN
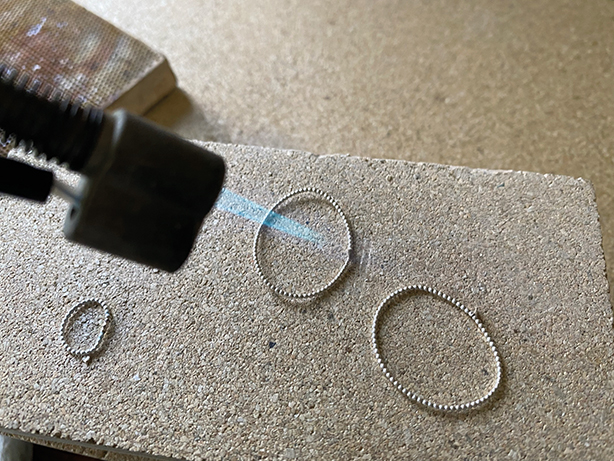
Ensure the two ends of the beaded wire sit flush and are touching. Place a small amount of hard solder paste at the join and heat evenly using a blowtorch. When the solder melts and flows, remove the heat from the blowtorch.
Using tweezers, drop the beaded circles into a warm acid safety pickle to clean. Remove with plastic tweezers. Do not put metal tweezers in the safety pickle as this can contaminate it. The wire should be flexible enough to manipulate with your fingers to align. To keep your pickle warm, use a slow cooker or pickling unit (999 AFD). Remember: safety pickle is a hazardous chemical and appropriate precautions should be taken.
Step 3
HARDEN YOUR CIRCLE SHAPES AND POLISH
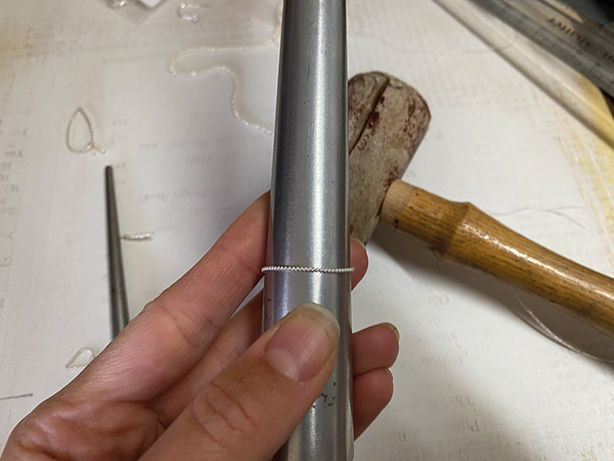
Once clean, rinse, dry and reshape the circles on the triblet or tube. Place the circle shapes into a barrel tumbling machine with steel shot, warm water and a spoonful of barrelbrite compound. Tumble the teardrops for 20–30 mins. If you don’t have a barrel tumbling machine, you could use a steel burnisher to harden the shapes by hand. Simply place the shapes on a stable surface and rub the steel burnisher over them, applying pressure. Then gently polish them using a Silver polishing cloth.
Step 4
MELT YOUR SILVER WIRE
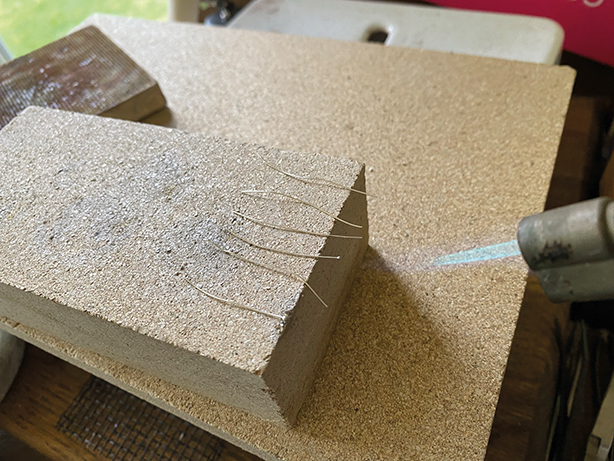
Take 3–4cm of 0.4mm Sterling Silver wire and place on a heat proof brick. Using a blowtorch, gently melt one end so it rolls into a ball at the end of your wire. Repeat six times.
Step 5

THREAD YOUR PEARL BEADS
Once cool, thread some pearl beads onto your wire. Use your round nose pliers to bend the wire back on itself and then around to make a loop.
Step 6
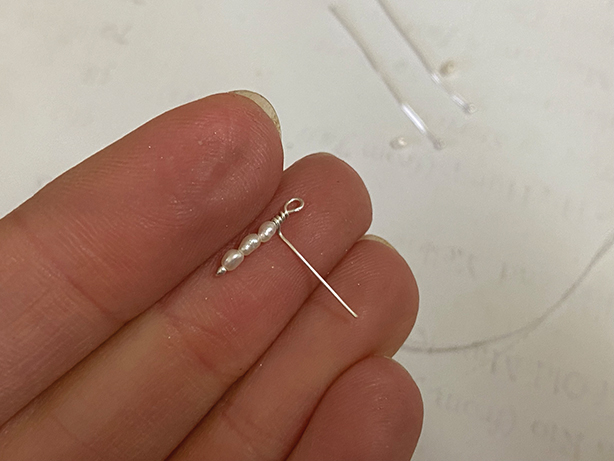
WRAP AND NEATEN YOUR WIRE
Hold the top of the loop with flat nose pliers and twist the wire around itself three times. Cut it flush using side cutters. Repeat this using different amounts of pearls another five times. Try to keep your wire wraps neat and aligned.
Step 7
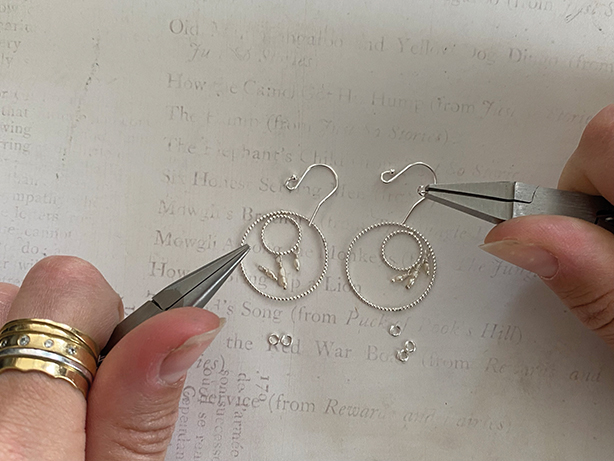
ADD YOUR PEARL BEADS TO THE CIRCLES
Grip either side of your jump ring using pliers (flat nose, chain nose or snipe) and twist to open. Add the loop to your pearl and the small beaded circle onto the jump ring. Reverse the twisting process to close your jump ring. Add three sets of pearls to each small beaded circle.
Step 8
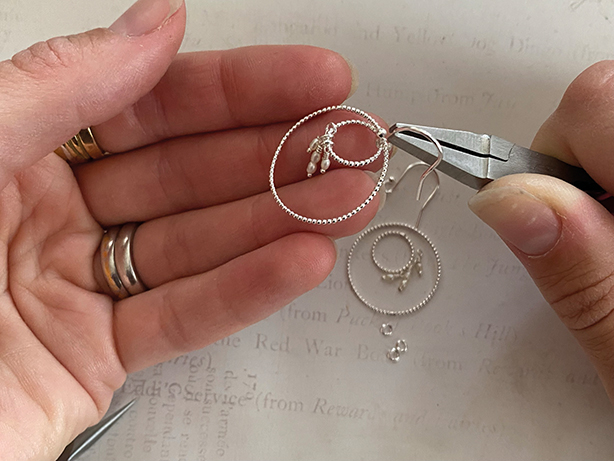
ATTACH YOUR BEADED WIRE CIRCLES TO HOOKS
Grip either side of the earring hook wire using your pliers (flat nose, chain nose or snipe) and twist in opposite directions to open. Add the large and small beaded wire circles and reverse the twisting process to close the hook wire.
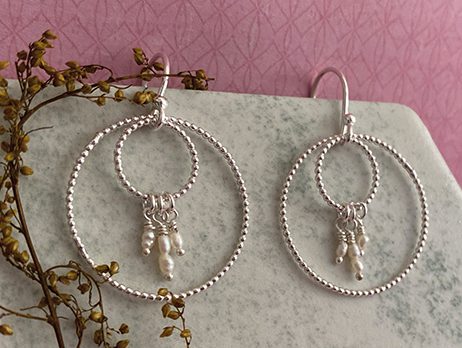
Your finished piece
We want to see what you have been making! Share your creations with us on social media, tagging in Cooksongold on Facebook and Instagram.

Sian Brown
Sian has been hand making her award winning jewellery in the West Midlands for over 12 years. Sian spent 10 years in Birmingham’s historic Jewellery Quarter before relocating to a quiet Worcestershire village.