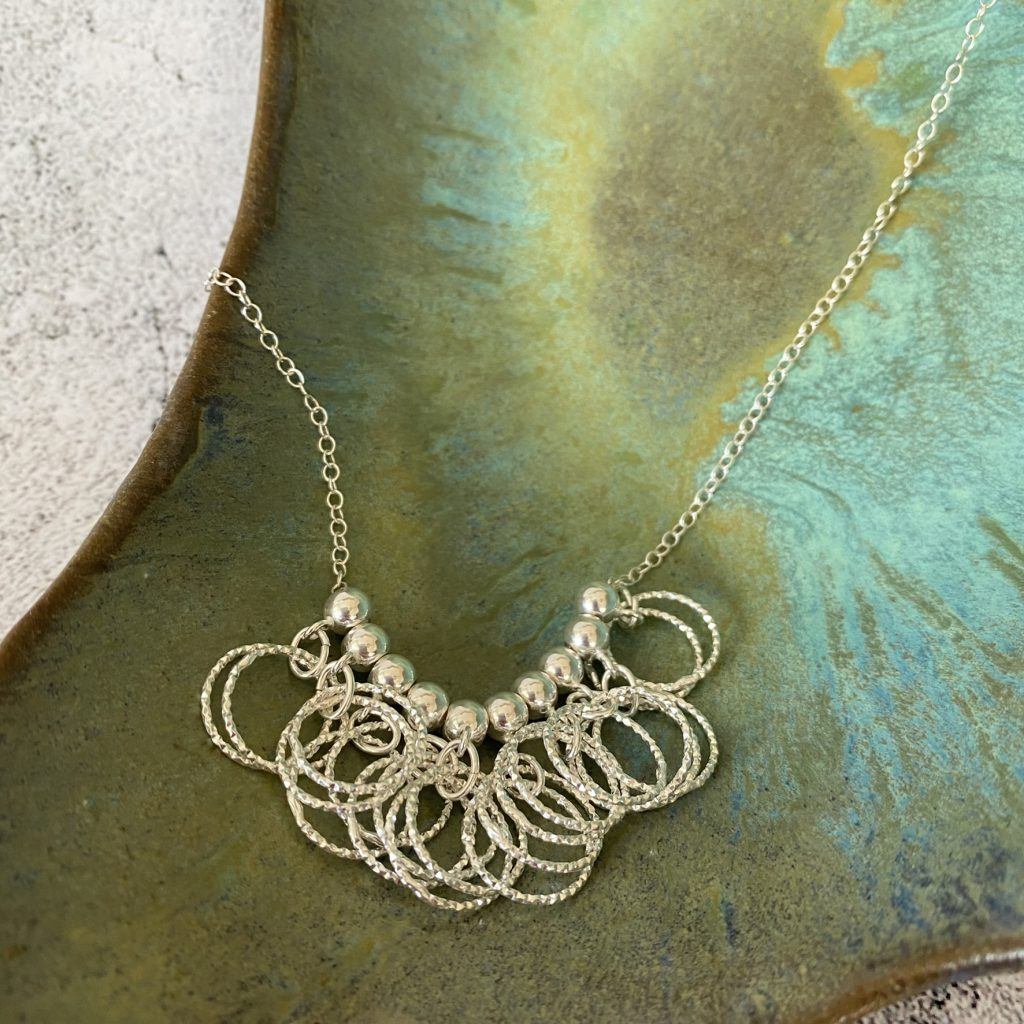
This Sparkly Cluster Necklace project is ideal for jewellery makers who want an easy jewellery project that doesn’t require any solder. Perfect to give as a gift or to adorn your own neck, follow these steps to learn how to get started.
Step 1
Hold your chain in one hand and use your chain nose or flat nose pliers in your other hand to gently squeeze the end jump ring loop on the chain until it is oval shaped.
The end loop needs to be made oval so that it will fit easily through the Silver bail beads. Try not to completely squish the loop as you still need it to attach your bolt ring clasp too.
Step 2
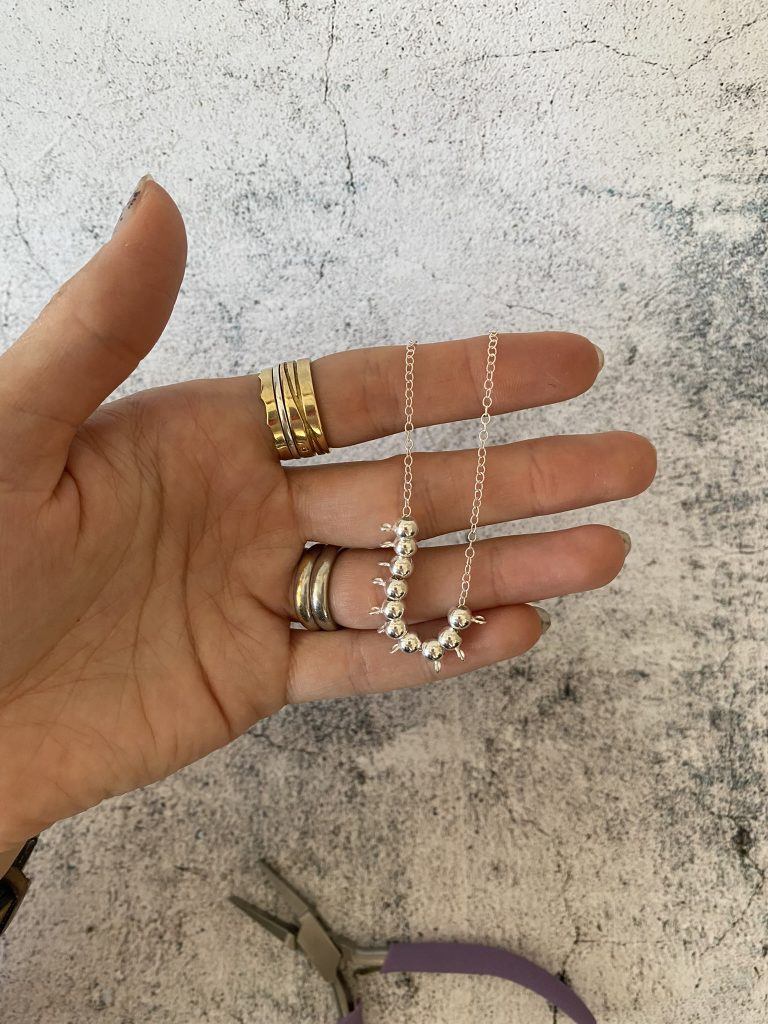
Thread the chain through the Silver beads.
Step 3
When you have threaded all 10 of the beads onto the chain, fasten the chain.
Step 4
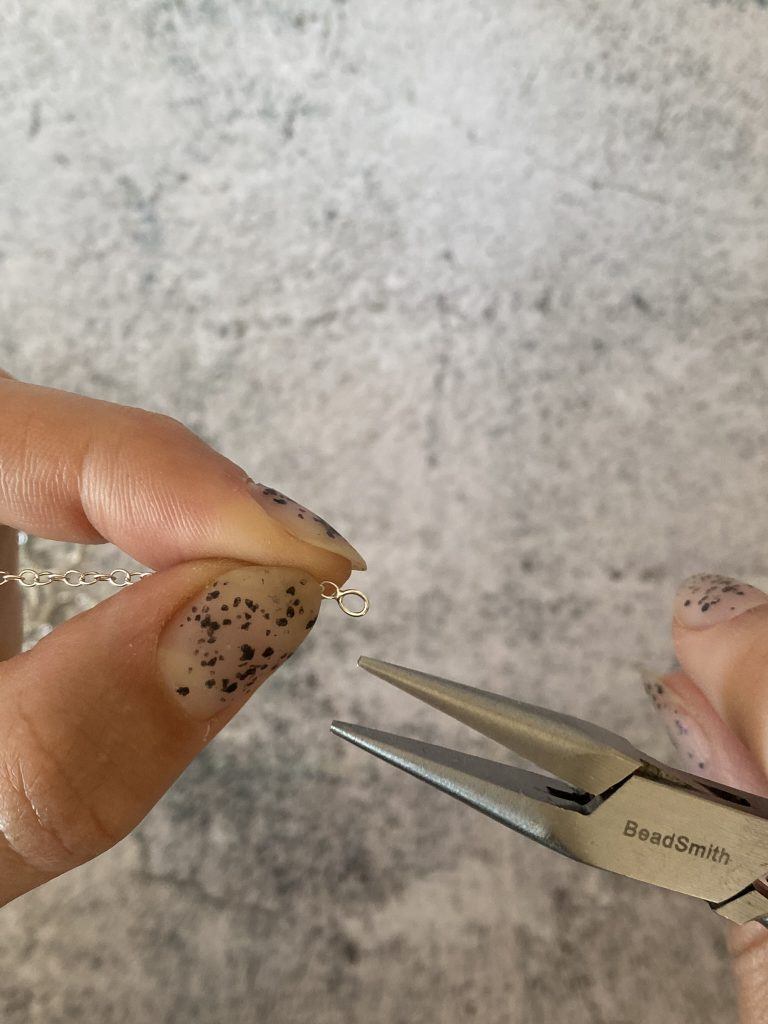
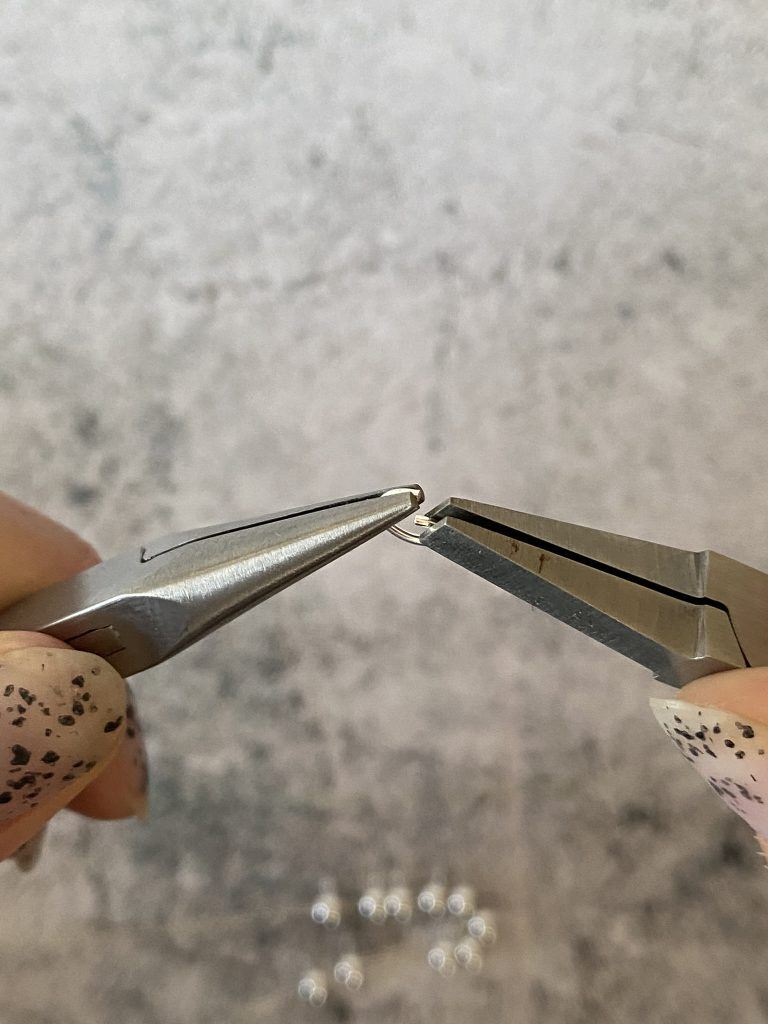
Grip one side of the jump ring with chain nose pliers and the other with snipe nose pliers. Next, gently twist the pliers in opposite directions to open the jump ring.
Step 5
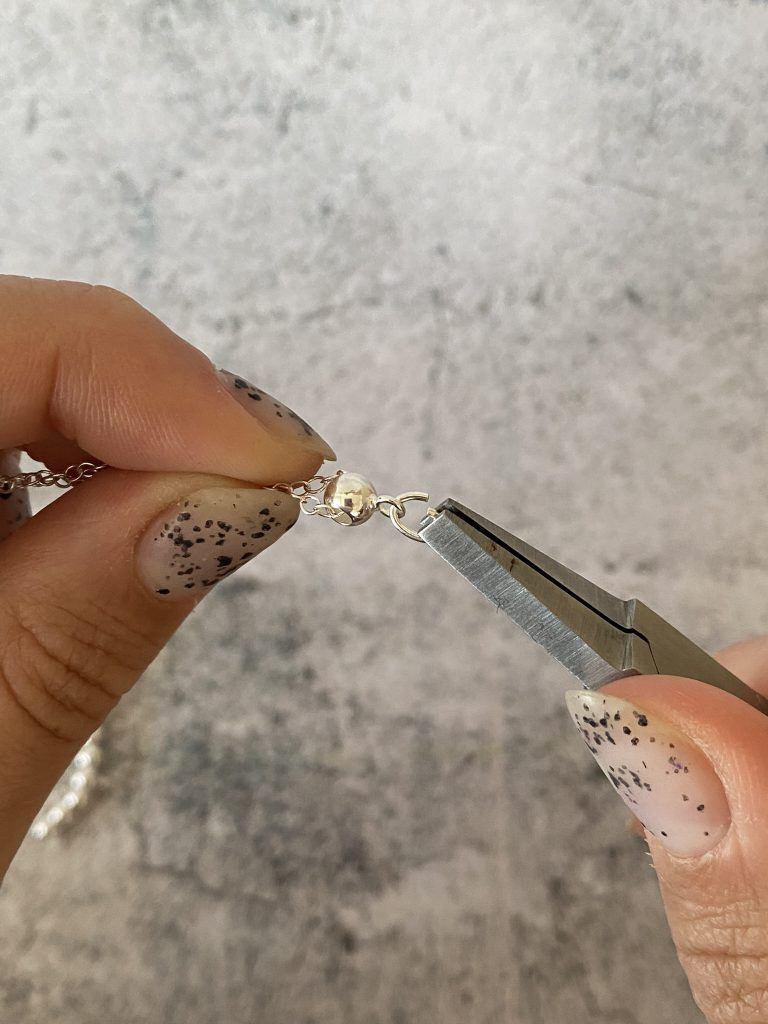
Hold the jump ring with the chain nose/snipe nose pliers and thread the jump ring through the loop on the bead.
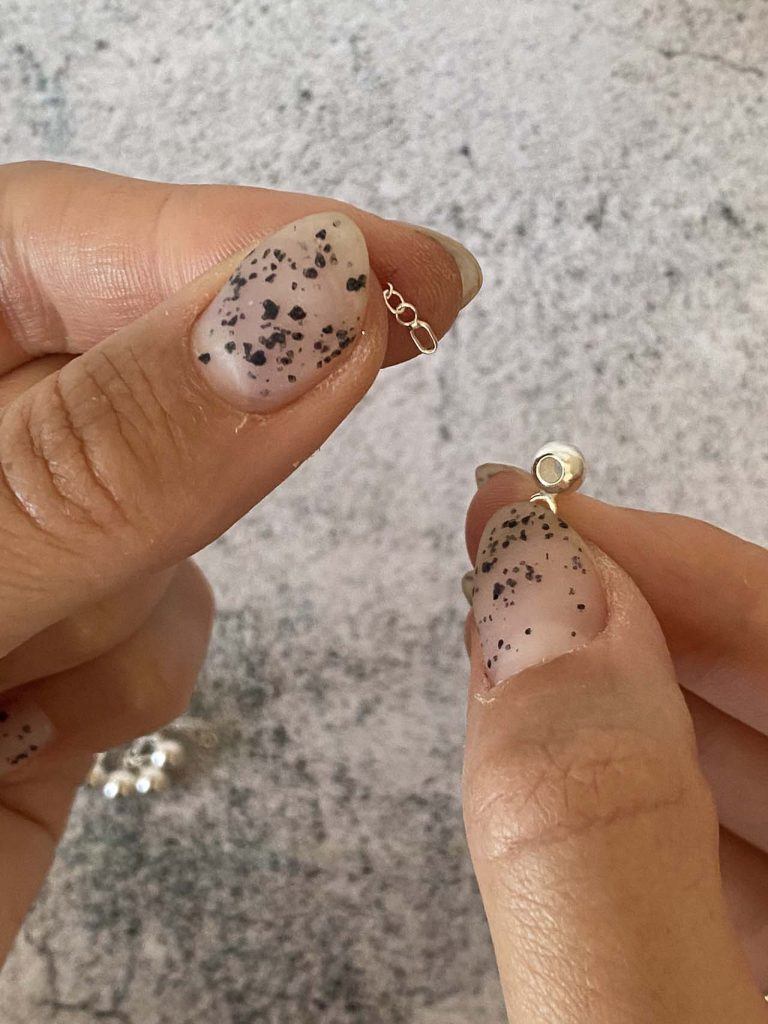
Step 6
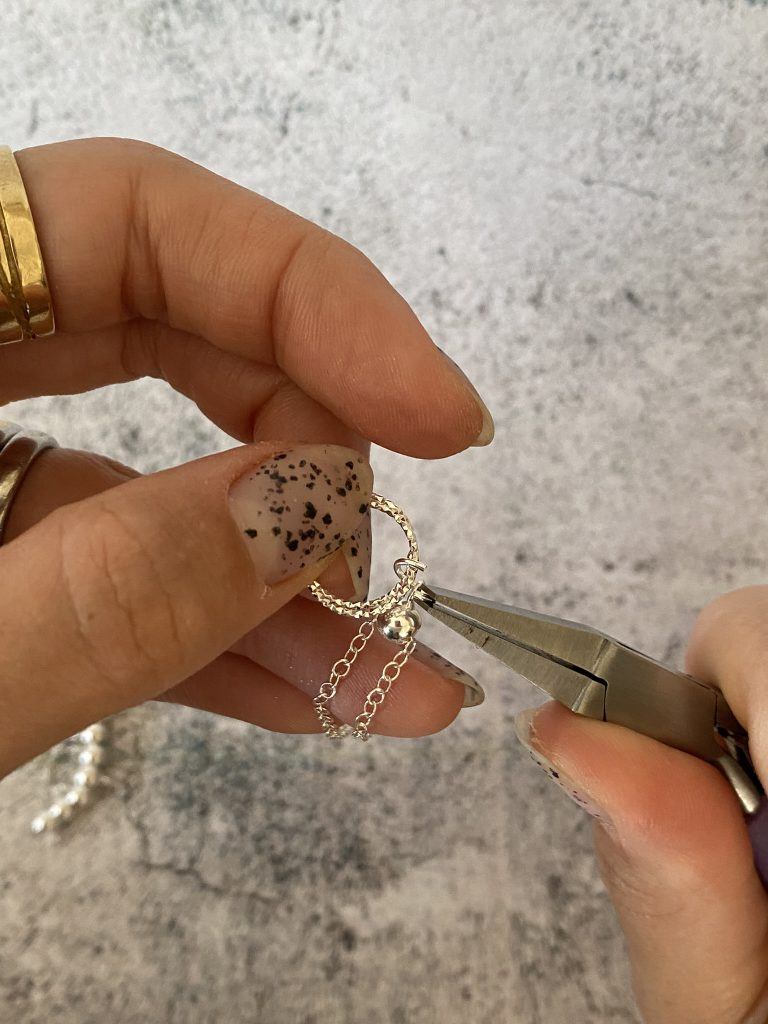
Thread two sparkle jump rings onto the open jump ring ensuring the jump ring is also still threaded through the bead loop.
Step 7
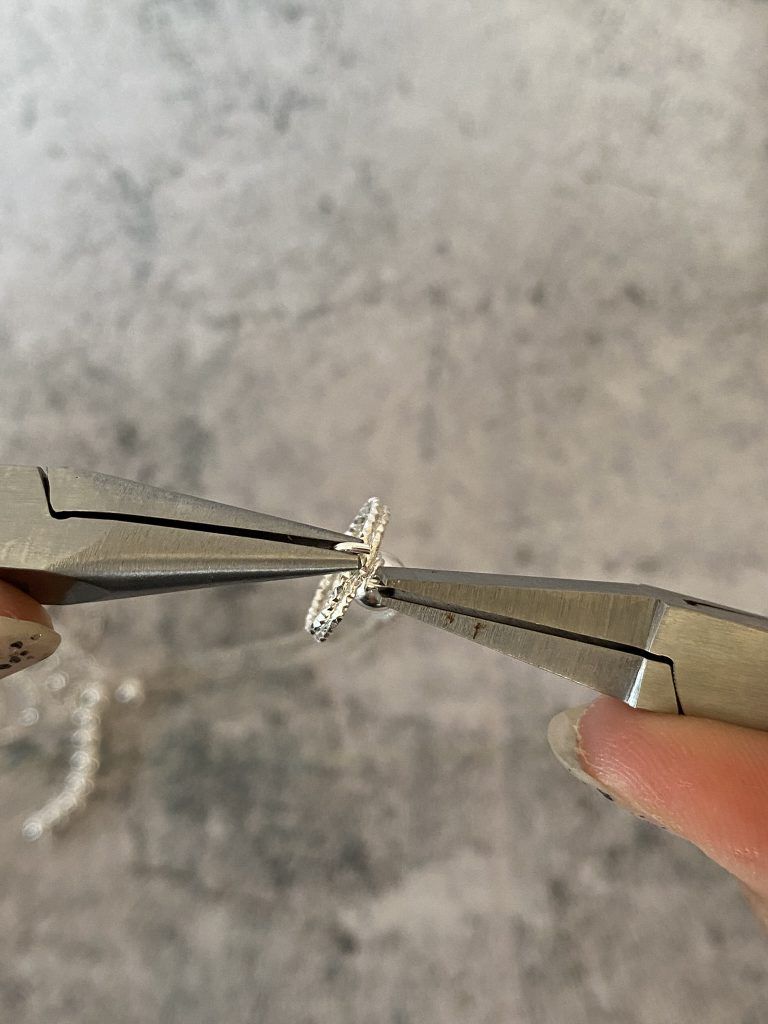
Grip one side of the jump ring with chain nose pliers and the other with snipe nose pliers. Then, gently twist the pliers in opposite directions to open the jump ring. Repeat this until you have attached all 20 sparkle jump rings to the 10 Silver beads.
You’re done! We hope you enjoyed making your very own Sparkly Cluster Necklace. We would love to see your finished creations. Share your creations with us on social media, tagging in Cooksongold on Facebook, Twitter and Instagram.

Sian Brown
Sian has been hand making her award winning jewellery in the West Midlands for over 12 years. Sian spent 10 years in Birmingham’s historic Jewellery Quarter before relocating to a quiet Worcestershire village.