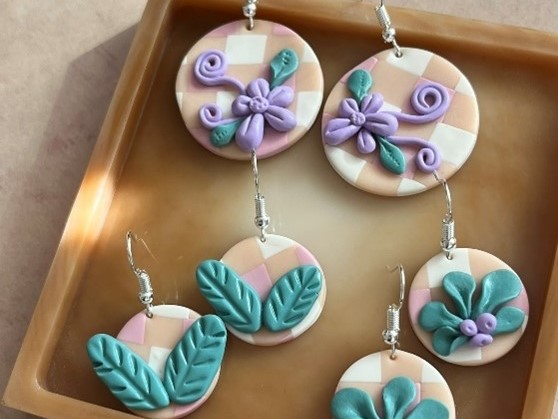
Create these beautiful, eye catching earrings with our step by step guide. Using Fimo polymer clay we’ll show you just how easy it can be to make your own unique designs. This particular project focuses on quirky cottage core designs but the benefit of working with polymer clay is that your jewellery as customizable as possible.
What is Cottage Core?
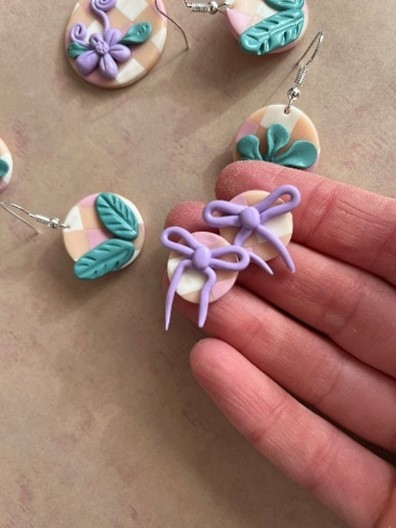
Cottage core designs are those inspired by nature. Flowers, leaves, woodland and anything else related to nature can all be classed as cottage core. The floral motifs associated with cottage core are universally loved for their natural beauty and romantic charm. The return of cottagecore aesthetics and botanical themes ensures these earrings will resonate with a wide audience.
We’ve put together an easy to follow, step by step design using polymer clay. These earrings are ideal for springtime or anyone drawn to feminine, nature-inspired designs.
Design Ideas:
- Sculpt small roses, daisies, or tulips in soft pastel colours like blush pink, lavender, and mint green.
- Combine individual floral pieces into clusters for studs, or attach them to dangling vines or hoops for more elaborate designs.
- Add fine details like textured petals or subtle colour gradients for a realistic effect.
Instructions:
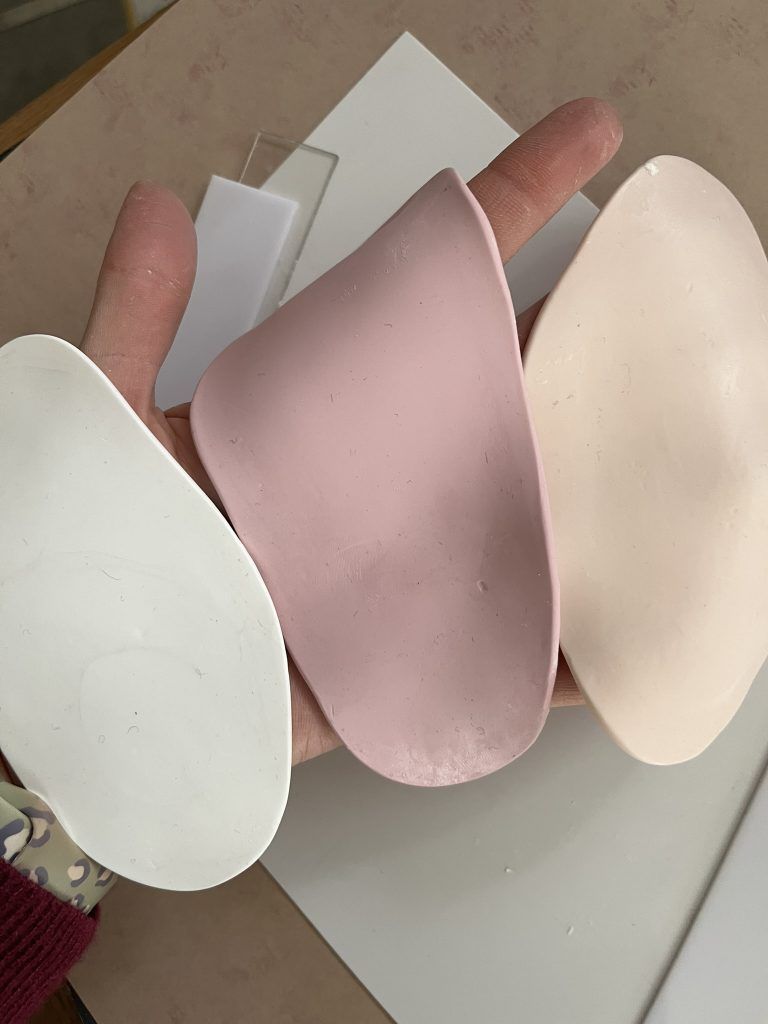
Step 1
Knead and soften the white, light pink and pink fimo polymer clay. Using ¼ of each block.
Roll out each ball of clay on a wipeable or non stick surface using an acrylic rolling pin to about 2mm thick. Place a stack of cards or acrylic strips either side of the roller ends when rolling to ensure an even thickness of clay.
When complete you should have 3 long strips of clay
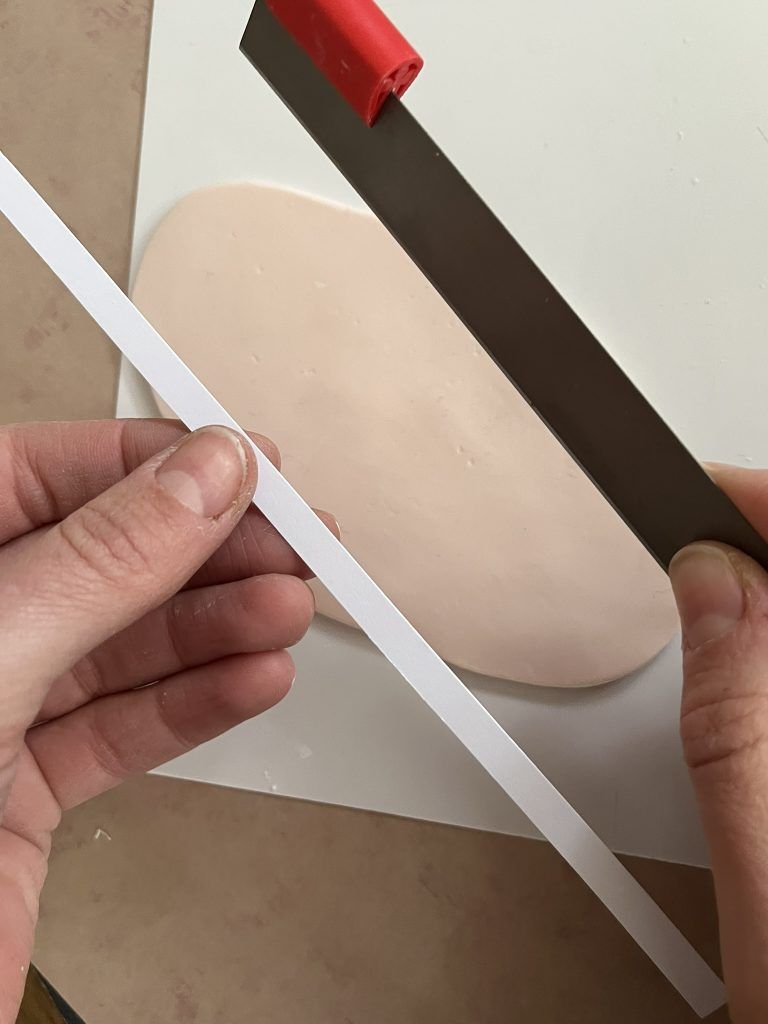
Step 2
Use a metal cutter and paper template strip to cut the clay into strips. The thinner the strips the more detailed the final gingham pattern will end up. The strips used here are approximately 5mm wide.
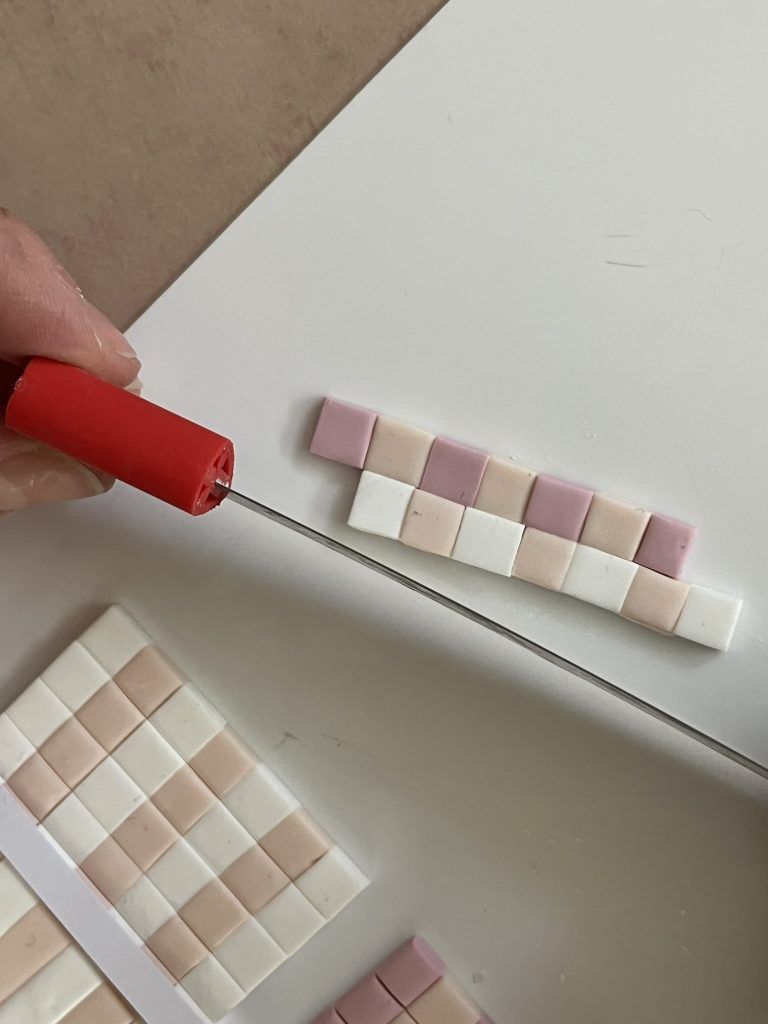
Step 3
Line up the white and light pink strips and then the light pink and pink strips together ensuring that they are straight and joined together.
Use the paper template strip again to cut strips of the strips and create an alternating square pattern.
Line these strips up against each other to create a gingham pattern and gently roll over so the squares join together.
Step 4
Use a circle cutter to cut out circle shapes.

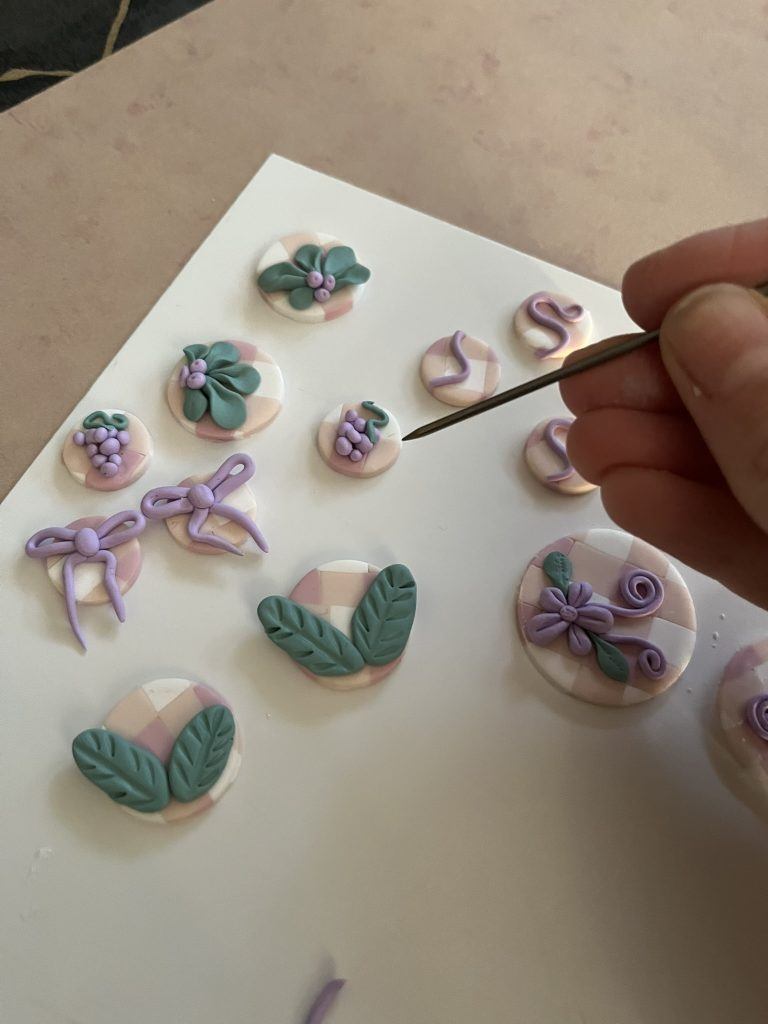
Step 5
Using a knife and silicone tools roll out petal shapes, spirals, bows and leaf shapes and add them to the circles.
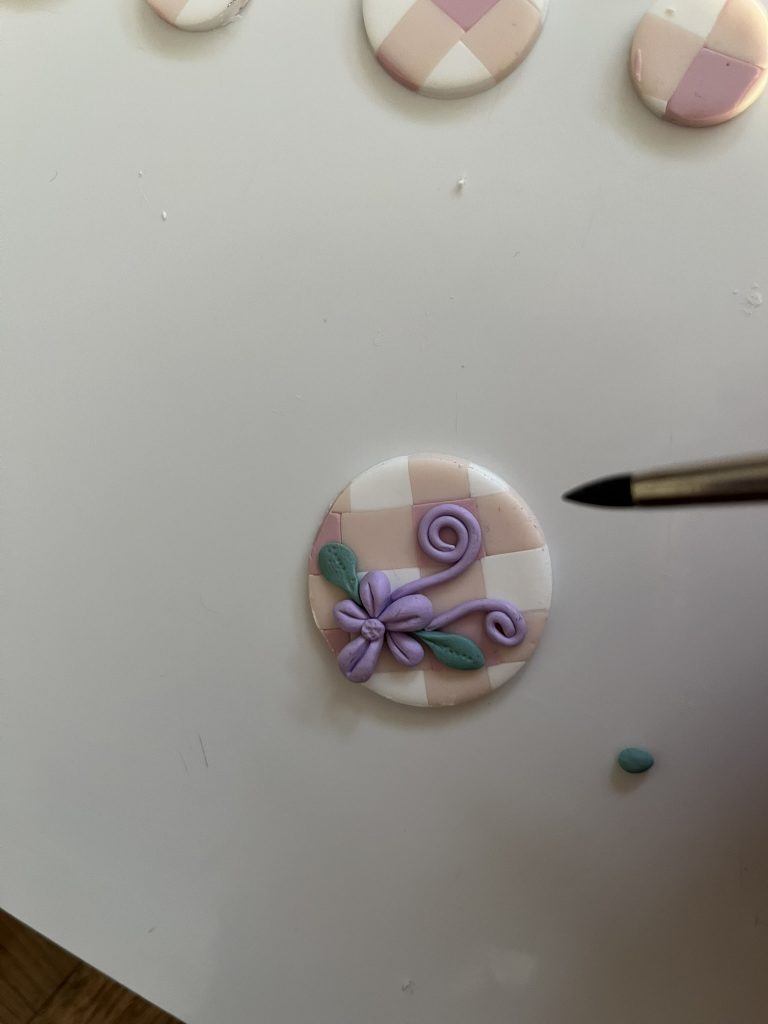
Step 6
Use a cocktail stick or piercing needle to add holes at the top of the shapes.
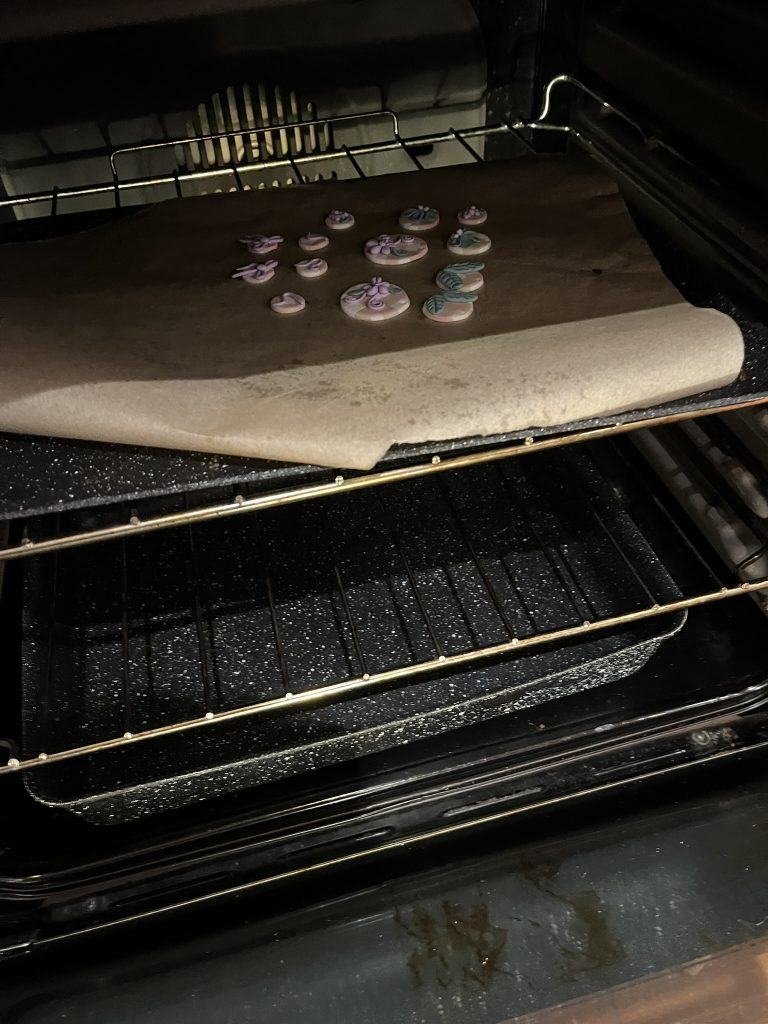
Step 7
Place the shapes on a baking tray and bake in the oven at 130 degrees Celsius for 20 mins or according to the instructions on the fimo packet.
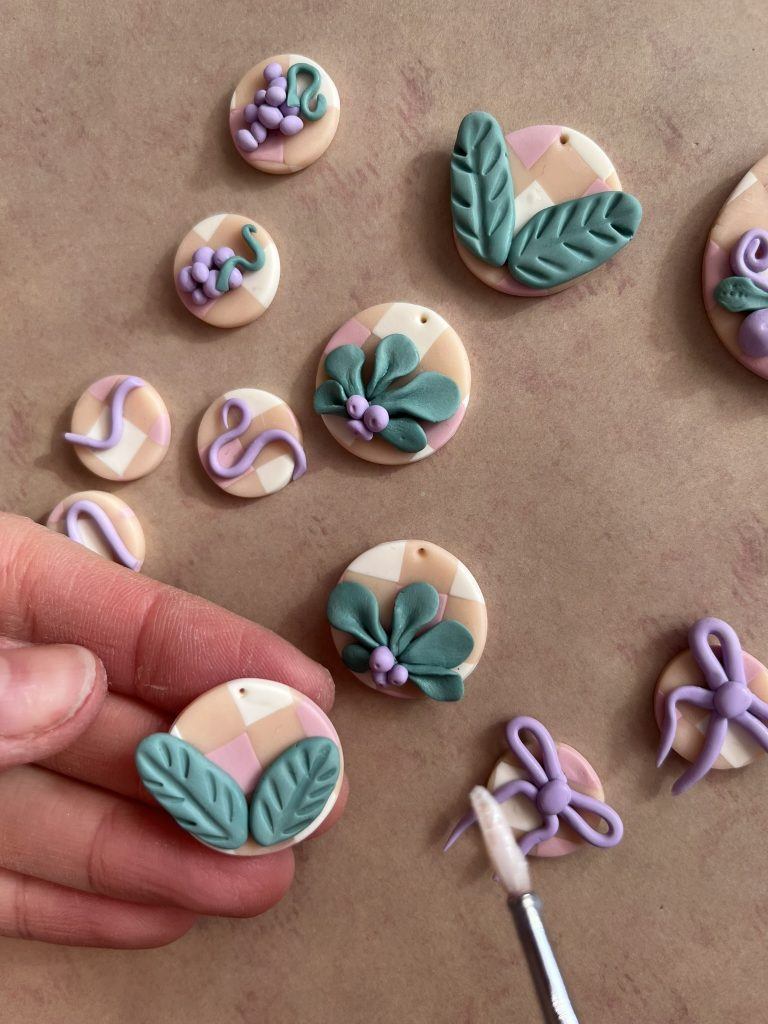
Step 8
When cool and hard use a grind and polish mat to smooth and shine the edges of each shape.

Step 9
Apply a thin coat of varnish to each shape to add shine.
Step 10
To make stud earrings place a small amount of glue on the reverse of the earring post and place in the centre of the reverse of the clay shape and leave to dry.
Step 11
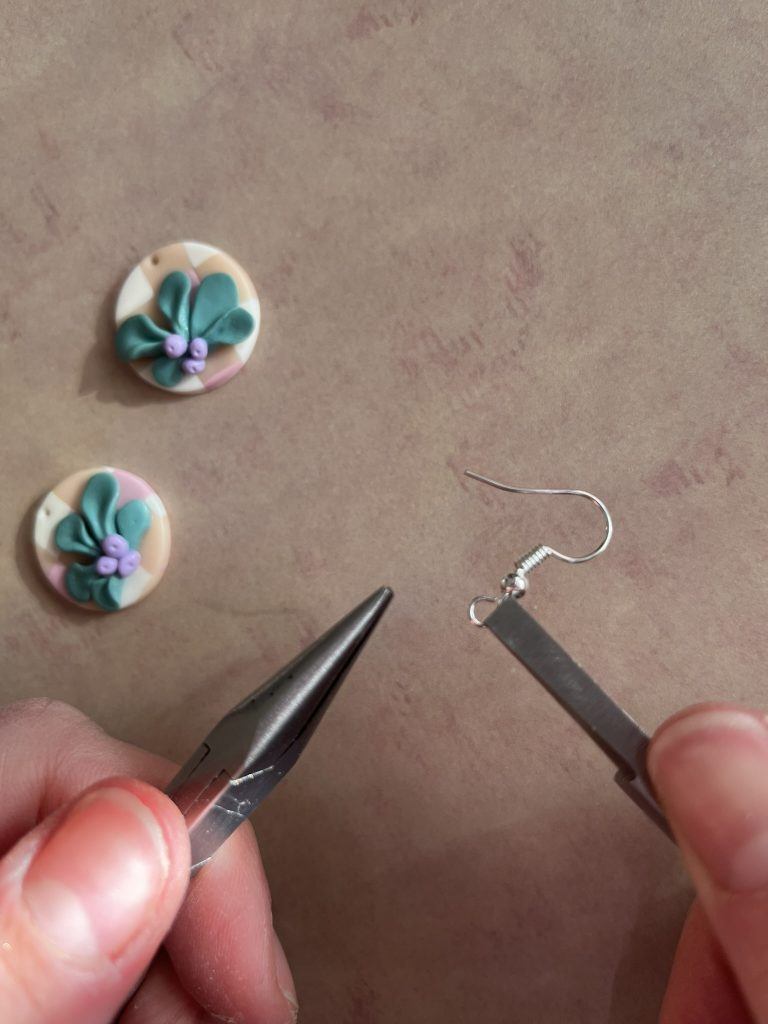
To create dangly earrings use pliers to grip either side of the hoop of the hook wire and twist to open. Thread on the clay shape through the hole and then grip the hoop of the hook wire with the pliers to close the hoop flush.
For those new to working with polymer clay, this is the perfect project to begin your jewellery making journey. Stock up on all of the essential tools and your polymer clay and you can begin. Remember, the beauty of working with fimo is that you can customise your designs to your taste easily so don’t be afraid to experiment! If you try this project don’t forget to tag us and let us know what you thought!

Sian Brown
Sian has been hand making her award winning jewellery in the West Midlands for over 12 years. Sian spent 10 years in Birmingham’s historic Jewellery Quarter before relocating to a quiet Worcestershire village.