Fimo polymer clay is a fun and easy to use modelling clay that is ideal for fun and creative jewellery designs. We’ve put together a step by step guide to creating a unique pair of abstract design earrings. This particular project is a great way to experiment with colours to create truly bold, stand out designs. As with all of the Fimo clay projects that you’ll find here on our blog, this particular project can be easily customisable.
Why Choose Abstract Designs?
Abstract designs are timeless and versatile, offering a balance between bold style and subtle elegance. The colour-blocking trend, with its clean lines and playful hues, appeals to minimalist and maximalist fashion lovers alike.
Materials and Design Ideas:
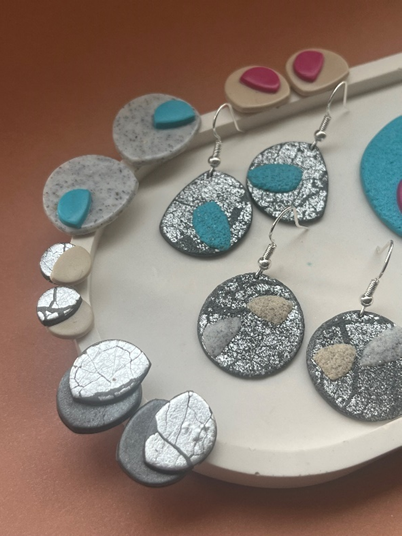
- Use a mix of neutral tones like beige and white alongside pops of vibrant colours like mustard, terracotta, or teal.
- Create organic, asymmetrical shapes like irregular circles, ovals, or arches.
- Layer or stack pieces to form dangles, combining different colours and shapes for a chic, modern look.
- Optional: Add metallic elements such as gold foil or brass connectors for extra sophistication.
Why It’s On-Trend:
The combination of geometric forms and trendy hues makes these earrings perfect for both casual and formal settings.
Step 1
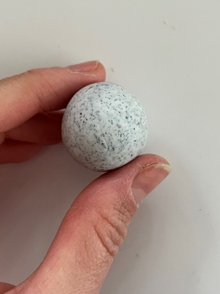
Take ¼ of your chosen colour of Fimo clay and knead the clay until soft and smooth using your fingers and hands. Roll the clay into a smooth ball
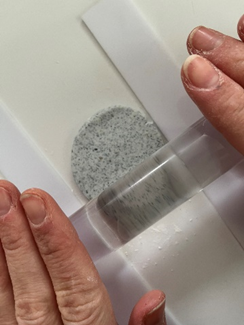
Place the ball on a waterproof mat and roll out the clay using an acrylic rolling pin.
You could stack up playing cards either side of the clay to ensure the thickness of the clay sheet you create is even. Roll the clay 2-3mm thick. You can use a light layer of corn flour on the mat and rolling pin to prevent any sticking.
Step 2
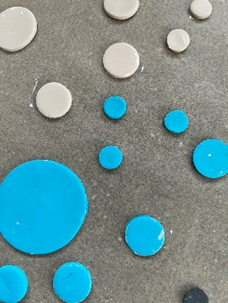
Use a round cutter to cut different sized circles out of the clay in pairs.
Repeat this process for your other chosen colours of Fimo polymer clay.
Step 3
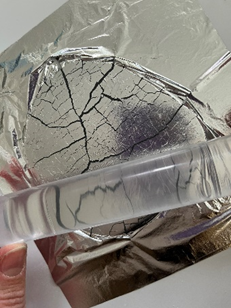
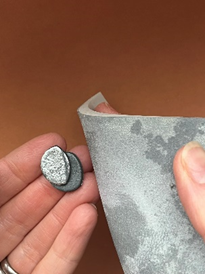
For the crackled silver foil effect place a sheet of silver foil on a rolled out sheet of fimo and use the roller to roll over the clay and foil to create a crackled effect.
Step 4
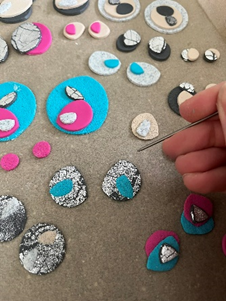
Use the circle cutter to cut sections of the clay circle off and create abstract shapes.
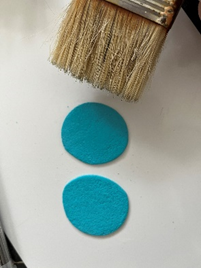
Add texture to some of the clay circles using a stiff bristle paintbrush.
Step 5
Layer up and compose different sizes and shapes of the clay in pairs and gently push together to bond.
Add holes to the top of any clay shapes you’d like to make into dangly earrings
Step 6
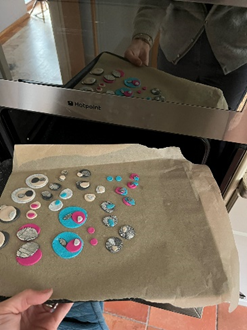
Place all the clay shapes on a baking tray and bake in the oven following the instructions.
Step 7
When baked and cooled use an abrasive pad with water to sand and smooth the edges of the shapes.
Step 8
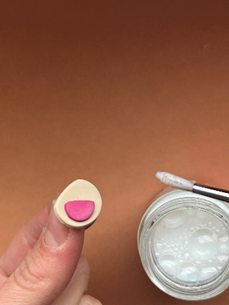
Add a thin layer of fimo varnish to add shine each clay shape.
Step 9
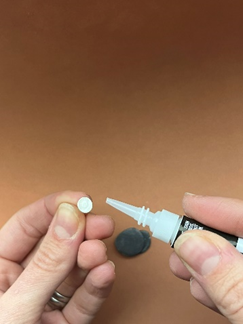
To create stud earrings apply a small amount of glue to the earring post and place on the back of the clay shape.
Step 10
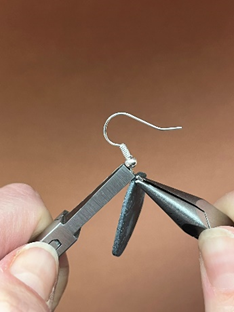
To create dangly earrings use pliers to grip either side of the hoop of the hook wire and twist to open. Thread on the clay shape through the hole and then grip the hoop of the hook wire with the pliers to close the hoop flush.
How to use Zap Gel to make Fimo polymer clay stud earrings
Zap Gel is a cyanoacrylate-based adhesive, which means it is very effective for bonding non-porous materials like metal and polymer clay. However, the success of the bond depends on the surface preparation and the type of polymer clay.
Tips for Using Zap Gel to Glue Metal to Polymer Clay:
- Surface Preparation:
- Ensure both surfaces are clean, dry, and free from oils or debris.
- Lightly sand the area of the metal and clay to create a rough surface for better adhesion.
- Application:
- Apply a small amount of Zap Gel to the metal surface.
- Press the metal firmly against the polymer clay and hold for a few seconds.
- Curing:
- Allow the glue to cure fully. While Zap Gel sets quickly, it’s best to give it several hours to achieve maximum strength.
- Considerations for Polymer Clay:
- Bake the polymer clay first. Attempting to glue raw clay to metal may not yield a strong bond.
- For extra security, you can embed the metal piece slightly into the clay before baking and then reinforce with glue after baking.
If durability is a concern, you might also consider epoxy adhesives, which offer a stronger and more permanent bond for metal and polymer clay projects.
Ready to start making your own Fimo clay earrings? Stock up on Fimo clay all of the essential tools we have listed above and get making today. Don’t forget to share your finished piece with us over on social media, we would love to see what you have been making

Sian Brown
Sian has been hand making her award winning jewellery in the West Midlands for over 12 years. Sian spent 10 years in Birmingham’s historic Jewellery Quarter before relocating to a quiet Worcestershire village.