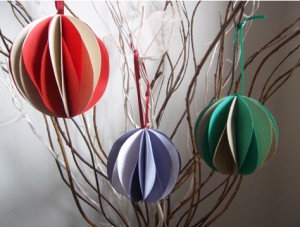
There are many online tutorials on how to make Christmas tree decorations ranging in complexity from simple to extremely fiddly. I’ve chosen one of the more simple designs to try which uses only a few very basic materials. It is straightforward but produces some lovely 3-dimensional results, so it’s well worth a try.
Step 1
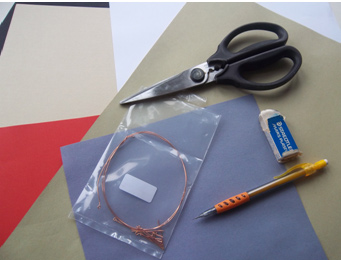
Select your paper. If using coloured paper choose 2 complimentary colours.
Step 2
Draw 12 circles of equal size using either a compass or by drawing round something circular. (6 of each colour if using 2 different colours). These circles were roughly 8cm in diameter but the scale is really personal preference.
Step 3
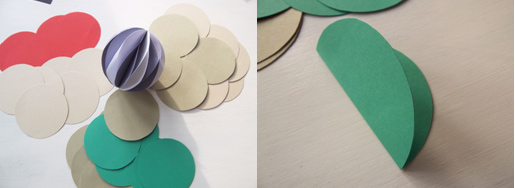
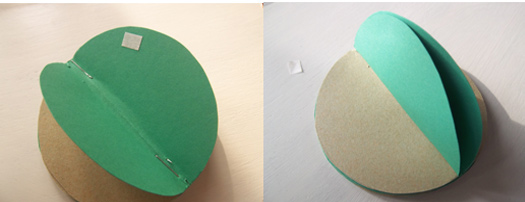
Cut out your circles and then fold each one in half.
Step 4
Stack your circles up into one pile. (If using 2 colours follow this pattern assuming A is one colour and B is your second: ABBAABBAABBA)
Step 5
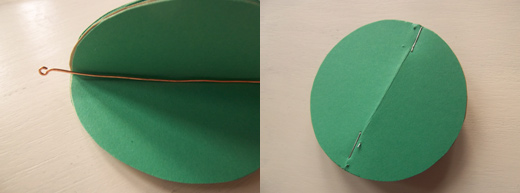
Next join your circles together either by wrapping wire around the centre line and twisting to secure or by simply stapling along the fold.
Step 6
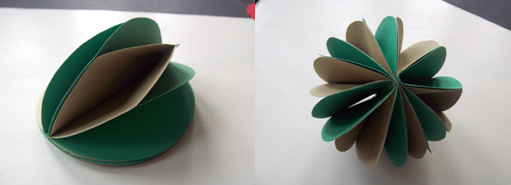
Then attach your first glue dot or piece of double sided tape about a third of the way down from your top edge where you’ve stapled. Then simply push the edges together.
Step 7
Then attach your second glue dot or piece of tape about a third of the way up from the bottom edge of the circle so you alternate from the first piece. Work your way round each piece repeating this pattern from top to bottom until all the edges are attached. You should then have an even 3-dimensional bauble!
Step 8
At this point the bauble is essentially complete, but might need pulling into position a little. Simply push your fingers gently into each section opening them out to achieve an even pattern and a spherical shape to the decoration. (You may think that it’s not going to even out, but if you just keep working round each segment it will eventually achieve an even round shape.)
Step 9
Finally thread a piece of ribbon through and around the central segment so it covers the staples or wire and then secure with a knot. Then tie the ends of your ribbon together to make a loop for hanging and that’s it – your finished bauble!
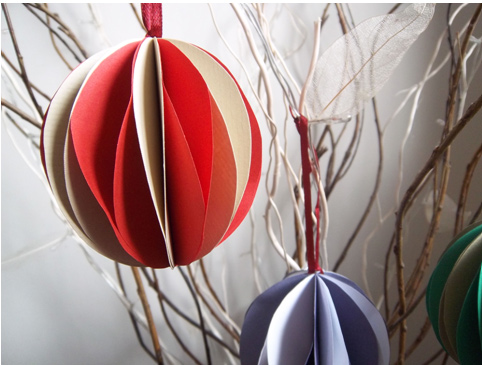
Obviously there are endless variations which can be achieved with this technique. Metallic papers would work well as would double sided paper if you have it. But also plain white would be lovely set against a background of twinkly lights and would cost relatively little to produce. I like the fact that you don’t need anything too specialised to produce these decorations. It’s quite surprising what can be made from some basic stationary items, so if you have an afternoon to spare this festive season, why not give them a try
We want to see what you have been making! Share your creations with us on social media, tagging in Cooksongold on Facebook, Twitter and Instagram.

Joanna Varney
Joanna has worked in and around the jewellery industry for well over 20 years. She has designed and created her own pieces as a designer maker, as well as working in jewellery retail on a much larger scale, producing designs and NPD for some of the UK’s largest high street retailers