
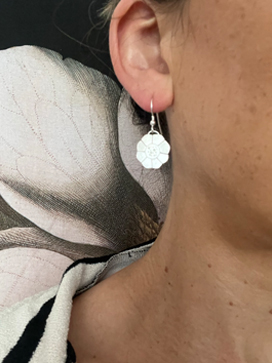
This project will show you how to make these beautifully detailed silver flower disc earrings…
Step 1
To start making your silver earrings, place a 7mm disc in the centre of one of the larger (18mm) discs and draw around the 7mm disc with a scribe or pen. To find the exact centre you could use dividers.
Repeat on the second large disc.

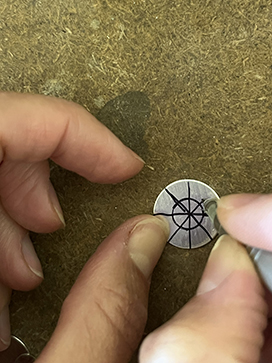
Step 2
Draw 4 lines across the 18mm disc to create 8 equal segments.
Repeat on the second large disc.
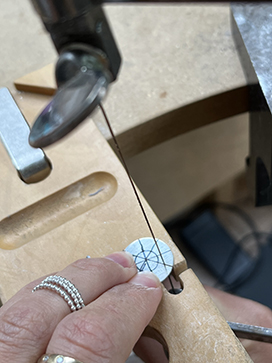
Step 3
Place one of the large discs on a bench peg and use a piercing saw to cut down the lines of each segment. Stop cutting just after the centre circle that is drawn.
Repeat on the second disc.
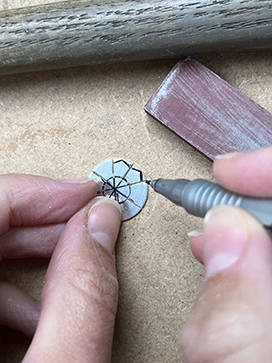
Step 4
Draw a V shape at each cut line on the large silver disc.
Repeat on the second large disc.
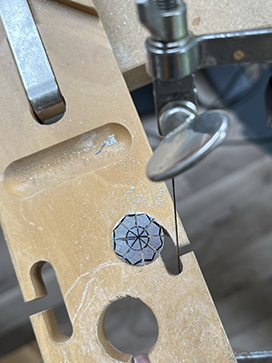
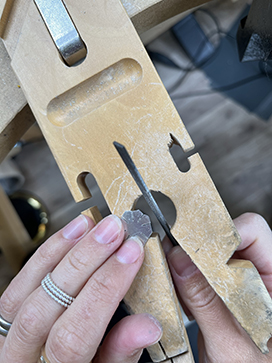
Step 5
Place the large silver disc on a bench peg and use a piercing saw to cut along the V lines to
remove these sections.
Repeat on the second disc.
Step 6
Use a flat file to round off the pointy edges from cutting the V shapes. Support the disc on a bench peg.
Next, use emery sticks on the edges, working from the coarsest to the finest emery stick until all edges
are smooth.
Repeat for the second disc. These discs are the flower shapes.
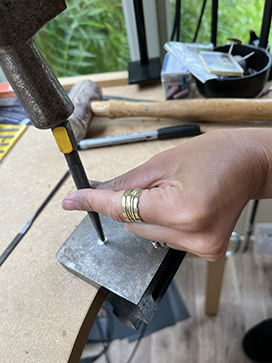
Step 7
Place one of the smaller discs on a steel block and place the centre punch on top. Hit the top of the centre punch with a hammer so that the centre punch creates a dot on the disc. Repeat this
process to form a ‘dotty’ pattern all over the discs, keeping the dots clustered in the middle of the disc.
Repeat for the second smallest disc.
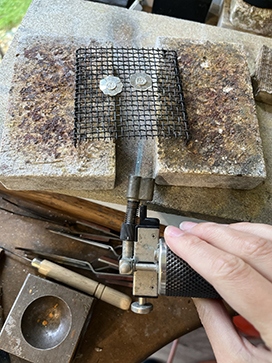
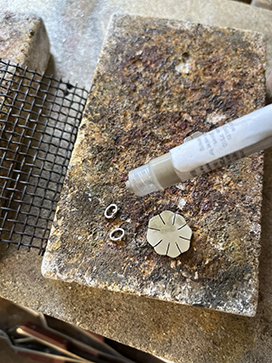
Step 8
Add a small amount of medium solder paste to the reverse of the smallest dotty disc, just enough to cover the whole area.
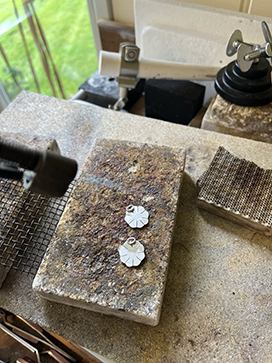
Place the flower shapes on a heatproof block or wire mesh. Place the smallest discs in the middle on top of the larger flower shapes, with the solder in between the shapes and the dotty pattern face up.
Use a hand blow torch to heat up each flower shape individually until the solder melts and flows.
You may want to use the hand blow torch to heat the flower shapes underneath. Placing the flower shapes on a wire mesh allows you to direct heat from your blow torch to the underside of the Silver.
Leave each shape to cool for a minute.
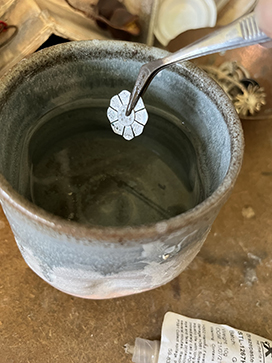
Step 9
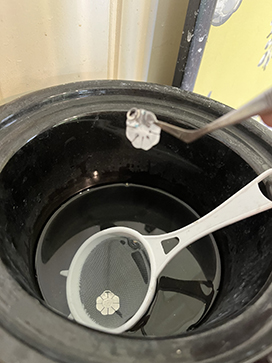
Quench (cool) each flower shape in water using tweezers. Next, place each shape in a warm pickle solution for 5 minutes or until clean.
Remove the shapes from the pickle using plastic tweezers.
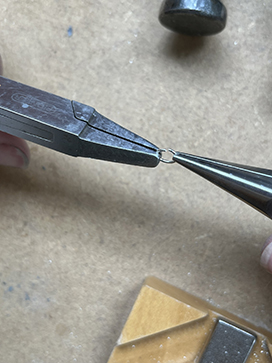
Step 10
Take 2 oval jump rings and close the jump rings flush.
To close the jump ring, grip it with a pair of snipe nose, flat or chain nose pliers on both sides. Twist one pair of pliers back to close the jump ring flush.
Step 11
Add a small amount of easy solder paste to each jump ring to the side where the jump ring join is. Add just enough solder to cover the length of the jump ring.
Place each flower (dotty middle face down) on a heatproof block and place a jump ring horizontally on the top of the flower. The top half of the jump ring should hang over the top of the flower, and the bottom half of the jump ring (where the join and solder is) should be in contact with, and sit flat on, the flower shape. This is so the earring hooks have something to hook through.
Step 12
Heat each flower shape individually using a hand blow torch until the solder melts and flows.
Leave to cool for a minute.
Step 13
Quench (cool) each flower shape in water using tweezers.
Next, place each shape in a warm pickle solution for 5 minutes or until clean.
Remove the shapes from the pickle using plastic tweezers.
Step 14
Polish the silver flowers for your earrings using a silver polishing cloth or in a barrel tumbling machine with shot,
barrelbrite and water.
You could also use a pendant motor with mops and rouge, as well as silicone polishing wheels to add shine.
Add a brushed scratchy finish by rubbing each flower with a metal wire brush.
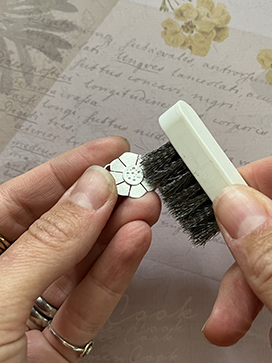
Step 15
Attach the hook wires by gripping the hoop of the hook wires with a pair of snipe nose, flat or chain nose pliers on one side and a pair of snipe nose, flat or chain nose pliers on the other side.
Twist one pair of pliers forwards to open the loop.
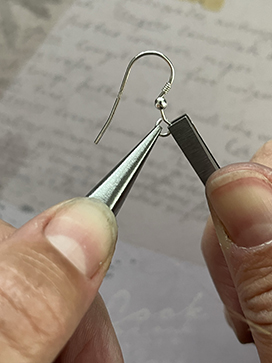
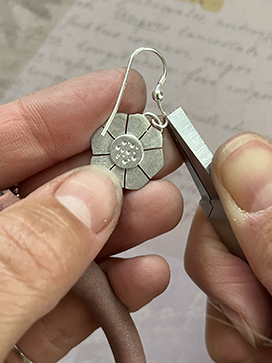
Step 16
Thread the earring loop through the silver hoop at the top of the flower. Close the hoop by
gripping the hoop of the hook wires with a pair of snipe nose, flat or chain nose pliers on one side and a pair of snipe nose, flat or chain nose pliers on the other side. Twist one pair of pliers back to close the hoop flush.
Repeat this to make the second silver earring.
We hope you enjoyed making your silver flower disc earrings. If you have any questions or want to know more, get in touch with us on Facebook, Twitter and Instagram. We’d also love to see what you’ve been making so please share pictures of your creations with us too, tagging Cooksongold

Sian Brown
Sian has been hand making her award winning jewellery in the West Midlands for over 12 years. Sian spent 10 years in Birmingham’s historic Jewellery Quarter before relocating to a quiet Worcestershire village.