Wedding season is almost here which means for every prospecting bride and groom its time to get planning. Whilst every aspect of a wedding matters, your table plans and layouts are what your guests will pay most attention too so why not consider getting creative with your table décor and make your own table numbers? Although primarily functional, you can really get creative with your table numbers and create something on theme that really adds to your wedding décor.
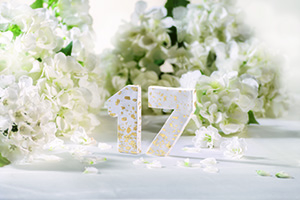
Did you know that Fimo Clay is a fantastic, fun and easy to use clay that can be used to create a range of projects including these stand out table numbers. Our Fimo air light table numbers are a great way to release your creativity. These white figures with gold highlights look particularly elegant but thanks to the huge range of Fimo air light colours, you can easily customise these table numbers to suit the theme and look of your wedding.
Fimo DIY Wedding Decorations Step by Step Guide
Degree of difficulty: Easy
Overview of other materials: Smooth work surface, templates printed out for the numbers required in a font of your choosing, fine brush, soft stencil brush
Time required: 30 minutes
Step 1:
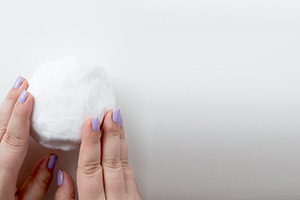
To make each figure, knead one block of FIMOair light into a ball.
Step 2:
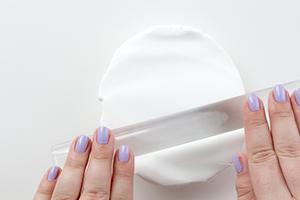
Then use the acrylic roller to roll out the ball into a sheet about 2-3cm thick. Make sure that the sheet is the same thickness throughout.
Step 3:
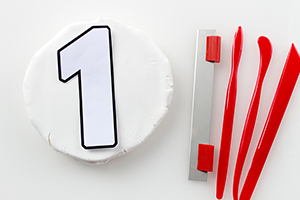
Print out the number template, cut it out and lay it on the FIMOair light sheet.
Step 4:
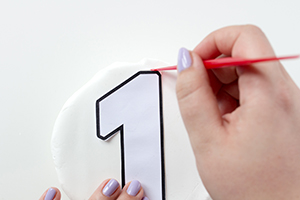
Use the modelling tool to trace the outline of the number template onto the FIMOair light sheet.
Step 5:

Remove the template and carefully cut out the number using a cutter. If the edges are slightly uneven, use the modelling tool to smooth them out.
Step 6:
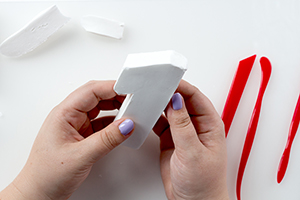
Make all the numbers in this way and then leave them to dry in the air.
Step 7:

After drying/hardening, remove any slight unevenness with a wet sanding sponge and smooth the edges again.
Step 8:
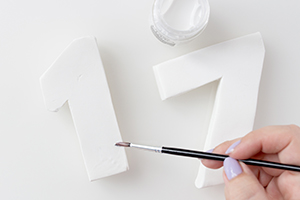
To achieve a metallic look, apply some size for leaf metal to parts of the number and leave to dry for 10-15 minutes. Important: Figures must be completely dry before leaf metal is applied, otherwise some discolouration may arise.
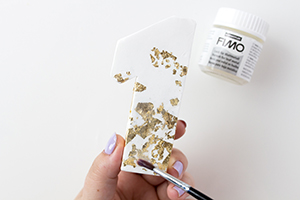
Step 9:
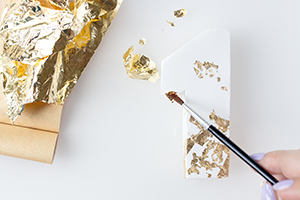
Now tear off small pieces of leaf metal and press on carefully using a soft stencil brush. A lovely effect can be created by using a greater amount of leaf metal at the bottom of the figure and decreasing the amount as you move towards the top.
Make sure you also apply the leaf metal to the sides and the back of the table numbers, so that the sparkle can be seen from all sides.
Step 10:
Finally, seal the figures with Semi-gloss varnish for leaf metal and leave them to dry thoroughly.
It really is that simple, with Fimo air light you can add a personalised, unique touch to your wedding. Have you browsed the full range of Fimo air light colours? We stock a variety of clay block colours and clay tools and accessories so if the white and gold doesn’t work for you then you can customise your table decorations to suit your own décor choices.
With Fimo, the creative possibilities are endless. Don’t forget to take a look at our other Fimo projects and other Fimo clay types to discover exactly what you can create.

Cooksongold