
Engraving rings with precision and personalisation has never been easier with the Magic E7 engraving machine. This step-by-step guide will walk you through the entire process of setting up your engraving template to fine-tuning the design and running the machine.
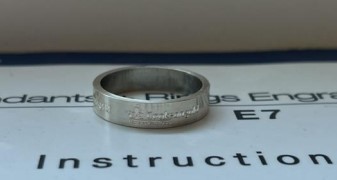
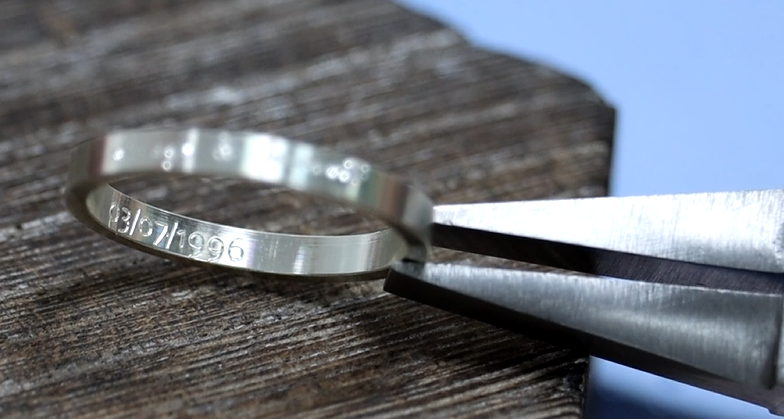
Inside ring Engraving
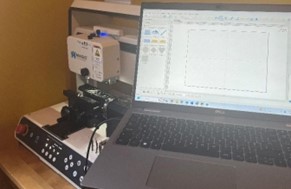
Step 1
Turn on the Magic E7 machine and load the Magic engraving software.
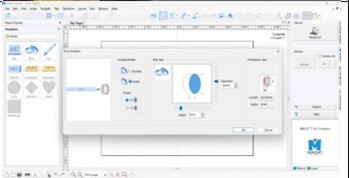
Step 2
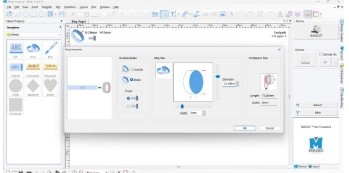
Measure the inside ring diameter using a digital vernier and create a new template. Select ‘ring’ from the templates, correct the diameter measurement to match your ring. Press ‘ok’.
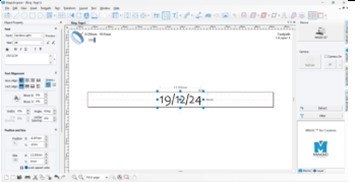
Step 3
Insert ‘text’ for the engraving. Select ‘insert’ on the software, Select ‘text’. Then click on the page and type out what you are engraving. Adjust the size of the text and font as desired, using the controls on the left of the screen. Centre the text by using ‘centre in page’ button at the top.
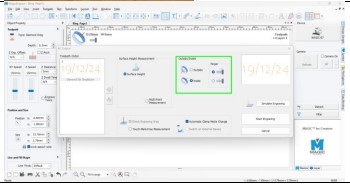
Step 4
To create a tool path for the engraving. Select the text so its highlighted. Select ‘single line tool path’ option. Enter the engraving details / text and the click ‘create toolpath’.

Step 5
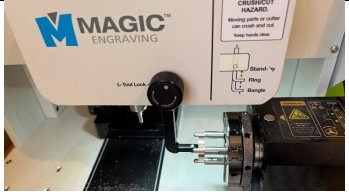
Set the machine to ‘inside ring’ engraving mode and make sure that the ring is secured in the vice. Press the green button on the bottom of the machine. Remove the flat lay vice as instructed by the machine. Press the green button once more. Lower the L tool as instructed by the machine – and the machine is now all set up!

Step 6
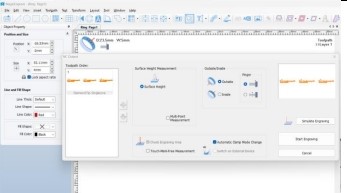
To send the engraving from computer to the machine, select tool path. Click ‘Magic-E7’ button. Check ‘inside ring’ engraving mode is selected on software, Click ‘start engraving’.
Step 7
To check the boundary mode (which is the boundary area of the engraving) this will be indicated by a laser red point. To adjust the position of the engraving point use the arrow buttons on the front of the machine, these will need to be held down until the laser moves to the correct point. To see all edges of the engraving, the arrows need to be clicked once in term for each boundary. Once you are happy with the positioning, press the ‘play’ button on the machine. This then starts the engraving process.
Step 8
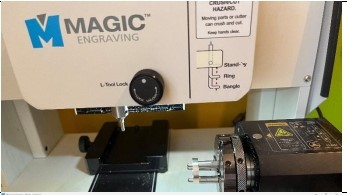
Once finished engraving, remove the ring from the vice and switch to outside ring engraving mode on the machine. Press the green button on front of the machine. Follow the instructions to raise L tool. Press the ‘play’ button on the machine. It is now in outside ring engraving mode.
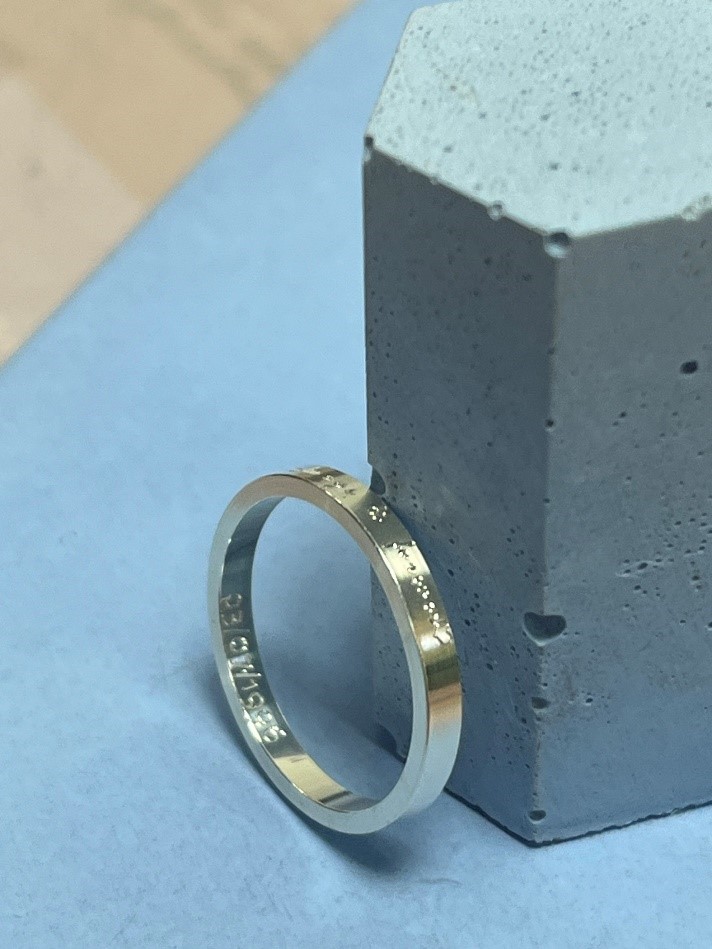
Outside ring Engraving
Step 1
Measure the outside ring diameter and create a new template. Select ‘ring’ from the templates. Correct the diameter measurement that fits your ring. Press ‘ok’ then place it in the vice.
Step 2
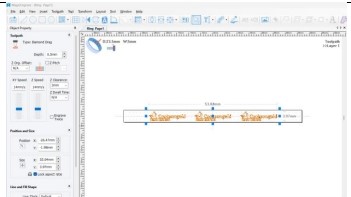
To insert a design onto ring template. Select ‘file’ > ‘import’. Select your chosen design which is pre saved. Ungroup due to double lines, Position, stretch and space the design across the wedding band.
Step 3
Create a tool path next. To do this select the design (if more than 1 select all designs). Select single line tool path. Enter engraving details and click ‘create toolpath’.
Step 4
Send the engraving to the machine from the computer. Select tool path. Click ‘Magic-E7’ button on bottom right of pop up window. Make sure ‘outside’ is selected in the next window. Click ‘start engraving’
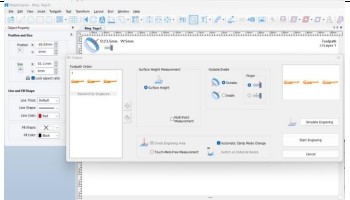
Step 5
Again, set the boundary mode. (As we did for the inside ring engraving). Arrows on the front of machine are used to see the boundary area. Press the ‘play’ button on the machine. The engraving process will begin. Remove from the vice when finished and its done!
With the Magic E7, engraving intricate designs on rings is a seamless process. By carefully measuring, setting up templates, and using the correct engraving modes, you can achieve professional-quality results every time. Whether you’re engraving text, logos, or custom designs, this machine provides accuracy and efficiency to elevate your jewellery-making skills.
Now that you’ve mastered the process, you can start creating beautiful, personalised rings with confidence!

Abby Blest
Abigail Yvette Blest is a jewellery designer and maker who trained in the historical Jewellery Quarter, she has a particular interest in traditional bench skills. In the past Abigail has explored mixed media in her jewellery practice, such as wood, ceramics and enamel.