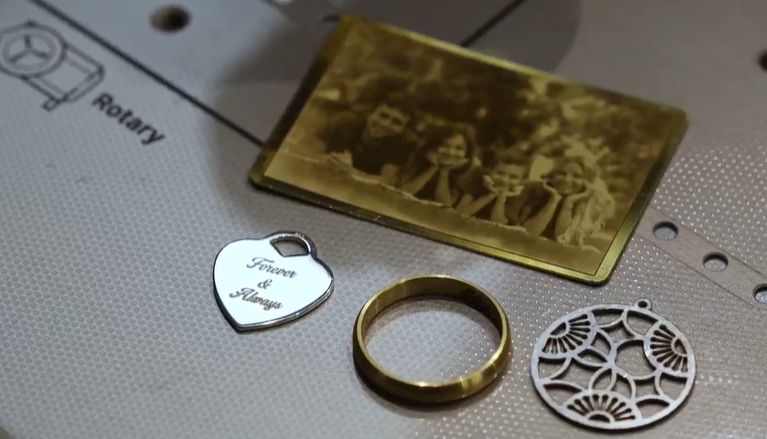
If you’re looking to add intricate, professional-quality imagery to your jewellery, the Orotig Canova Laser Engraving Machine makes it effortless. This laser engraver is built for jewellers who value speed, precision and flexibility, whether you’re marking rings, personalising pendants, adding logos or even engraving full images onto metal.
In this guide, we’ll walk you through how to engrave an image using Marko software alongside the Canova’s integrated tools, so you can achieve crisp, accurate results every time.
The Orotig Canova is designed to make the engraving process as smooth as possible. With its built-in camera, air-cooled system, full software suite and dual fume extraction, it’s ideal for producing detailed markings on precious metals including silver, gold, and platinum.
Step-by-Step: Engraving an Image onto Metal
1. Create a New Project in Marko
Start by opening the Marko software. Create a new project and give it a clear title—this keeps your files organised and easy to revisit.
2. Import Your Chosen Image
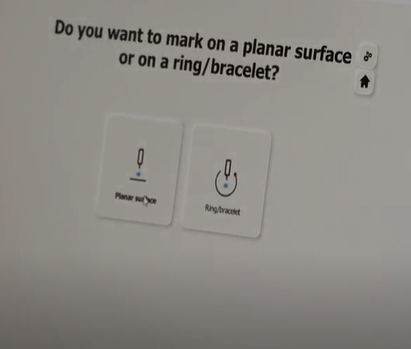
Select flat surface as your working mode, then import the image you want to engrave from your desktop.
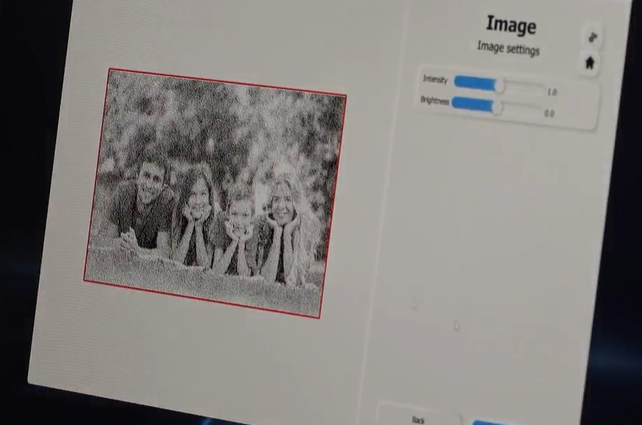
3. Position and Resize Using the Preview Camera
Once the image loads, use the software’s preview camera to position it accurately on your workspace. Resize and align it to fit the engraving area perfectly.
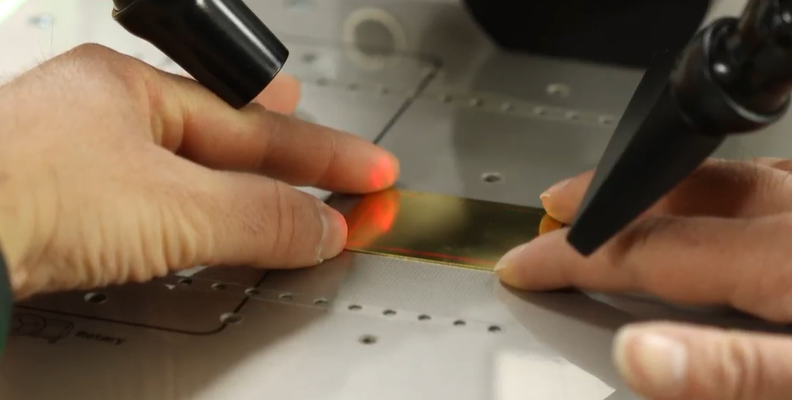
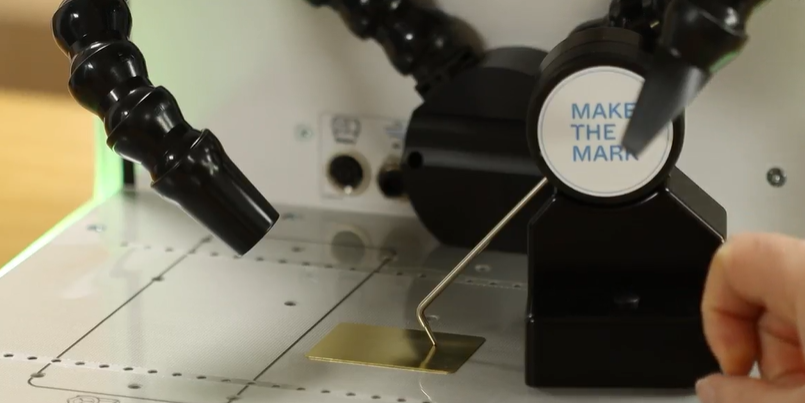
4. Adjust the Metal Piece on the Canova
On the machine itself, use the red laser guide lines to line up your metal piece. This helps you confirm that your placement matches what’s shown on screen.
5. Set the Engraving Height
Using the Touch Pro tool, measure and confirm the correct height. This step ensures the laser is precisely focused for maximum clarity and accuracy.
6. Set Up Your Engraving Layers
Click Mark to begin creating engraving layers. These determine how different parts of your design are processed. Drag, reorder and rename layers to keep everything clear and logical.
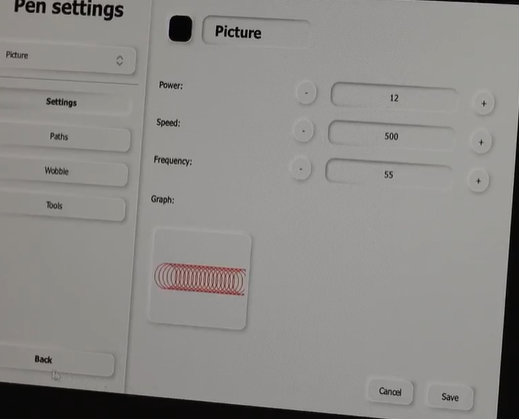
7. Check Your Engraving Parameters
Before you continue, double-check your key settings:
- Power
- Speed
- Frequency
These parameters dictate the engraving depth and finish, so accuracy here is essential.
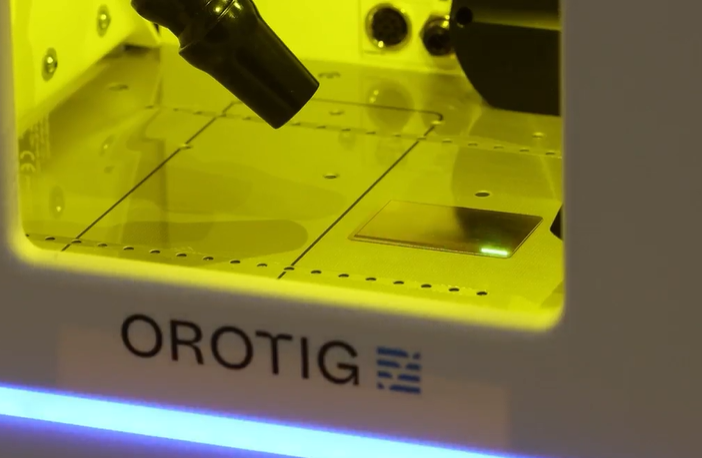
8. Preview the Outline
Use Total Outline to project the design’s boundary onto your metal piece. This confirms that the entire image sits safely within the metal piece.
9. Begin Engraving
Once everything is set, click the blue Engrave button and close the lid. You can follow the process through the viewing window or via the software, which displays a live countdown timer.
In just a few minutes, your image will be engraved.
Tip:
If you’re working with a new metal, a particularly detailed image, or unfamiliar settings, it’s worth running a test engraving on a scrap piece first.
Why Choose the Orotig Canova?
The Canova model is engineered for high-speed laser marking with stunning clarity. Its built-in camera and air-cooled system keep operation smooth, while the included software gives you complete control over every detail. With dual fume extraction and compatibility with precious metals, it’s a powerful addition to any workshop.
You can book a free demo here or visit us in-store and discover how it can elevate your jewellery making capabilities.

Sian Brown
Sian has been hand making her award winning jewellery in the West Midlands for over 12 years. Sian spent 10 years in Birmingham’s historic Jewellery Quarter before relocating to a quiet Worcestershire village.