Ever heard of solder paste but not quite sure how it works, or why you’d want it in a syringe? You’re not alone. In this guide, we’ll break down what solder paste is, why it’s so useful, and how to use it step-by-step. Whether you’re soldering delicate jump rings or tackling more complex designs, this is the tool you didn’t know you needed.
What is solder paste?
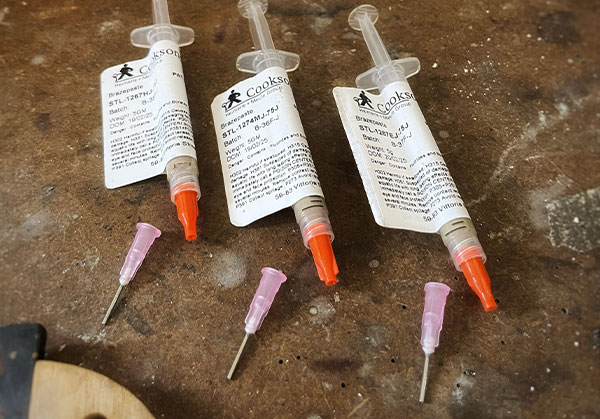
Solder paste is a ready-to-go mix of metal solder powder and flux, the two key ingredients needed to join pieces of metal securely. Unlike solder wire or strip, the paste comes pre-mixed, saving you time and giving you more control, especially for fine, detailed work.
You’ll find solder paste in a variety of alloys, including silver and gold, and with different melting points (hard, medium, easy). That means you can choose the right one depending on your project.
Why Use Solder Paste Syringes?
Solder paste often comes in a syringe, which makes precise application easy which is perfect for those tiny jump rings and intricate findings.

How to Use Silver Solder Paste Syringes
Step 1: Prep Your Workspace and Metal
- Start with clean metal, no fingerprints, dust, or oils.
- Make sure your join is flush. File down any gaps until no light shines through. This will help your solder flow smoothly and form a strong joint.
Step 2: Apply the Solder Paste
- Attach the needle to the syringe and save the plastic caps for storage later.
- Gently press the plunger to apply a small amount of paste. It might take a little practice to get the right pressure.
- Use a bit more paste than you would with pallions, since the flux will burn off and leave only the solder.
Step 3: Apply Heat
- Heat your piece using circular motions, as you would with solder wire.
- As the metal glows a dull cherry red, focus the flame on the joint.
- The flux will bubble and burn off, and the solder will begin to flow. Don’t worry if it shifts—it’ll settle into the join as long as the heat is right.
Tip: If your join didn’t come out perfectly, clean it, reapply paste, and reheat. No need to start from scratch.
Step 4: Finishing Touches
- Quench and pickle your piece to remove oxidation.
- File any excess solder or rough edges for a clean, polished finish.
How to Store Solder Paste (and Make It Last)
Solder paste can last over two years if stored well. Here’s how:
- Always cap the syringe tightly after use.
- If you’re not using it for a while, remove the needle, reattach the plastic cap, and store in a sealed bag to keep air out.
- Keep your syringes organized by melting point to avoid mix-ups.
- Got a clogged needle? Soak it in warm water or gently clear it with fine wire.
Ready to Try It Yourself?
Now you know everything you need to use solder paste in your latest projects, you’re ready to perfect the tricky art of soldering jump rings and other fiddly findings! Browse the complete range of solders at Cooksongold to find the supplies you need.

Cooksongold