 Looking for a new jewellery making technique to diversify your designs? Learning how to make byzantine chain or a byzantine weave is an excellent way of branching out into different looks that could become the basis of a new collection.
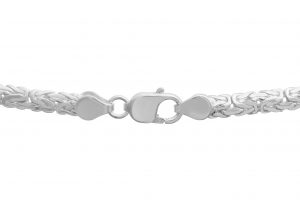
Follow our step by step guide below on making byzantine chain. Once you’ve got the basics, you can then use this technique to create not only chains, but unique earrings and rings too.
What you’ll need:
- Chain nose pliers (Two pairs are handy for this project if you have them)
- Jump rings (Size depends on how large you want your byzantine chain to be. For a smaller weave try a 4mm jump ring)
How to make byzantine chain in 6 steps
Step 1: Start with two jump rings
Take your first jump ring. Place it in the jaws of your chain nose pliers with a gentle but firm grip. Now with your other set of chain nose pliers, twist the jump ring until the join is completely flush and no longer noticeable. Using two sets of chain nose pliers make this easier, as you can accurately shift the jump ring so that you have a completely flush join. Now repeat this process with the other jump ring.
Step 2: Add your two closed jump rings to another
Once you’re happy that your first two jump rings are tidily closed, take another and open the join with a sideways motion using your pliers. Add your two closed jump rings to your open jump ring and close it securely. You should be left with two closed jump rings looped through one closed jump ring.
Step 3: Add a new jump ring to your two jump rings
Take a new jump ring and open it with your pliers. Loop it through the two jump rings that are already connected to the one jump ring. Now close it with your chain nose pliers.
Step 4: Add two more jump rings to the two you’ve just added
Repeating that technique, take another two jump rings and open them with that twisting motion using your pliers. Loop them through the two jump rings one by one, and close off. You should now be left with three double loops.
Top tip: At this stage you may want to use a pipe cleaner or something similar to thread through the first two jump rings. Tie this off so that you keep your byzantine weave organised as you work. With so many jump rings, it’s easy to get confused!
Step 5: Now for the fiddly part!
Now you have your three double rings in place, take the two end jump rings (the ones that are not attached to your pipe cleaner). Flip them back on themselves, taking one jump ring left and one right. Open another jump ring, slide it between the two end loops and catch the two loops that you‘ve just pushed back. Then you can close the jump ring you’ve just added. Don’t forget to add your second jump ring in the same position – remember that you always work in pairs with this project.
Step 6: Rinse and repeat
Once you’ve perfected the above steps, you can repeat this process again and again to create the correct length of byzantine chain for whatever design you’re creating.
Making byzantine chain with jump rings galore!
Learning how to make byzantine chain is a great way of expanding on your designs with minimal effort and without spending much on supplies. Once you’ve perfected the byzantine chain pattern, you could experiment by attaching shorter lengths of byzantine to earrings designs, or by separating each byzantine chainmail link with beads. Just remember that you’ll need to stock up on jump rings to create multiple pieces!

Cooksongold