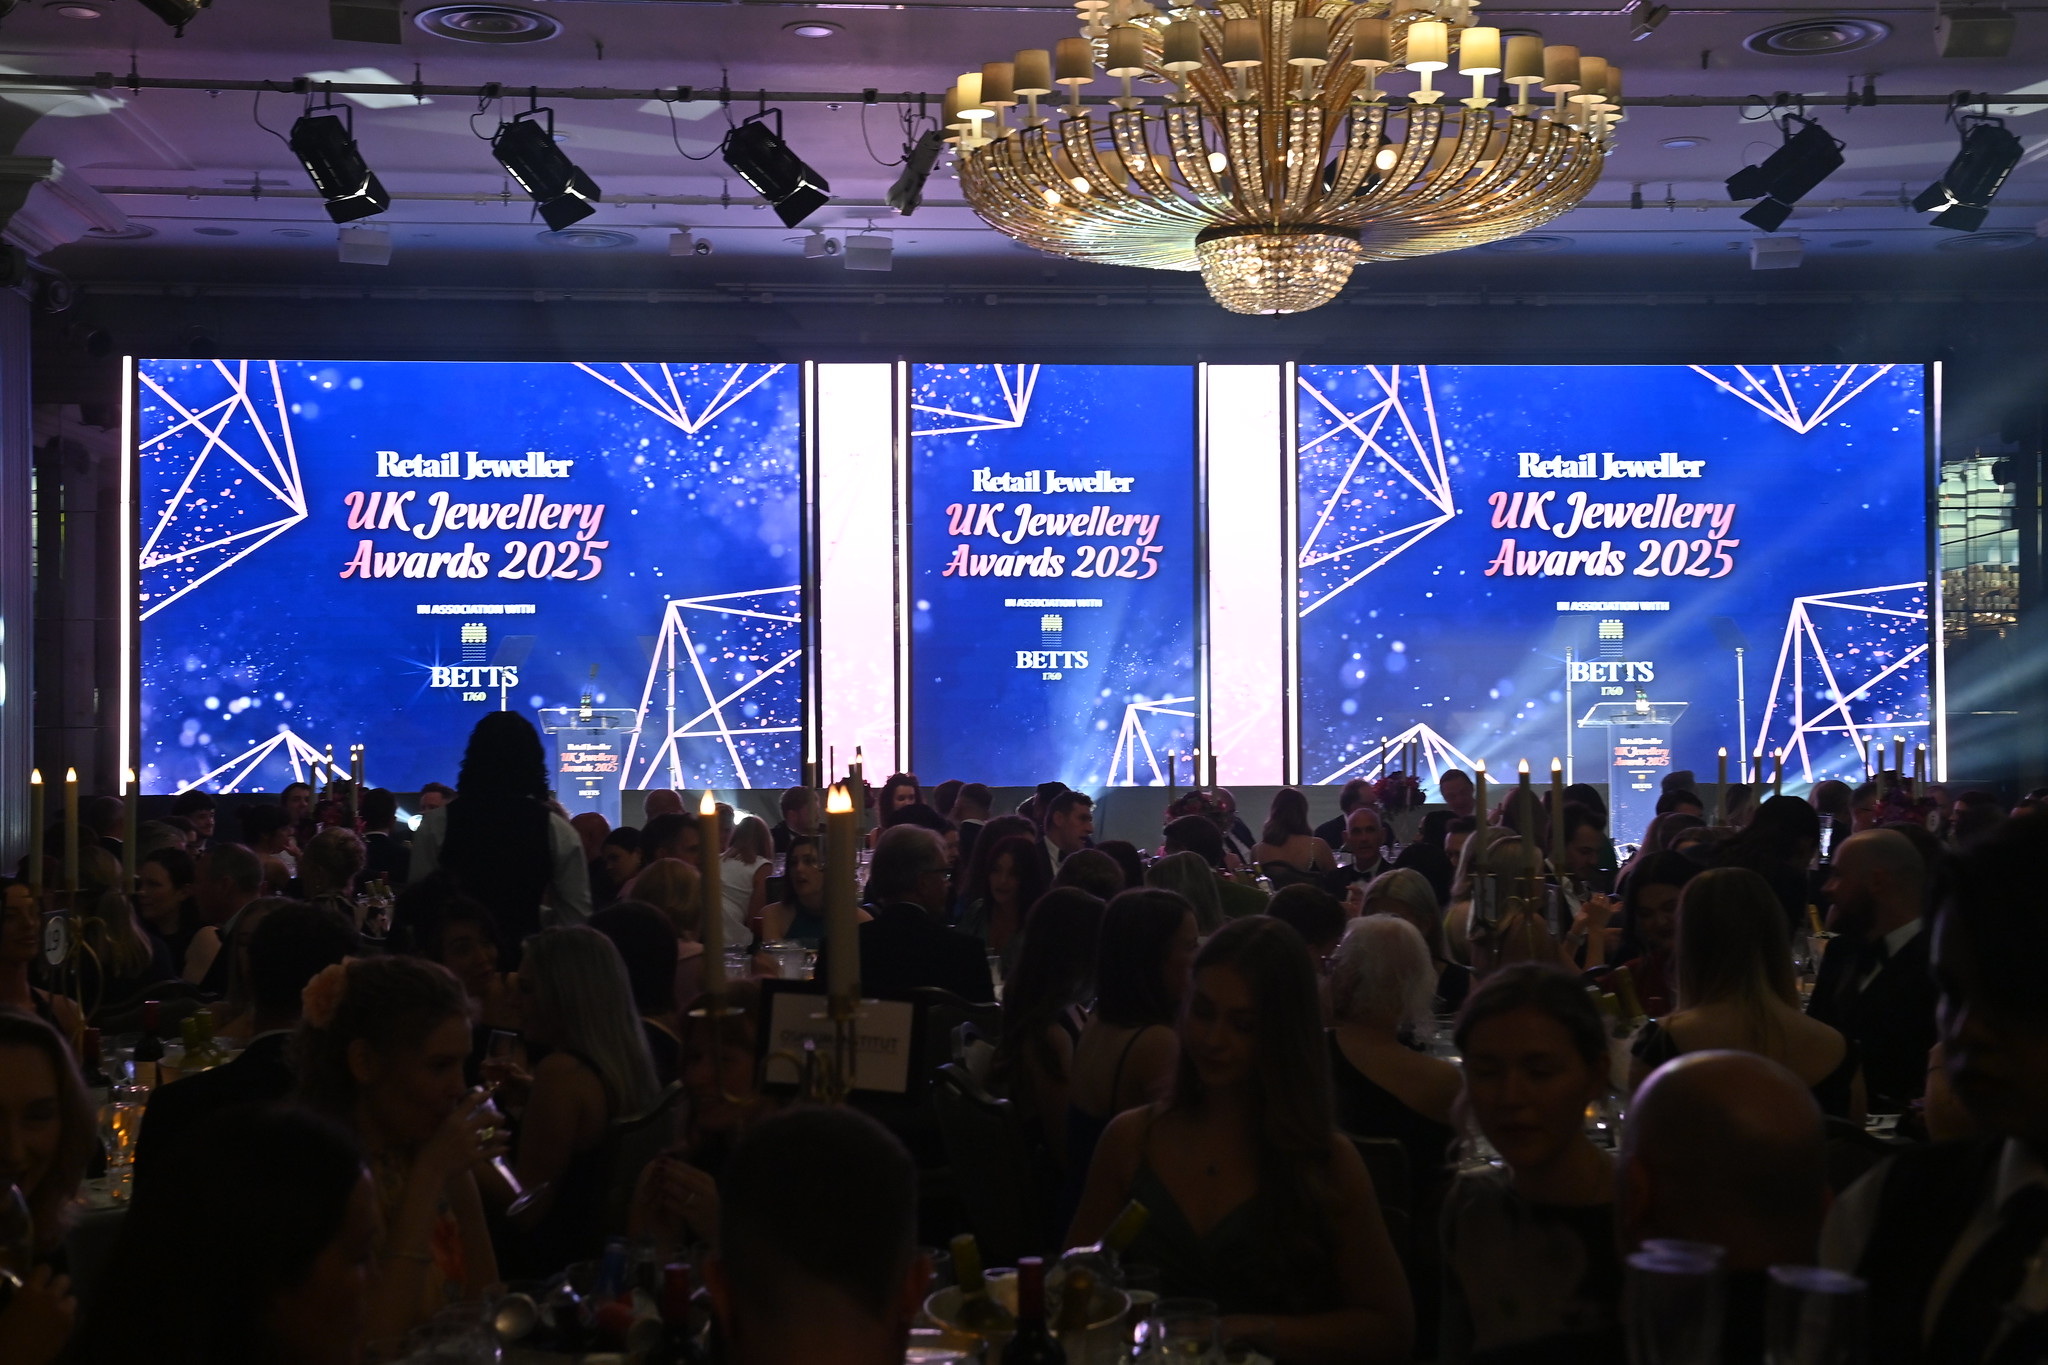
New Inspirations

January 18th, 2012

Joanne Varney gives her tips on how to kick start a new range. She holds a BA (Hons) in Jewellery and Silversmithing and is part of the Cooksongold team.

The sky is dark, it’s pouring with rain and the wind is whistling down the chimney. It’s the start of a New Year and time to think about the months ahead and what you intend to achieve in them. If, like many others you are feeling a bit flat and uninspired after the retail buzz of Christmas, don’t despair.  Over the next few paragraphs I’m going to share with you a few tips I use to kick start my design ideas when inspiration is a little short in supply.

Ideas Book – Many of you probably keep one of these as standard but for those who don’t, this is simply a notebook or box where you can store your sources of inspiration as you find them. These can be in almost any form from magazine cuttings and photos to found objects such as leaves and stones.  It’s great to keep these items in one place so that when you’re ready you can quickly refer back to a previous idea and start to expand upon it in the form of a mood board or sketch book.

Colour – Colour can be a great starting point for a new range as it can be evocative of so many different things.  For example if you are drawn to cool blue tones, what images do they conjure up? Today, if I think of blue tones, I think of clear blue skies and warm seas which in turn lead on to soft fluid images of ripples, waves and clouds. By this point I am already thinking of smooth, rounded shapes in cool silver tones, so very quickly, as a jeweller, I have converted those initial thoughts into the beginnings of a new range. This of course is only a simple illustration of how to get started and in practise far more consideration and research would be given to each stage, but you can see how easily colour can be a terrific trigger for new design ideas.

Texture – Texture can very easily be transformed into fantastic pieces of jewellery once it has been captured in metal. This can be achieved relatively quickly by casting direct from the object using either PMC or plaster of paris and then wax to make a mould. (If you are lucky enough to own a rolling mill, varying textures can be rolled onto metal, providing the objects used won’t damage the rollers) I’ve had some fantastic results in the past using objects as mundane as household tin foil. Once crumpled up it takes on an interesting texture which I captured using molten wax. I then got the wax cast into metal which I cut into simple shapes to make a selection of pieces. I have also used stone and miniature tyres from a toy car both of which worked really well.

Form – Perhaps the most obvious source of inspiration, form can be taken from absolutely anywhere be it natural or manmade. Whether you choose a literal or abstract interpretation, the key to success is in how you bring that form together into a piece.  I have found that looking at things with a restricted or distorted view can bring some interesting results. For example, just by cutting a hole in a piece of paper and placing it over a drawing, you will be able to look at the image differently, perhaps picking up new details that might otherwise have been missed.  Distortion can also give some great results, try looking at objects through patterned glass or even through a mass of bubbles and you will soon have some fascinating new imagery to work with.

Working as a designer/maker can sometimes be a lonely and difficult experience especially when you’re stuck for ideas. Learning to become resourceful using the objects around you is a great skill to have and will help you through those inevitable periods when the designs just won’t come.

Designer of the Month: Lydia Niziblian

January 9th, 2012

In 1992 I left school and took a foundation in Art & Design.

At the point of completing the course, I should have followed my heart, and gone on to study fine art.

I went on to take a degree in Film & Video at (what was then) West Surrey College of Art & Design. In spite of all my best efforts to the contrary, I graduated with a shiny new BA(Hons) in 1996.

Work in television production followed. Highlights included electrocuting myself while testing products for a review show, audibly vomiting during a live cookery programme and being pecked on the head by an eagle owl.

Despite these giddy showbiz heights, I missed my artistic endeavours, so took a City & Guilds in Jewellery Design specialising in Silver at night school. It was here, (thanks to my fantastic tutor Nicholas Keogh) that I discovered a real passion for working with silver.

When I had my daughter in 2005, I became a full-time mum, and my husband and I moved back to Cardiff. My son followed in 2008. A couple of brushes with death for two of the four Niziblians led to us having a discussion about what exactly we wanted to do with our lives.

I dusted off my tools and made a few pieces of jewellery. I showed them to people, and they all sold. With the support of my fantastic family, that same week in April 2009, I became officially self-employed as a jewellery maker.

When I was little I wanted to be an archaeologist, and I think the idea of discovering something hidden in the earth stuck with me.  I love working with gemstones, minerals and crystals in their uncut and unpolished state.  Lots of my work is designed to look ‘found’.  I really enjoy playing with finishes, especially oxidising and the range of colour-play it can give.  There’s definitely a perverse pleasure in making something clean and perfect, then working it back to look distressed, aged and worn. Although I like trying out new materials, silver is my real love, it’s fantastically easy to transform and the variety of ways you can work it are vast.  It’s a little bit magic.

I currently work from a studio in TactileBOSCH in Cardiff, where I am on a constant learning curve. I’m always trying my hand at new techniques, and find inspiration in many places, from nature to science-fiction.  I recently had a go at working with brass, silver and copper for some large-scale autumnal jewellery for an alternative fashion magazine.  The oak-leaf cuff I made won me a new workbench in Cookson’s design of the week competition. I was delighted, and it’s going to see a lot of use!

As for the future, I’m looking into expanding the range of ready-to-buy jewellery I offer.  I plan to keep experimenting, learning and creating for as long as I possibly can.  I consider myself incredibly lucky to be doing something I love so very much.

Take a look at Lydia’s gorgeous work:  www.niziblian.com

Things to look out for in 2012 by Jo Varney

December 14th, 2011


As inflation and unemployment figures hit new highs, Retailers are being forced to slash prices, innovate and adapt simply to stay in business. Those who are slow to react are paying the ultimate price as more stores go under day by day. As metal prices continue to remain high, the jewellery industry is suffering like everyone else. Gold is simply too expensive for most people’s pockets at the moment, even silver isn’t cheap, so as we look towards Christmas and into 2012, the biggest challenge facing designer/makers is going to be how to continue to offer quality, yet affordable jewellery.   To repeat my opening statement, the answer has to be, innovate and adapt.

Base metals and plated metals are rapidly increasing in popularity for obvious reasons. It’s all about the look you can achieve for less, but this doesn’t have to be restrictive, in fact quite the opposite.  In fact two trends tipped for 2012, Dark Nature and Vintage both lend themselves to Antique Style brass and gun metal finishes very easily. Look out for oxidised findings which will help you to achieve this look far more successfully than if you were to use highly polished, regular findings!

Colour picks for 2012 are as varied as ever depending on which source you happen to refer to. On the one hand you have the Trend Forecasting Agency TJF tipping emerald green, aqua blue and icy white, and then on the other you have Swarovski Gem Visions suggesting that fire reds and oranges are the way to go. The one constant theme that is coming up time and time again is monochrome i.e. black and white. Obvious you may think, but don’t overlook it. Whilst other colours will go in and out of fashion, black and white will remain a classic, so take advantage of this and ensure it’s always there as a colour option.

Two contrasting eras are being highlighted in fashion as being big for next year; the 1960s and the 1920s each bringing with it some extremely different features.  There is currently a film adaptation of the novel The Great Gatsby in production which brings with it images of flapper dresses, fringing and beading detail, decorative headbands, feathers, Jazz and Chanel. These subtle elements will be creeping into fashion at every level so be prepared if you can!

In stark contrast the 1960s styling is anything but subtle. Bright, bold colours, hard materials (plastics and PVC) and oversized geometric prints to name but a few. This ties in quite nicely with a Futuristic trend which references modern day icons such as Lady Ga Ga and Katy Perry. Two different styles you may think, but if you can picture Jane Fonda in the cult classic Barbarella and then imagine her side by side with Lady Ga Ga, are they really so different? Bold but affordable, low metal content but high impact – are these themes which can be incorporated into your ranges???

As I have said before Trends are something to be aware of, not laws which should be followed to the letter. At the end of the day, you know your style and that is also what your customers know, so never abandon that for the sake of a fashion trend. However, as things become ever more challenging in the Retail environment, it pays to stay one step ahead of the opposition. So don’t ignore what goes on in the world around you, but try to embrace it – it may just pay dividends!

Designer of the Month: Tom McDowell

December 5th, 2011

Being the son of a jeweller, jewellery has always been a part of my life and something that I’ve been fond of.

I originally studied at Bucks New University as a metalworker but soon found I preferred the smaller scale of jewellery. I came out of my BA with a good skills set and a body of work that whilst looked good, wasn’t something I felt passionately about. This influenced my decision to go on to do my MA at UCA Farnham where I would have the time to focus on a new set of designs that were more “me”.

During this time I did a 1 day course in anodising aluminium, a process that makes the metal more durable but also allows it to be dyed vibrant colours and patterns. Having previously only worked in mainly silver I was keen to see what could be done with this new material.

My ideas were based around ways of making people smile through the wearing of jewellery. As I also work in an after school club I fell in love with the drawings that children come up with.

I find that the way a child picks up on certain details and the quirkiness of their drawings are fantastic and aren’t something that we as adults can easily replicate (I wish I could draw as well as some of these children!)

I particularly like their versions of animals and find that they are something that most people can relate to. As a result I based my range of jewellery on them by transforming these into wearable pieces. I combine the anodised aluminium with mixed media such as feathers to create something colourful and fun.

Pieces such as my peacock brooch are based off drawings that I did when I was a child. But I often have commissions from parents who want their own children’s drawings turning into something they can wear.

Since graduating I was selected by the Designer Jewellers Group to exhibit with them as one of their 6 new designers at their winter exhibition at the Barbican. From that I won their Stephen Maer award which allowed me to become an associate member for another 2 years.

My work can currently be seen at the Barbican with the Designer Jewellers Group from 9th Nov to 6th Jan.

Contact details:

Phone: 07973770691

Email: info@TomMcDowellDesign.com

Web: www.TomMcDowellDesign.com

Facebook:

 http://www.facebook.com/pages/Tom-McDowell-Design/124983417549475

How to: Festive FIMO Snowman Jewellery

November 23rd, 2011

When the supermarket shelves are brimming with Christmas goodies, your summer clothes all packed away in boxes and your thick winter coats are hanging up in the hallway again, then it’s time to start thinking about Christmas! About cosy winter evenings in front of the fire, about trees and gardens covered in a thick layer of snow … and snowball fights. All those who don’t want to wait any longer for the first snow to fall can get into the Christmas mood early by putting on this attractive combination made out of FIMO. The adorable snowmen and sparkling snowflakes are a real eye catcher – each one cuter than the next. Not only does this jewellery guarantee you an instant white Christmas, it also makes a superb present with a personal touch.

You will need:

Step 1

Basically, the snowman is made out of two different-sized balls. For the body, take the larger of the two balls (approx. 25 mm in diameter) and flatten it a little. Then, for the head, do the same with the smaller ball (approx. 15 mm in diameter), placing it so that it slightly overlaps the first one. Make a sausage approx. 5 mm in diameter for the arms and cut off two 1 cm long pieces.

Step 2

The snowman’s hanger is fixed in his hat. To make the hanger, take a piece of wire and shape it into a loop. Then, bend the ends to the sides to give it a good hold in the FIMO later. Next, using black FIMO, roll out an approx. 1 cm thick sausage and cut a 1 cm long piece off it. Make an indent in one side of the top hat.

Step 3

Now it’s time to give the snowman a broom. To do this, roll out a thin string of black FIMO. Cut a 3 cm long piece off it for the broomstick. Then shape the FIMO into an approx. 1.5 cm long, cone-shaped piece and, using the knife, make lots of fine grooves on it. Place it on the end of the broomstick. A final fine string of FIMO placed across the broomhead makes it look as though the bristles are being held together.

TIP: It’s best to harden the broom in the oven on its own first. This makes it easier to position on the snowman’s arm later and ensure that it keeps its shape.

Step 4

Now put the hat on the snowman. Then add the broom and the arms and press everything on firmly. Use small black balls for the eyes and buttons. The orange coloured carrot nose and mouth are made out of fine strings of FIMO. The scarf is made out of a sausage of FIMO. Flatten it a little, cut one end off straight and use the knife to fray it.

Step 5

To make the snowflakes, roll out an approx. 5 mm thick sheet of white glitter FIMO using the acrylic roller. Place one of the two small six-pointed stars on it and – just as if you were making biscuits – cut out a number of stars. Fill the ring base with white glitter FIMO and place one of the stars on it.

Step 6

Make a hole through the middle of the snowflakes using a straight piece of wire – this is for stringing them onto the necklace later. A tool for making a snowflake pattern can be made easily out of a piece of wire. To do so, take an approx. 10 cm long piece of florist wire and bend both ends at right angles as shown – one end about 2 cm in and the other end about 2-3 mm in. Press the ends onto the snowflake carefully to make the desired pattern.

Step 7

With the bead roller, it’s easy to make nice, uniform-shaped beads. To do so, roll the FIMO to form an approx. 1 cm thick sausage. Then cut approx. 1 cm wide pieces off it and shape them into balls in your hands. Place them in the bead roller and slide it back and forth a couple of times. This gives you perfectly shaped beads.

Step 8

Cut off approx. 10 cm of florist wire and use it to make a hole as close as possible to the middle of the beads. Turn the beads around and push the wire through the hole again from the opposite side. This is the best way to keep your beads in shape when making holes. Next, thread all of the beads onto the length of wire and hang this over a glass bowl. Place in the oven like this in order to avoid a denting of the beads.

Step 9

Harden the finished pieces in the oven for around 30 minutes at 110°C. After cooling, the snowflakes are given an extra treatment: To make the pattern stand out more, brush over the grooves with a thin layer of blue watercolour paint. Allow to dry for a moment and then remove any excess paint with a piece of kitchen roll. Leave to dry properly! Finish off by applying a thin coat of FIMO gloss varnish to all pieces. Now all that remains to be done is string the pieces onto the necklace and add the clasp and thread the earrings onto a piece of florist wire and fix onto the earring hooks. If necessary, you can stick the snowflake onto the ring base with glue. This will keep it stuck tight.

TIP: You can make the small, silver-coloured spacer beads yourself: To do so, use the bead roller to make small balls out of silver FIMO effect and then add a layer of silver coloured leaf metal. Make holes, harden and add a coat of gloss varnish – finished!

How to: Painted Leaf

November 17th, 2011

We really loved last night’s episode of Kirstie’s Handmade Britain especially her exploration of Silver Clay. This project allows you to make a similar painted leaf that featured on the programme so you can enjoy the rewarding experience of creating beautiful, delicate designs.

You will need:

Agate/metal burnisher or tumbler
polisher

Badger Balm

Clayshapers

Leaf

Paintbrush and cup of water

PMC3 6.3g silver

PMC3 Paste (1 Paste pot
covers approximately 3 leaves of 3cm square)

Rubber block

Sandpaper

Stainless steel brush

Snake roller

Straw

Torch and block to fire or Kiln

Work mat or Teflon

Step 1

Open your Paste pot and paint the reverse side of the leaf thoroughly. Leave to dry and repeat until you have built up 8 layers of paste. Leave the leaf to dry completely. Fire it using a kiln only- if using the Evenheat Pro-Set kiln fire on the preset PMC3 Slow Programme (600C/45mins). Once fired do not polish before attaching the bail.

Step 2

Use the snake roller to roll a coil. Press down on the coil to create a flat block. Wrap the flattened coil around a straw and leave to dry.

Step 3

Attach the bail to the back of the fired leaf using some paste. Allow to dry. Once dry gently remove the straw and refine your piece until you are happy with the finished look. If required you can create a long coil from the lump clay by using a snake roller. This can then be attached to the back of the leaf as shown in the image above to improve the look of the bail attachment. The bail can be torch fired onto the leaf. Simply heat until it glows orange and time for a minimum of 2 minutes or kiln fire using the PMC3 Fast programme (700C/10mins).

Step 4

Place the fired piece on a rubber block to support the leaf and use a stainless steel brush to polish. To achieve a high shine finish, continue using a burnisher or place in a tumbler polisher with mixed stainless steel shot and 1/3 teaspoon of tumbler soap.

Aftercare: Polish using silver polish and a soft cloth.

Tips – Choosing a leaf

Don’t use a leaf with a waxy or fleshy surface like holly or laurel as these have no texture

Do choose a leaf with good veins as these will show nicely on your finished piece. E.g. sage, ginko or geranium leaves.

Do choose a fresh leaf.

Designer of the Month: The Beauty of Lace

November 9th, 2011

Louise West, currently studying for her MA ADAPT, talks about her contemporary lace journey so far and her future prospects.


My creative journey started during my BA (Hons) in Textile Design, which I started as a mature student in 2006. During the first year I had the opportunity to do a commission for a London based architect and produce the lace design for the facade of the Nottingham Contemporary, taken from antique lace. The design was then cast into concrete to clothe the building.

This led to other opportunities, doing voluntary work at a local museum, where I now have an exhibition – “The Vital Statistics of Lace”. The exhibition starts my contemporary lace journey, with very traditional pieces of lace, some of which are my own design and others from the 19th century which I have worked and reinterpreted. It also features a contemporary piece from the first stage of the MA programme I am currently studying.


I am now in my second year on the MA ADAPT (Art and Design Applied Practice and Theories) at the University of Derby and this is allowing me to explore a wider range of media for the portrayal of lace. It is this that has led to the development of my silver jewellery inspired by lace. Some of the pieces are obviously from lace but others are slightly more abstract in their appearance. My MA working is currently developing using traditional techniques with historical inspiration and memories but using less traditional materials and methods.

In April this year I took a big step in moving into a studio in Bank’s mill studios, Derby, to allow me to develop the silver jewellery side of the work, to be able to offer workshops in both lace and PMC and also to give me space to continue the larger scale of lace for the MA. It has made a big difference to my work allowing it to develop much faster than previously. One of my favourite moments this year was entering the Cookson’s Mothers day jewellery competition with a piece in memory of my late Mother, and having the fortune to win it. This came at a difficult time as it was two years since losing her, and so an honour in her memory.


Plans for the future – finishing the MA next year, continuing teaching lacemaking and building on the workshops offered for PMC, talks to interested groups, and exhibiting and selling jewellery at the National Christmas Lacemakers Fair,(3rd December) and the Harrogate Lace Event (31st March 2012) and in my spare time continue with the exciting world of Precious Metal Clays.

More photos of Louise’s work, exhibitions and more detail about her designs can be found on her website at http://www.louisewestlacedesign.co.uk

Technique focus: Annealing precious metals

October 26th, 2011

Annealing is the process of heating a metal before being worked on, through which this is softened and made pliable. This process will allow you to shape the metal into the jewellery piece you want. You might need to repeat the process in case your metal work-hardens.

When annealing your metal will turn into an obviously darkener colour follow by blackening, a chemical process known as oxidizing. The heating process has to be continued throughout oxidizing until it reaches a red colour. This is known as “quenching” the metal (cooling it) and the colour will last for a few moments until the metal relaxes.

It is not possible to predict the exact moment a metal needs annealing and you will only learn the difference between a soft and hard state through practice. There are however a few basic tips that can help you:

  • Remove protective plastic before annealing. This can sometimes be kept when performing various piercing applications;
  • Sheet: When buying sheet, always assume that it will need annealing;
  • Wire: it will be easier to decide whether 1-mm round wire is soft, however less easy when working with a 5-mm wire therefore always anneal thicker wire;
  • Note pure 999.9 silver and 24-carat gold do not oxidise as they are intrinsically soft. They will only need annealing if extensive work has been performed;
  • Perform your annealing with a soft flame by gently pushing it up the length of the metal rather than waving it from side to side;
  • Ensure your metal is completely dry after quenching. This is essential as you do not want to rust the tools you work with. Check that your tools have no marks as they can be passed on to your metal.


Annealing thin wire: wrap it into a coil and tuck both ends back into the coil. This will prevent it from springing apart when heated. Place your coil on a soldering block and heat it will a soft flame. Keep moving the torch up the metal to avoid melting the wire. Turn the metal with a pair of insulated tweezers and anneal the coil on the other side.

Annealing thick wire: unlike with thin wire, you will have to support your metal when heating it. Place the metal on the soldering block. Use a soft flame until it turns red then move along the wire to complete the process. Let the metal cool for a few seconds then quench in water. You can bend your wire to fit the pickle. Leave it until it has turned white. After removing it from the pickle, rinse and dry and you are ready to work!

Annealing  silver sheet

  • Cover your silver with a protective non-oxidizing powder. Keep the powder away from your soldered joints to avoid making the solder run;
  • Remove the plastic coating from your silver wire and rub dry paper over both sides of your silver to remove the silver shine;
  • In a saucer, form a thick paste by mixing powder and methylated spirit or water. Add a little more spirit or water to make it easy to paint over both sides of your metal;
  • Place silver on a soldering block and heat it with a large soft flame. Like with wire, use the torch on your sheet until it has turned red and then move along the surface to complete.
  • After cooling the metal place it in warm pickle for 5-10 minutes. This will remove the protective powder.

Get Ready for Christmas! Top 5 Tips by Jo Varney

October 19th, 2011

October is the month that most Retailers start to fill their shelves with Christmas fare. It seems impossibly early for most of us and is usually met with grumbles and groans of  ‘it’s too early!’The truth is that in the world of Retail it is never too early to kick start the most profitable period of the year.

Most large chain stores will plan their Christmas offers and promotions from 6 – 12 months in advance and whilst I’m not suggesting you go quite that far, a bit of forward planning will stand you in good stead for successful festive selling.

Plan your range around price points:  At Christmas time, all people with all budgets come out to spend, so if your work will allow, try to ensure you have good stocks of items at every price point. The high street retailers start low and gradually increase in steady increments; £4.99, £9.99, £14.99, £19.99, £24.99 etc etc.  You don’t need to be as rigid as this, but by having larger stocks of lower priced items you will guarantee more impulse buys from customers. You still need those show stopping, higher priced pieces; just don’t spend time making them at the expense of your ‘bread and butter’ items.

Organise your Display: Be it a window, a cabinet, a party table or even a shelf, your jewellery display must be organised to reflect not only your range but to showcase your price points. One infamous high street chain store always puts their low priced, high volume,  sellers at the front/left of the store so it is the first thing you see when you walk in. You should really work on a similar principle. Put your best sellers and more inexpensive items towards the front of the display. Make them easily accessible. If you can have some out on a counter top so customers can handle them – it makes a big difference. Selling from behind glass can be very difficult as it presents a barrier between the customer and the merchandise. People like to handle the goods, so do what you can to break down the barriers.


Plan your stock: This sounds like an obvious one, but make sure you don’t run out of your bestsellers! The chances are if you are selling, you will be short of time to make any more stock should you run short. Think about your sales over the past year and plan accordingly.

Record Sales Activity: It is vital to record every sale. It will provide you with vital information to use going forward, not only regarding popular styles but also patterns of customer behaviour.  I have found in the past that more careful shoppers will start earlier in the year and focus on the more inexpensive items. (These are usually women) Where as in the run up to Christmas Day, as people start to panic, the more expensive pieces will go as people think less about the price tag. (These are usually men).  Any insight into the minds of your customers will help you plan more strategically for the future to ensure maximum profitability.

Have plenty of packaging to hand:  Nothing seals a sale like a gorgeous gift box, especially at Christmas time. With the ranges available now there is really no excuse not to offer a box with every sale, so make sure you get your orders in early to avoid disappointment. Don’t leave it as an afterthought, instead make it a feature by using them in your displays. Let your customers know you have thought about the whole package not just the jewellery.

Christmas selling should be fun. It should really be your reward for hard work and careful planning throughout the year. Let’s be honest those gloomy months of January and February will be much easier to get through if you can look back on a successful Christmas period, so do yourself a favour and get prepared!

Technique focus: 13 Steps to Stone Setting

September 28th, 2011

Stone setting is a way of securely attaching stones into a piece of jewellery.  You can use various techniques to incorporate stones into your designs including: Claw, Gypsy, Bezel, Illusion, Pave, Channel, Tension and Grain. The stone’s shape and hardness dictate which type of setting technique is suitable.  Stones can add colour and a focal point to your design and helps your design attract customers’ attention!

Types of settings

1.  Claw settings: A small amount of metal is used to make up claw settings, allowing light to pass through the stone and also allows easy access to the stone for cleaning. Claw settings are made up of prongs. The prongs are bent over the stone to secure in place.

2. Gypsy settings: are done by using the surrounding metal to set a stone. which makes the stone appear flush within the piece of jewellery.

3. Bezel settings: or rub-over settings require a tight wall of metal around the stone. It sits on a ledge of wire or a sheet of metal at the base. Creating a wall and pushing it against the stone.

4. Illusion settings: are used to visually exaggerate the appearance of a small stone. This is done by a stone being set into a collet with a large wall.

5. Pave settings: the word pave originates from the French meaning paved.  Pave setting uses small stones to cover the surface of a piece of jewellery. Tiny beads of metal are pulled up from the surface and are pushed up over stone.

6.  Channel settings: are usually used in lines. Stones that are channel set are supported on two sides and underneath. The two sides are pushed down to tighten the stone in place.

7. Tension settings: use the metal surrounding it to secure stone in place. It requires tension through the metal to support the stone. A tension setting allows light to pass through it and show its full beauty.

8. Grain settings: consist of small stones in lines. Tiny beads or grains of metal are pulled up from surface and are pushed up over the stone.

Bezel Setting on a Pendant

You will need:

Tools:

Materials

STEP 1

Take the 12mm x 50mm Silver, the texturing hammer and the flat stake. Place your silver sheet onto the flat stake, hold one edge of the silver sheet, use the texturing hammer strike the sheet numerous times in one direction, turn the silver sheet and repeat on opposite end.

STEP 2

Using a half round file, use flat edge and file the edges straight and using Emery sticks buff the edges to become smoother.

STEP 3

Using Dividers measure 42mm on steel ruler and score a line width ways in the textured sheet. Saw pierce along this line. The textured sheet will have become hard as it has been worked on, it is ready to anneal, quench and pickle. To create a curve, push the non – textured edge against a large curve of your choice. If you have bangle mandrel this would work perfectly.


STEP 4

Place curved edge against 15mm x 40mm piece, approximately the same length. Take a sheet of course emery paper and rub edges down until flat and sit flush onto the larger piece of sheet.


STEP 5

Using borax cone and dish make up flux and with a flux brush dab flux on sheet and the just buffed edge, then place the curved piece of sheet onto one side of silver sheet. Then with shears snip two small pallions of hard solder and place on the fluxed join.

STEP 6

Using hand torch gently apply heat, gradually increasing until it is hot enough and the solder flows. Then quench & pickle.  Repeat on the opposite end, again using hard solder. Quench and pickle.

Tip:  When using more than three solder joins, use hard solder as many times as possible!

STEP 7

To make the bezel, wrap the strip around the stone, letting it strip overlap, once you have the correct shape remove the stone. Where the strip overlaps saw pierce or cut with end cutters and make sure the two ends are flush with no gaps. Flux the join of the bezel; place a small pallion of hard solder on the join with tweezers. Apply heat gently and evenly to the bezel until the solder flows remove flame. Quench and pickle.

STEP 8

Place bezel onto triblet or use round nose pliers and tap with a mallet to get true circle.  Check the stone fits at this stage, if bezel is too large saw pierce down the solder line, if the stone still does not fit file the ends. The bezel strip will be higher than the stone, to reduce the height rub the base against course emery paper. The height of the bezel needs to be approximately level with the beginning of the curve of stone.

STEP 9

Place the bezel on right hand corner of your piece. Flux and add medium solder pallions around the outside of bezel. Solder on wire mesh and soldering block. Apply heat evenly starting gently and gradually increase until the solder flows. Quench and pickle.

Tip: A wire mesh is advisable so the heat can be spread evenly through the piece; this will also prevent the bezel overheating and maybe melting! Using remaining textured sheet curve over triblet or using round nosed pliers and this will make your loop for necklace.

STEP 10

Rub edges on emery paper until flush. Flux loop and centre of piece. Place together. Using shears cut pallions of easy silver solder and place two pallions either side. Heat gently and gradually increase until solder flows. Quench and pickle. Clean up piece going through grades of emery paper leaving a matt finish.

Tip: Use oxidizing solution on the textured strip of the pendant and polish raised areas to enhance the appearance of the texture.

STEP 11

To set the stone, try to gain as much grip as possible. Using a flat bezel pusher, push one part of the bezel wall against the stone. Push in at points ‘north’, ‘south’, ‘east’ and ‘west’. This is to avoid a build up of metal. Push in between these points and continue to do this around the stone. Bringing the pusher up to a higher angle, and apply pressure against the middle and top edges of the bezel. Use a burnisher rib for the top edge to get rid of sharp edges and brighten the silver.

.

STEP 13

Now hook the silver snake chain through the loop. You have finished the project!