-
 Making a silver ball pendant
Hello,
The other day I made a pendant and photographed the process as I went along. I thought Id post it here so you could see what ive been getting up to.
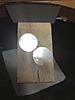
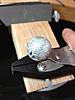
First I cut out 2 silver discs
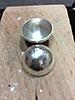
Then I domed them and made sure they matched each other. That was trickier than I thought it would be.
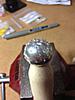
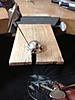
I marked the design out that I wanted and drilled holes so I could get the piercing saw through.
Didi
-
Part 2
The finished piercing on the first hemisphere
Attachment 4383
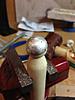
I then soldered a thin strip around the inside of the hemisphere so it would fit inside the other half and not wobble. I then superglued the two together, polished them up to a high shine, washed and de greased them.
Attachment 4382
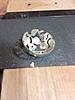
I then painted them with poster paint
Thanks at this point to James who told me how to do this!
Attachment 4384
Didi
-
Part 3
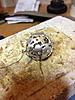
With the paint dry , I drew the rest of the pattern in pencil so that it flowed around the whole ball.
Attachment 4386 Attachment 4385
It was even possible to rub out mistakes and draw again until I was happy with the design
Didi
-
Part 4 Will try to get the images in line rather as attachments!
With the design complete I scratched though the pencil lines and marked the areas I wanted to cut out
I then drilled holes to fit the saw through
Piercing nearly done

Now to saw out the delicate edge shapes. This was difficult to keep it all in shape as it distorted whenever the saw got stuck
Didi
-
Part 5
Both parts pierced out.

Now, wire it together. Once, twice, three times. Grr!! it kept slipping out of place
Flux, position solder. reposition solder, start again. have a cup of tea....finally solder

Whoop! done!!!
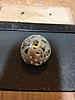
At this point feel very pleased with myself
Didi
-
that is so cool! well done you, you should be pleased with yourself!
-
Part 6
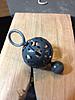
Solder a silver ball on one end of a length os 1mm wire, thread it through the ball and shape the free end into a bail.
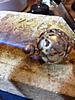
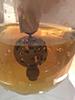
Suspend it in Liver of Sulphur
Take it out, look at it and decide the whole silver bead bit is too big! Have another cup of tea.
Thats better, Ive replaced it with a smaller bead and polished the LOS off the outside.

Voila!!!! Finished
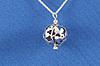
Hope you like it. Didi
-
lovely! though I confess I liked the larger ball version. It looked a bit astronomical.
-
So pretty! I love step to step photo guides, I'm pretty nosy and love to see how other people work 
-
Quite a labor of love and pretty result. Dennis.
 Posting Permissions
- You may not post new threads
- You may not post replies
- You may not post attachments
- You may not edit your posts
-
Forum Rules


 Reply With Quote
Bookmarks