
Looking pretty good to me. Glad it's sorted.


 Senior Member
Senior Member
Senior Member
Tell us some more about the beach hut and the bar please nick. Kind regards , Dennis.
Junior Member
Hi Dennis,
I'm fairly new to silversmithing so the little beech hut is a bit of play really. My partner said something about a beech hut inspired pendant, so rather that just cut out a hut shape I thought I've never made a box structure lets do that! Its a copy of a little wooden ornament so it will probably end up stood with that, either that or it will be the ultimate residence in the monopoly set!!!
Its made from 3 bits and has had hard and medium solder, so I've only really got one go with easy left to add anything else to it. Like all these things, now I've done it once I can see that I could have made it from 2 bits and only soldered it once.
The little bar is a offcut with my first attempt at a gypsy/flush type setting. Its a 2mm peridot and the setting is quite rough on close inspection, but I'm actually pretty pleased with it! I set it by naked eye and definately need to get a magnifyer to see accurately what I'm doing next time. At the moment its secure but the pushed over silver is a bit like a pie crust. I guess I need to run a graver (which i need to buy) around to give it a clean sharp edge. I have a few more 2- 2.5mm stones to practice on once I've bought a magnifyer and a graver, then I need to set a diamond or two in a ring!
Senior Member
Dear Nick,
I think you are doing just fine. I am rather nervous of gravers, as in my hands they can make things worse, or even loose the retention of the stone. So I finish with a tiny burnisher, made by breaking off the working part of a small round burr and giving the tip of the remaining tapered end a ball shape. For this you need a grindstone and a rubber wheel. This home made tool I screw into a universal wooden handle (Cooksons 999AZM) to burnish round the crevice between the metal and the stone. I could go on and on, but i'd like to say that for an invisible setting the best pusher has a rounded end and is then bevelled at the top so that it comes to a smooth blunt knife edge at the bottom. In use this leaves hardly any damage to clean up.
As far as soldering is concerned, bear in mind that solder once used will melt at a higher temperature next time . As a result you can use the same grade of solder at least two or three times, before resorting to the next grade. The only downside is that the solder line will show a little more each time. To help avoid this you can apply a line of antiflux and also avoid trimming close to the solder line until you have finished with that grade. It also helps to solder in semi darkness to see when you are overheating your piece.
I'm sorry if I have overstepped the mark with all this, Kind regards Dennis.
.
Senior Member
Not sure if it helps either, but, I use an embossing tool (they come with different sized balls at the end) as a little burnisher.
Lorraine
Senior Member
I'm planning to attempt a gypsy setting over the summer. It's my daughter's 21st in December and she's asked me to make her a gypsy set ring with diamonds. Will be practising with much cheaper stones in the meantime. The above info is very useful, thank you.
Tabby
Junior Member
thanks again for the tips guys, the one about the solder is interesting to know- its definately very useful to know when planning pieces in the future there's that extra flexibility. I'm guessing antiflux stops solder from flowing, so keeps it where it is!
With regards to the setting, I went back and rubbed round the stone with the pusher that I made and the finish is better/smoother. Like you both suggest, I can see how a rounded burnisher would be perfect for finishing, I just need to refine the pushing over and angles of attack so to speak!
Dennis, do you have a picture, or a link to one online somewhere, of the pusher you describe?
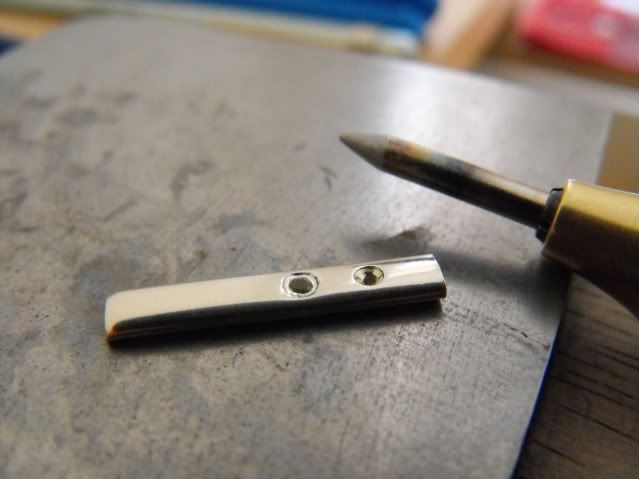
I've added another couple of pics, the first one is the stone set in place with the uneven finish. The second shows the pusher I made and the setting once I'd rubbed round it again. As you can see the finish is smoother, I think I went in a bit too vertical as I now have a step instead of a nice bevel from the edge of the setting down to the stone.
Senior Member
Dear Nick,
Here is my setting tool . You cant buy them. I made it myself from 5mm steel stock during a stone setting class. It is used this way up, but in my ignorance I put the handle on upside down. My other picture is scanned in from a print, but you can see a textured hollow heart made to a grand daughters request. There was minimal surface damage.
Looking at your new pictures it is apparent that your stone is much too deep. The girdle of the stone should be only just below the surface, say by 0.3mm at most. The table of the stone will be level with the surface. Of course all this becomes much more difficult with rings made of round wire. I suggest you scour the Forum for the many posts on stone setting and tube setting, because the system is the same. Only the pusher is different for flush setting.
Professionals can do much of this by eye, but for me it only works if I measure and match everything with callipers. Let us know how you get on, Kind regards, Dennis.
 Senior Member
Wow Dennis - I love that pendant! The texture looks stunning.
Anne
Feel the fear, and do it anyway!
Blog: http://www.whiteoakjewellery.blogspot.com/
Website: http://www.whiteoakjewellery.co.uk
Junior Member
Thanks for the pic, I will set about making a pusher like that one to try! I can see now how the shape will give a smoother more consistent finish than my bullet shaped item.
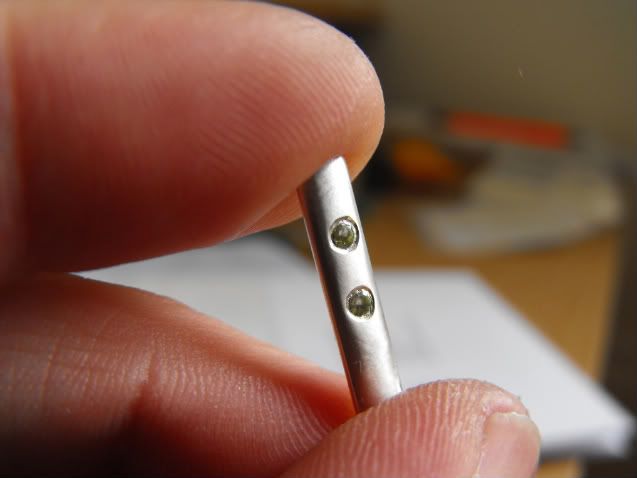
I thought the stone must be too deep, so I set another one next to it this morning and played about with shaping the setting with different burnishers.
I set it by eye and (it may not show in the pic) but more of the stone is visable and it sparkles more than the first, though reading your advice I think it should be shallower still.
Going in the right direction though which is good!
 Posting Permissions

 Reply With Quote
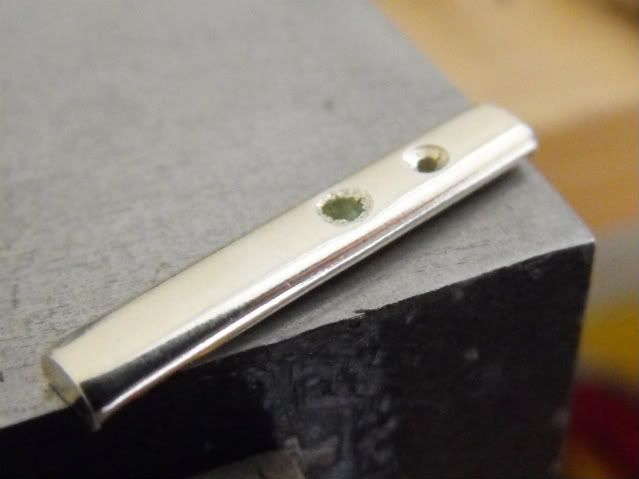
Bookmarks