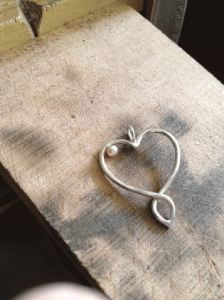
In this post I will be showing you a simple little trick on how to use pearls in your jewellery! From elegant drop pearl earrings, to rings, brooches, anything you can think of. You could also use this trick in beaded jewellery as well as precious metal!
If you’ve wanted to use pearls before, but aren’t sure how or what tools and adhesive to use, read on to find out!
What you will need –
1. A half drilled cultured freshwater pearl of desired size. You can buy these pearls in ¾ or full round. For this tutorial you will need either of these. You can also buy halved pearls but they are predominately used to be trapped in the metal, with claws for example.
2.Wire that fits snugly into the drilled out hole in your pearl. I believe most pearls have around a 0.5mm hole in them but don’t take my word for it, if you can, check before buying your wire.
3. Of course, the piece of jewellery for the pearl! (Finish and polish the piece as much as possible before setting your pearl to avoid damage later)
4. An epoxy adhesive, I recommend the two-part Araldite Rapid, a heavy duty Epoxy adhesive that is really strong and holds well with any movements, unlike superglue which may crack and break.
Step One
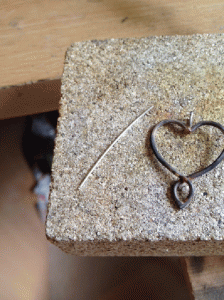
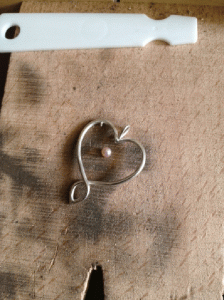
Start off with your finished piece that you would like to attach your pearl to, here is just a simple pendant design I created for a giveaway, you’ll notice I haven’t pickled it, so it’s still pretty oxidised, I usually don’t have much trouble with soldering on oxidized silver like this, unless it’s been heated lots. Choose where you would like your pearl to go, in this design the pearl is going inside the heart at the top left.
Step Two
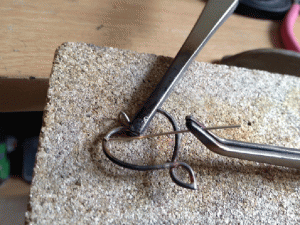
I held my heart design with a third arm so it wouldn’t move when placing the wire on the inside. Borax the end of your wire and on your piece of metal where you will be attaching it, apply a small pallion of solder. I used easy silver solder as this is the last thing I was soldering onto this piece. In this photo the piece of wire for the pearl was held in place by reverse action tweezers.
Step Three
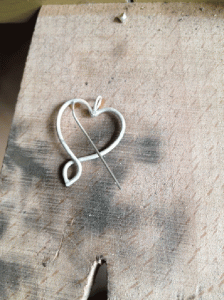
Once you’ve heated up your piece and your wire is now soldered on, (be careful when soldering this wire as the thinner the wire, of course the easier it is to accidentally melt it!) pickle it to get rid of the oxide layer.
Step Four
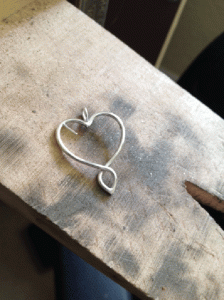
Cut down your piece of wire if you’ve used a long piece like me, so that it doesn’t get caught up easily in your pendant motor. Buff and polish your design now before starting to fix in your pearl.
Step Five
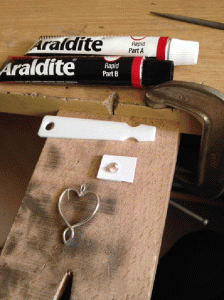
Prepare your adhesive! Here is the Araldite two part A-Epoxy adhesive. It comes with the two tubes of epoxy solution, the resin and the hardener, a mixing stick and instructions. Be careful getting it on your skin as it can irritate. Here you can also see two little pearls, one of which will be set into my piece!
Step Six
Cut down your wire to the length desired to go into the hole in the pearl, whilst not being visible once inserted. You’ll notice here because it’s a really tiny pearl, the little stump of wire is probably only around 2mm long.
Step Seven
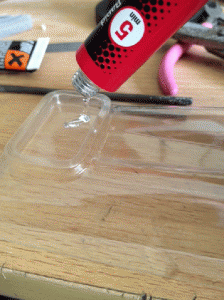
Squeeze both parts of the Araldite Rapid onto a scrap piece of plastic or little dish, make sure you use equal amounts of 50-50. Because you’ll only need a tiny bit, be careful when squeezing! (they can come out pretty fast and catch you off guard, glue everywhere!) Mix them together thoroughly for around 30 seconds with the stick provided.
Step Eight
Make sure your little pearl post is clean and dry, perhaps even with a bit of a rough surface. Apply the adhesive to the post and carefully insert the pearl onto it, push down firmly and let it set! It will set completely in around 10 minutes, but is at its strongest approximately 16 hours later.
Step Nine
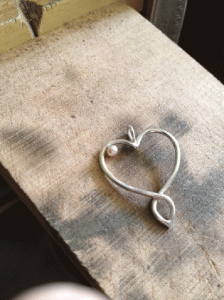
Once the adhesive has set, give it another careful polish (I just used a polish-impregnated cloth) and there you have it! A wonderful little trick on using pearls in your jewellery. If you’re more into using beaded jewellery, you could use this trick to your advantage too! Perhaps finish off the end of a piece of wire wrapped jewellery with a little half drilled pearl, there’s lots of possibilities.
Thank you so much for reading and I hope this has been helpful! If you have any questions or tips I would love an email from you!
Enjoy! – Aimee
Aimeelbooth@ymail.com
www.facebook.com/alvynejewellery


Cooksongold

